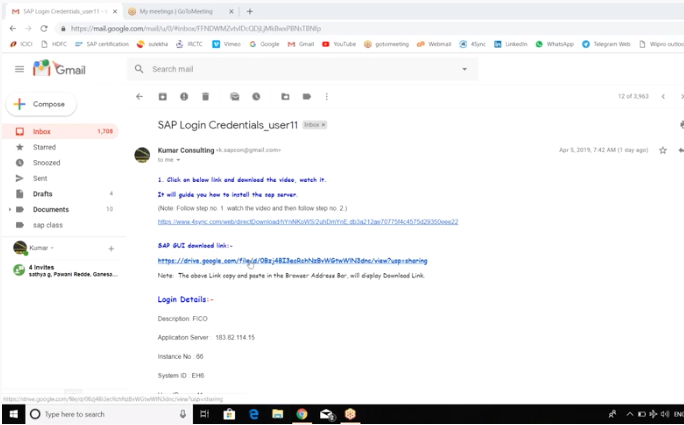
SAP Download Information
(1) Starting from the email
- Top
- YouTube Video: 22:06 How to install SAP Server in your Laptop/Desktop (Contact: +91 7416797921)
Intro & The breakdown of the contents of the Email.
- 00:16 click the correct link from the email
(2) Whoops, but Download
- Top
- 00:24 A new tab opens in the browser and the following spalsh page is displayed
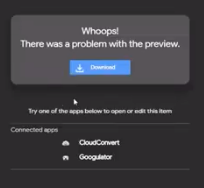
- 00:31 the following screen is displayed right after the splash screen
- This screen contains the blue Download button the speaker talks about.
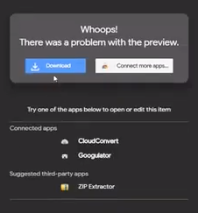
- 00:33 Click on the blue Download button even though there is a Whoops message displayed on the screen
(3) Download Anyway
- Top
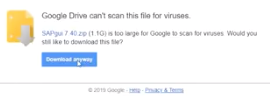
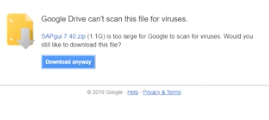
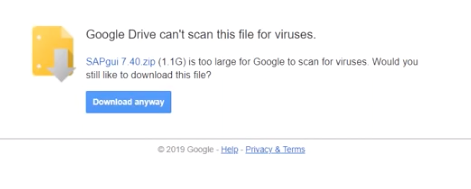
- 00:46 Click on the blue Download anyway button even though the screen displays that Google can't scan this file for viruses
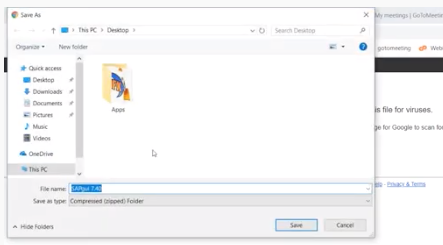
- 00:48 The Save As dialog is displayed and explained
- 01:03 he suggest to save on the Desktop
- 01:05 he clicks the Save button
- the Save As dialog box disappears and we see the Google Drive can't scan this file for viruses message and the blue Download anyway button.
(4) Downloading
- Top
- 02:00 Currently at the bottom left corner of the screen we can see SAPgui 7.40.zip downloading to the desktop, as shown below
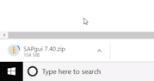
- 02:12 download is completed, it took 20 minutes

- 02:40 he clicks on the down arrow button and clicks Open from the submenu, as shown in the screenshot below.
(5) Clicking the "Open" item
Top
Below is the Screenshot of the zip file "SAPgui7.40.zip" located at the bottom right corner of the screen, and displaying it's submenu with the focus on Open.

After selecting the "Open" menu item
- Top
- 02:46 the desktop is displayed with the additional zip-folder icon titled "SAPgui7.40"
- double-clicking the zip file from the Desktop, brings up the browser displaying the message
- "Google Drive can't scan this file for viruses."
- it also displays the zip file in the lower left hand corner where you click on the arrow button
(6) File Explorer
- Top
- 03:03 upon clicking Open, a File Explorer dialog box is displayed
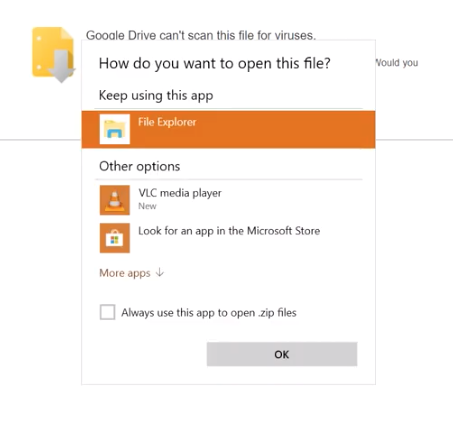
- 03:30 click the grey OK button
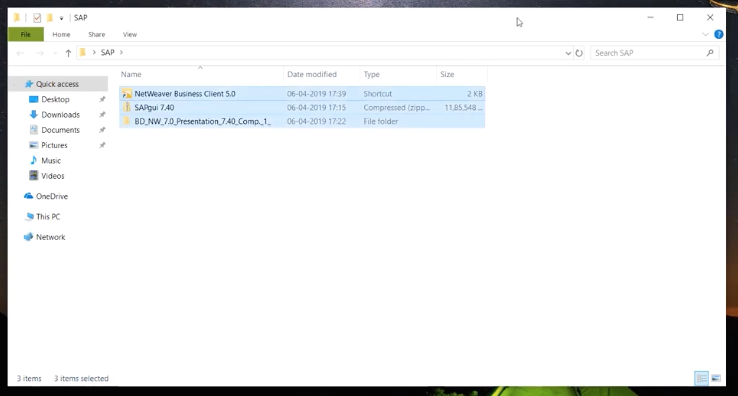
(7) File Explorer for BD_NW_7.0_ ...
- Top
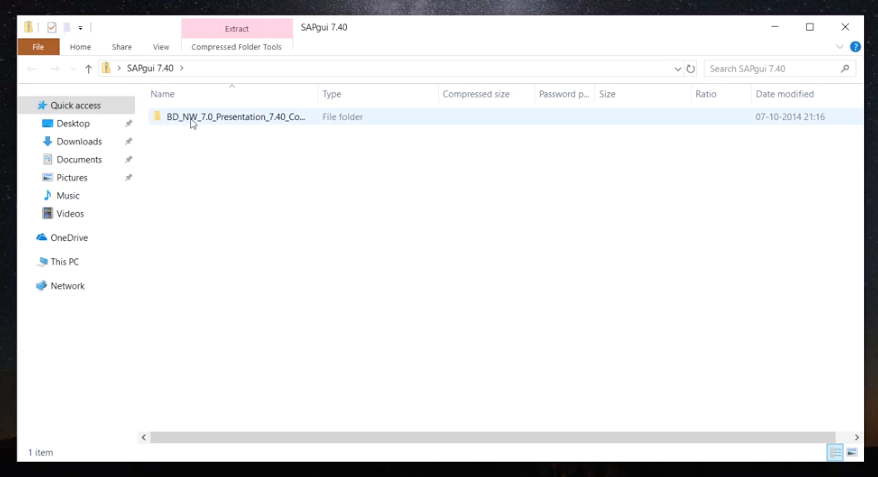
- 03:38 the File Explorer screen is displayed with a file named "BD_NW_7.0_Presentation_7.40_Co..."
- 03:42 he double clicks that file and another folder named PRES1 and other files are displayed
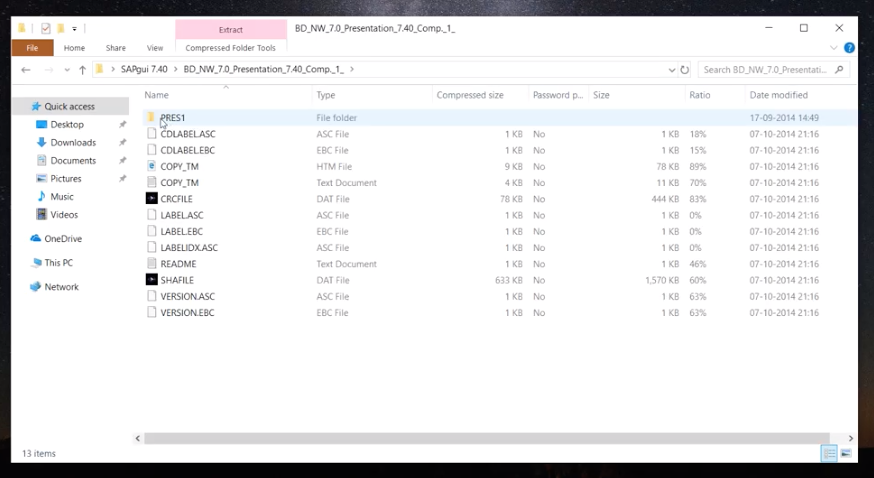
- 03:46 he double clicks that folder and 7 other folders and 4 more files are now displayed
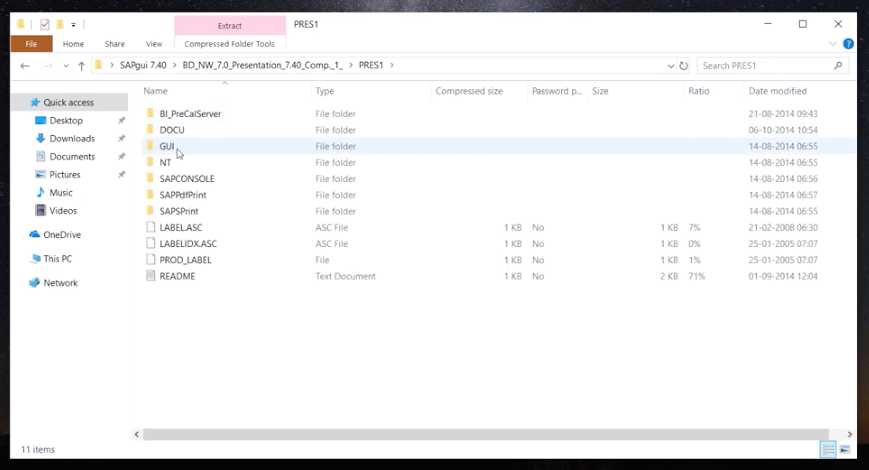
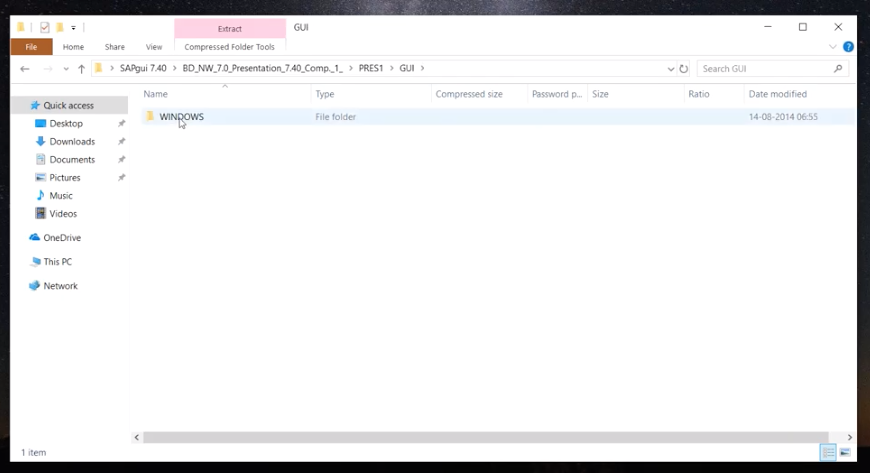
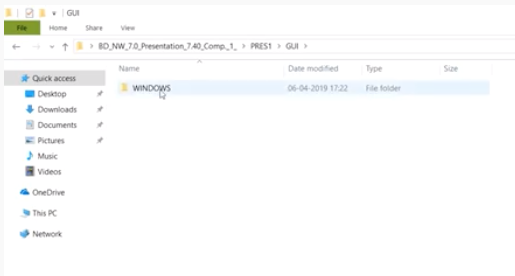
- 03:51 he double clicks the folder named GUI revealing a folder named WINDOWS
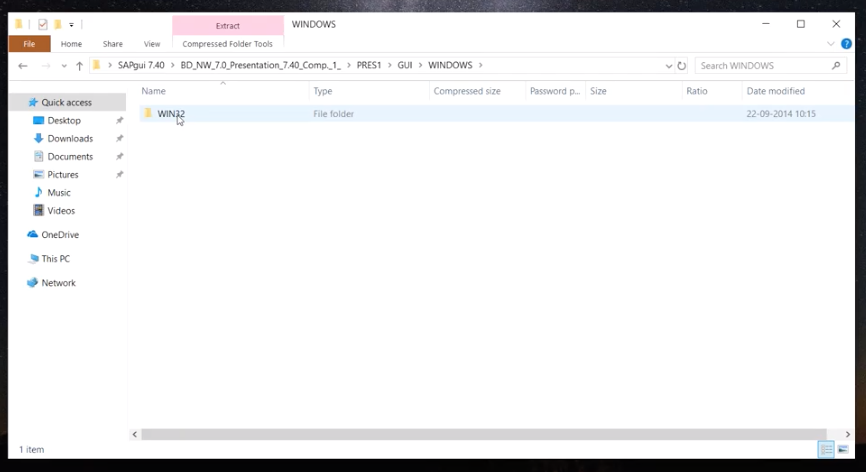
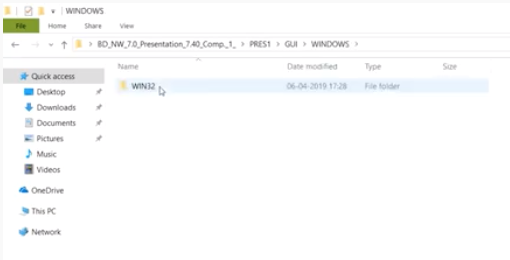
- 03:54 he double clicks that WINDOWS folder which reveals the WIN32 folder
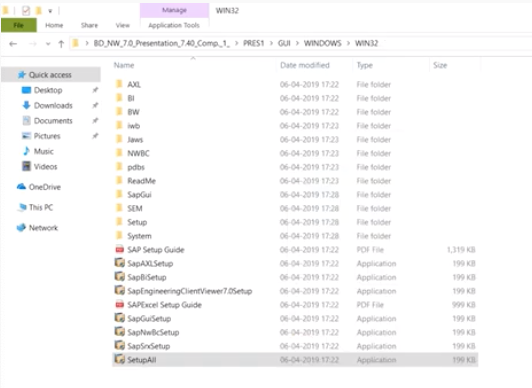
(8) File Explorer - GUI to the WIN32 folder
- Top
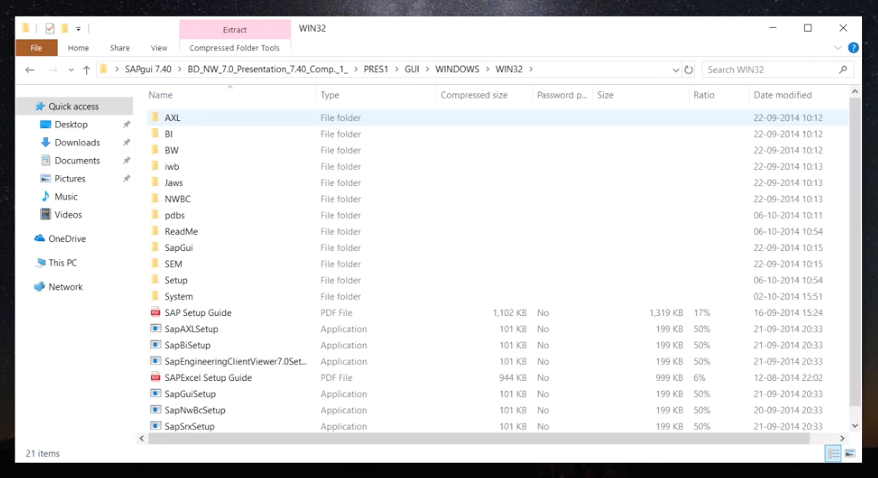
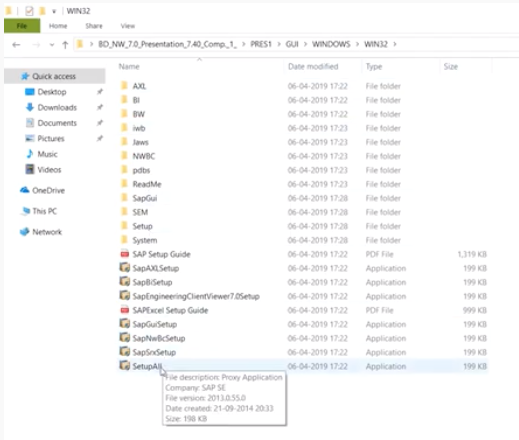
- 03:57 he double clicks that WIN32 folder which reveals 12 folders and many files
(9) File Explorer - SetupAll
- Top
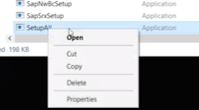
- 04:09 he searches for a file named SetupAll
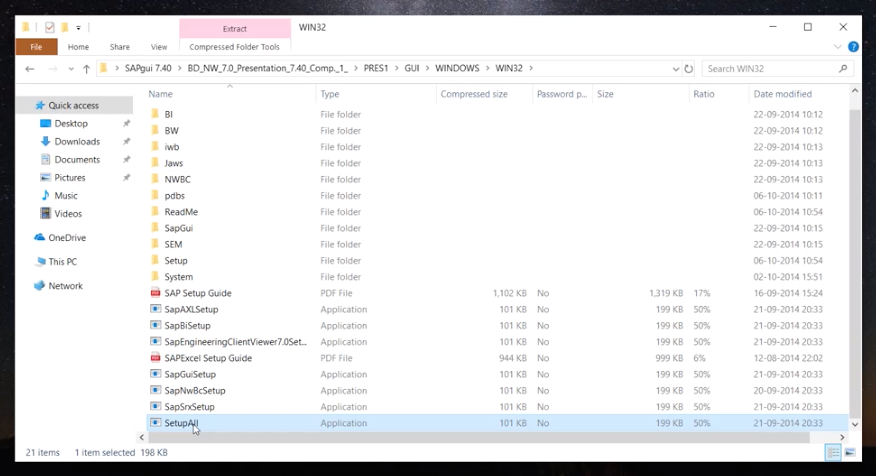
- 04:14 he right-clicks on the SetupAll file and he clicks Open from the submenu
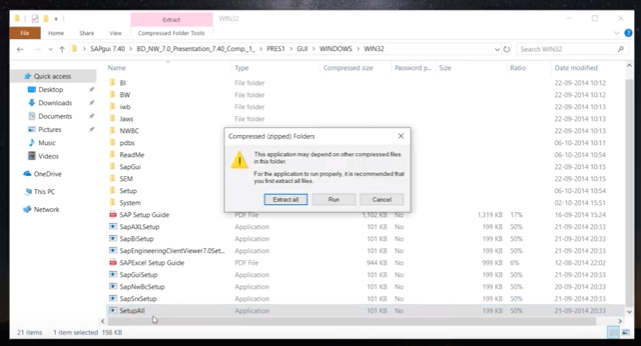
- 04:32 which reveals a dialog box titled "Compressed (zipped) Folders" with three grey buttons, Extract All, Run, and Cancel
(10) Extract All
- Top
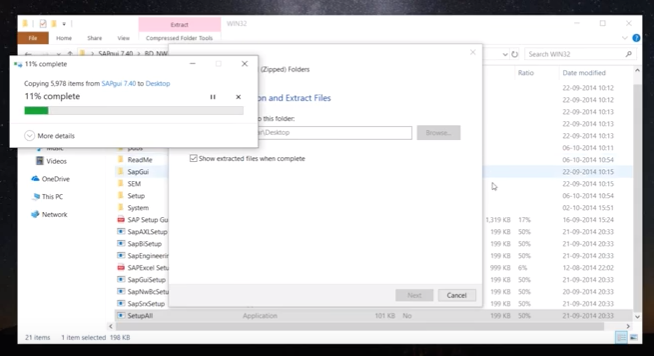
- 04:45 he clicks on the Extract All button which displays a Extract Compressed (Zipped) Folders dialog box
- The dialog box's text:
- Extract Compressed (Zipped) Folder
- "Select a Destination and Extract Files"
- Files will be extracted to this folder:
- C:\Users\Kundan Kamar\Desktop\SAPgui 7.40 [Browse...]
- [x] Show extracted files when complete
- two buttons near bottom right of dialog box
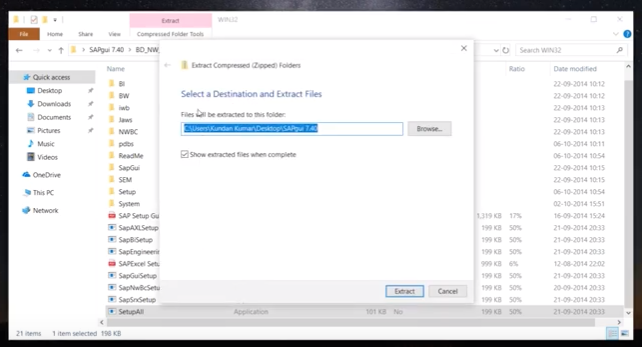
- 04:55 he will click on the Browse... button
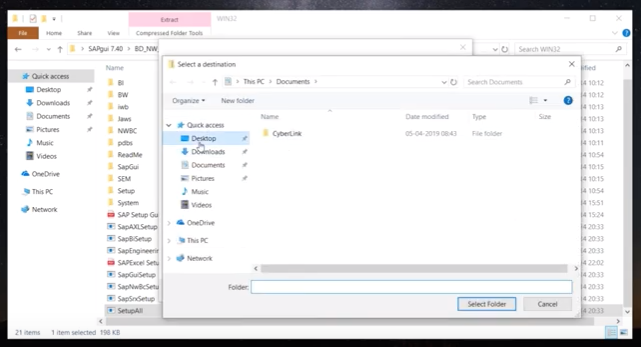
(11) correct Desktop
- Top
- 04:58 he wants to save it to the Desktop (under Quick access), not the Desktop folder it was currently pointing to,
- which was "C:\Users\Kundan Kamar\Desktop\SAPgui 7.40"
- so he clicks Desktop, which places the folder's name Desktop to the Folder text box near the bottom of the screen
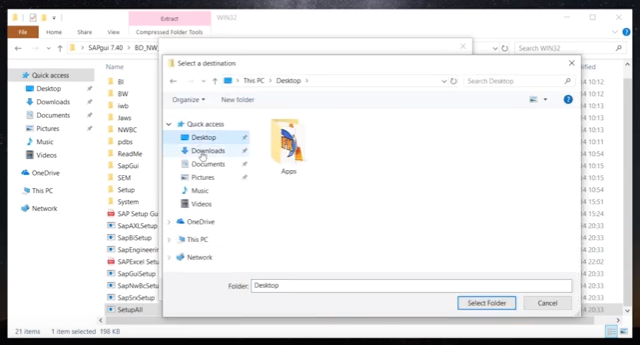
- Top
- 05:10 he then clicks the Select Folder button
- Top
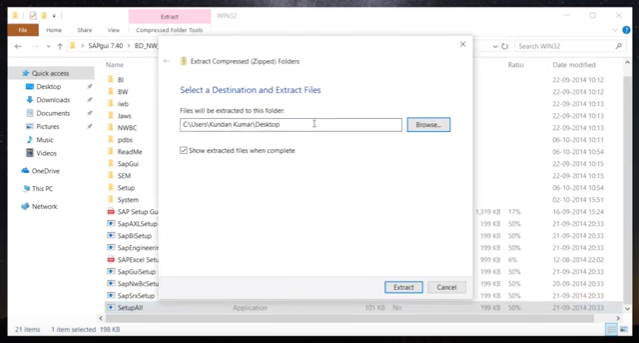
- 05:15 another dialog box is displayed confirming where the extracted files will be placed
- The dialog box's text:
- Extract Compressed (Zipped) Folder
- "Select a Destination and Extract Files"
- Files will be extracted to this folder:
- C:\Users\Kundan Kamar\Desktop [Browse...]
- [x] Show extracted files when complete
- two buttons near bottom right of dialog box
(12) the Extract button
- Top
- 05:22 He leaves the path alone, he clicks on its Extract button
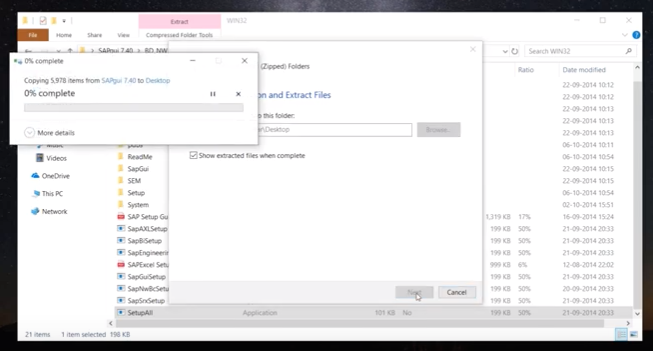
- Top
- 05:27 a status dialog box shows "Copying 5,978 items from SAPgui 7.40 to Desktop"
- and displays the percent complete and the progress bar
- he also says it takes some time, 5 or 10 mintes
(13) Pointing to the two Icons on his Desktop
- Top
- 06:06 the progress bar is up to 11% complete
- 06:15 he had paused the video to allow the extraction to complete
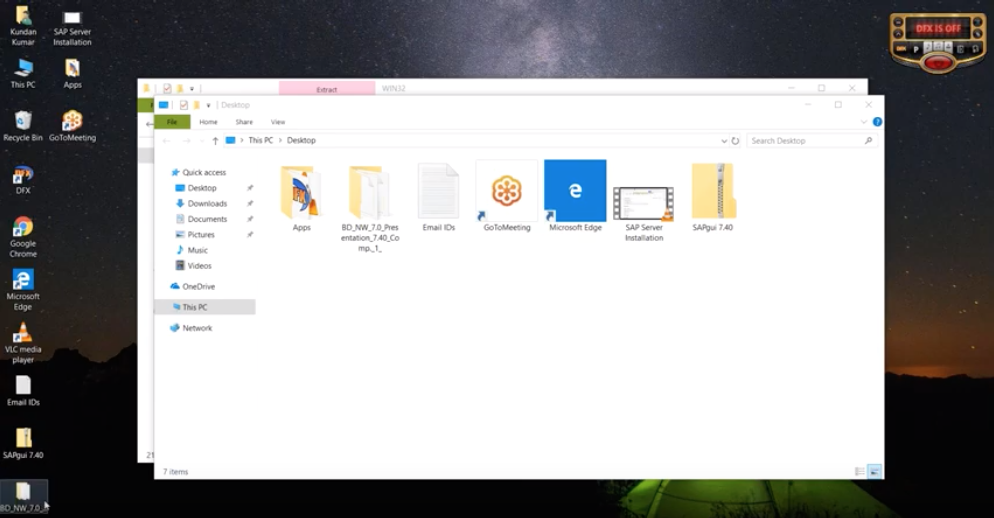
- when he continues with the video we see the current desktop
- Top
- 06:25 He references the bottom 2 icons on his desktop
- first he points to BD_NW_7.0_... which is a folder and it's extracted
- than he points to SAPgui 7.40 the zip file
- Top
- 06:45 he double clicks the BD_NW_7.0_... folder
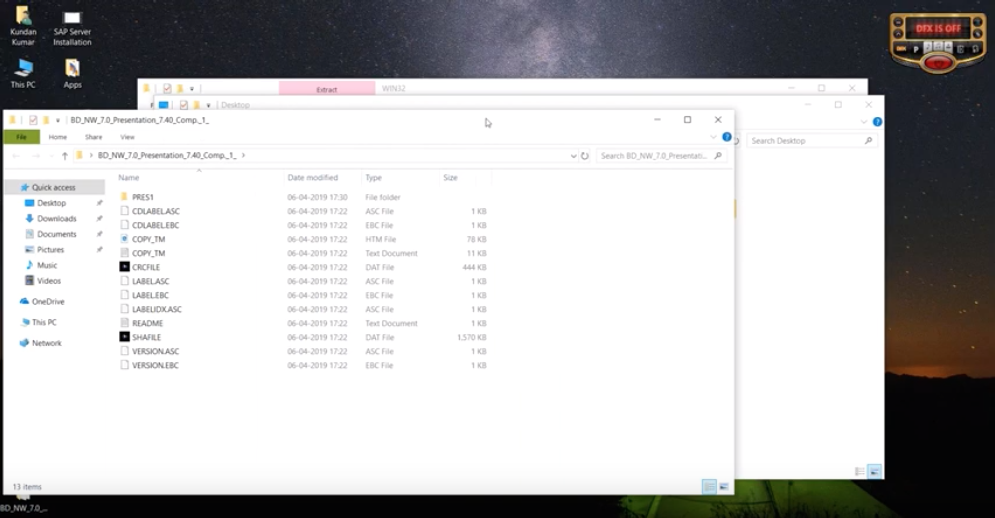
- 06:49 displays the PRES1 folder and 12 files
- 06:55 double click the PRES1 folder, reveals 7 folders and 4 files
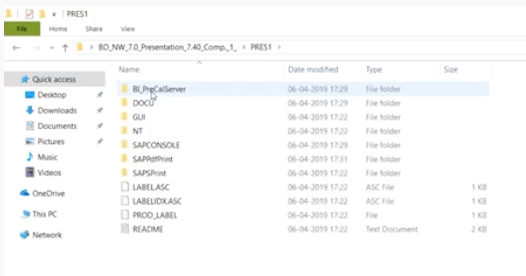
- 06:58 double click the GUI folder, reveals the WINDOWS folder
- 07:02 double click the WINDOWS folder, reveals the WIN32 folder
- 07:07 double click the WIN32 folder, reveals 12 folders and 9 files
- 07:13 double click the SetupAll file
- 07:22 He says: it is asking if we are allowed to make changes, click on YES
- I don't see where it asks to allow changes and I don't see the Yes
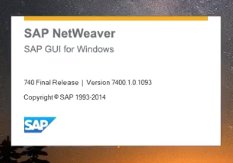
(14) First look at the Front-End Installer
- Top
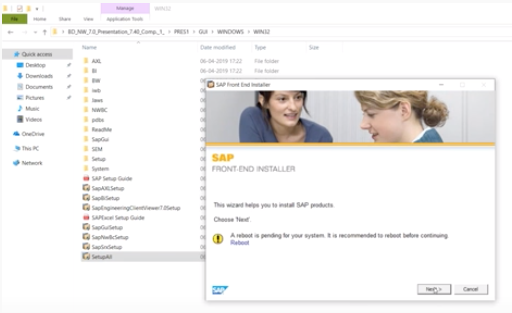
- 07:29 A splash screen is displayed with the Header of SAP, FRONT-END INSTALLER, Version 9.0.55.0 (version wasn't clear)
- The Splash screen goes away and comes back displaying new information
- Top
- 07:36 Click on the Next button
- 07:41 The SAP FRONT-END INSTALLER now displays a List Box
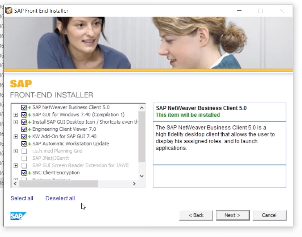
- 07:43 Click on Select All located as the first text under the List Box
- 07:48 Click on the Next button, its the grey button in the middle
(15) Target two Directories
- Top
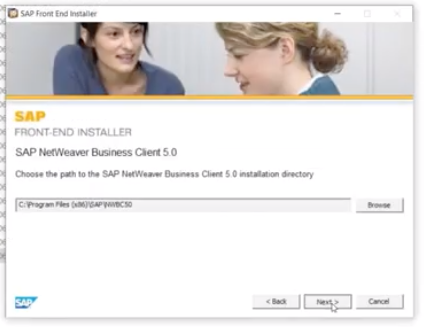
- 07:51 The SAP FRONT-END INSTALLER now displays a Save As dialog box
- that ask: Choose the path to the SAP Netweaver Business Client 5.0 installation directory
- he leaves the default path and click the Next button
- reserve
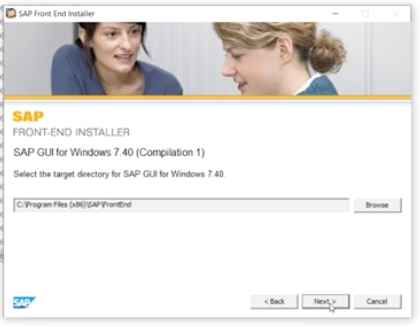
- 07:55 again the Save As dialog box is displayed asking for a target directory for the "SAP GUI for Windows 7.40" folder ?
- again he accepts the default path because he just clicks the Next button
- Top
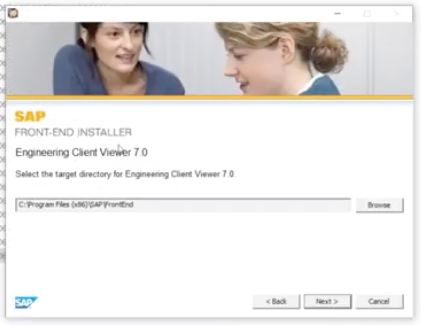
- 07:59 again the Save As dialog box is displayed asking for a target directory for the "Engineering Client Viewer 7.0" folder ?
- again he accepts the default path because he just clicks the Next button
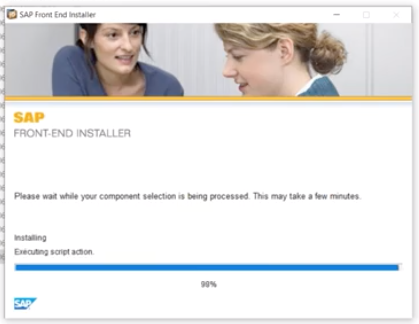
(16) Installation has Started
- Top
- 08:11 Installation is started and may take 20 minutes
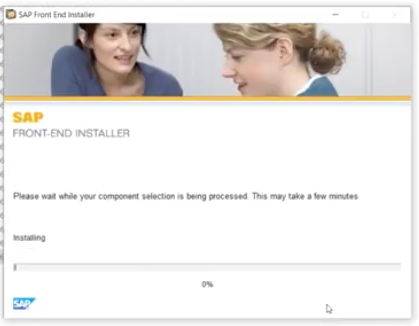
- 09:46 he suggest that you have Microsoft Office on your laptop, at 30%
- 11:00 at 66%

(17) Installation asking for a Reboot
- Top
- 12:04 The SAP FRONT-END INSTALLER is asking you to reboot
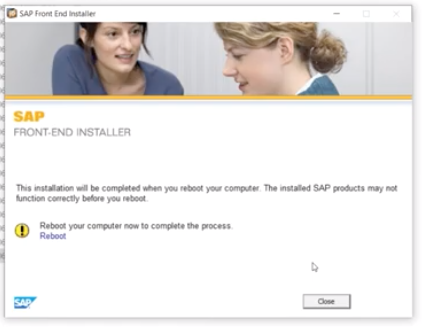
- Top
- 12:07 He clicks on the Close button
- 12:08 The window closes leaving File Explorer displayed on his Desktop
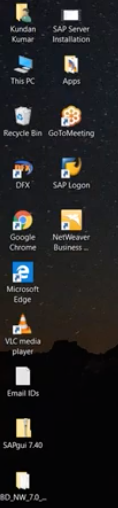
(18) Four New Desktop Icons
- Top
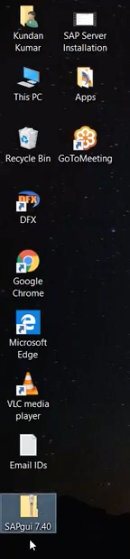
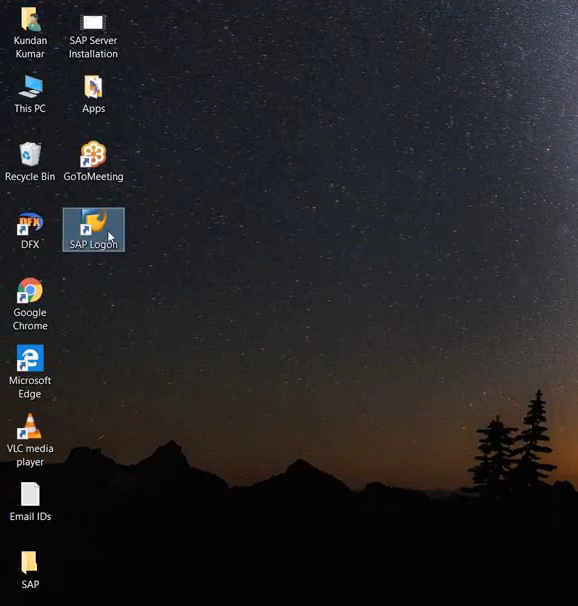
- 12:29 He now has four new icons on his desktop
- SAP Logon
- NetWeaver Business Client 5.0
- SAPgui 7.40
- BD_NW_7.0._Presentation_7.40_Comp._1_
- Top
- 12:59 he creates a new folder on the Desktop named "SAP"
- 13:36 he places 3 of the icons into the new SAP folder
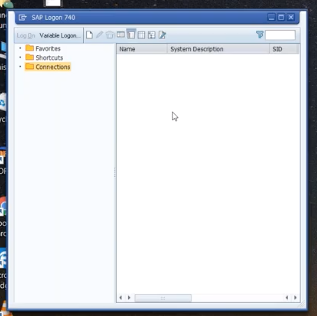
(19) SAP Logon
- Top
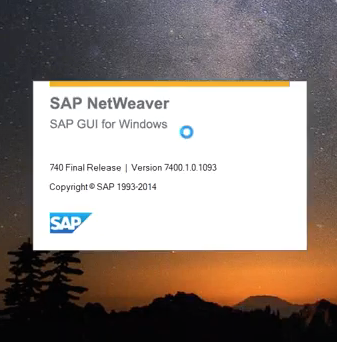
- 14:05 He double clicks on the SAP Logon icon from his Desktop
- 14:12 a Splash screen is displayed
- 14:16 The logon screen is displayed
- 14:20 He points out that under Name, System Description, and a third column (cannot make out it's heading)
(20) Create New System Entry dialog box
- Top
- 14:28 click on the New button located to the right of the text, Variable Logon
- 14:30 a Create New System Entry dialog box is displayed, he just clicks the Next button, keeping the default entry
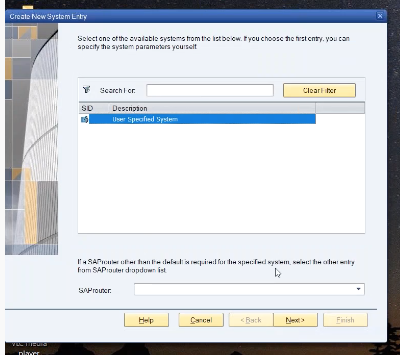
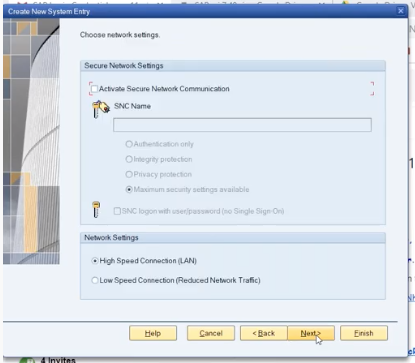
(21) System Connection Parameters
- Top
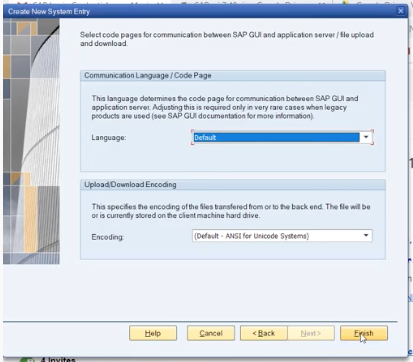
- 14:38 The next Create New System Entry dialog box appears
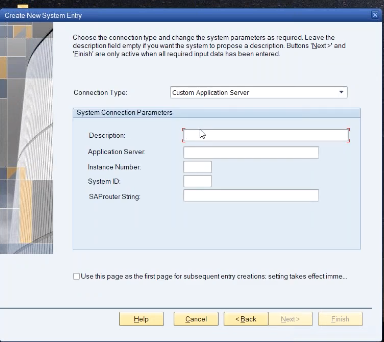
the "Create New System Entry" dialog box Parameters
- Top
- Screen Title Bar: Create New System Entry
- Paragraph below the title bar
- Choose the connection type and change the system parameters as required.
- Leave the description field empty if you want the system to propose a description.
- Buttons "Next >" and "Finish" are only active when all required inputdata has been entered.
- Connection Type: Custom Application Server
- System Connection Parameters
- Description
- Application Server
- Instance Number
- System ID
- SAPRouter String
- [ ] Use this page as the first page for subsequent entry creations setting takes effect imme...
- Buttons
- [Help] [Cancel] [< Back] [Next >] [Finish]
- Top
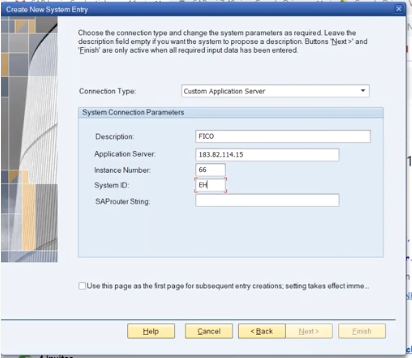
- 14:42 he suggest FICO for Description
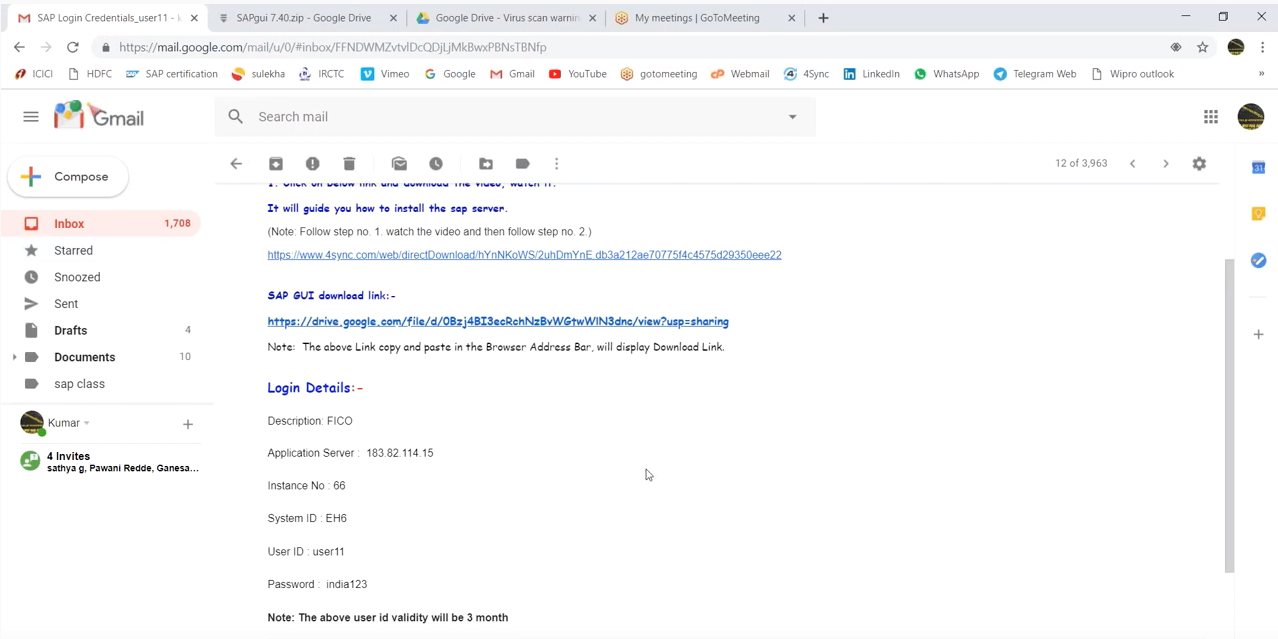
- 14:52 you have to go back to your email
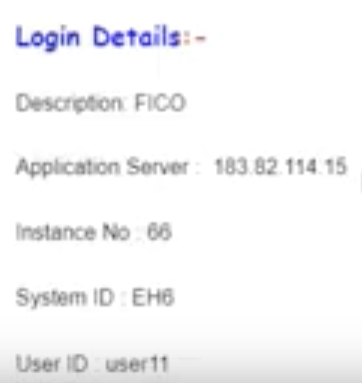
- 15:03 he copies and paste the ip number from Application Server in the email
- to the Application Server text box in the System Connection Parameters section of the screen
- watch out for extra spaces not needed from the copy and paste action
- 16:09 types in the Instance Number from the email
- 16:20 types in the System ID from the email
The completed screen
- Top
- 16:30 he discusses the SAPRouter String which he leaves empty
- a business concultant will set this string
- used to access the office server from your home
(22) Pressing the Next Button After Parameters Filled In
- Top
- 17:24 he clicks the Next button
- 17:28 he just clicks the Next button
- Top
- 17:35 he finally clicks the Finish button
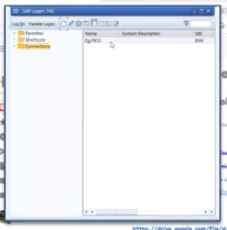
- 17:39 the SAP Logon screen is displayed
- FICO now appears in the right pane
(23) the New Password screen
- Top
- 17:47 he double-clicks on FICO
- 17:54 the message Connecting to EH6 please wait... is displayed briefly in a Message Box on the Desktop
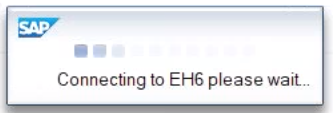
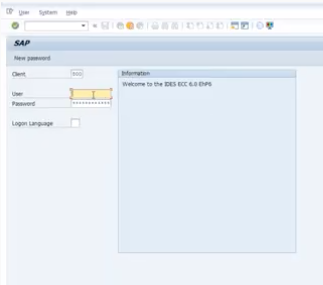
- 18:02 the SAP New Password screen is displayed
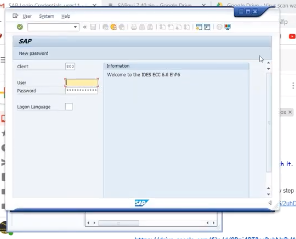
- Top
- 18:02 enter the User ID and Password from the email
- note: the password only works once
- the system will ask you to reset and confirm a new password
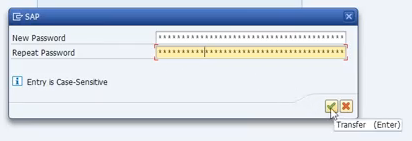
- 19:04 the screen to enter and confirm your now password is displayed
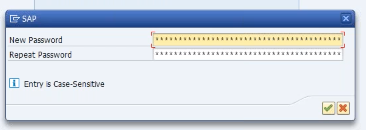
- 19:31 minimum length is 6
- 19:37 if you miskey your password 3 times, you have to request a new password, which may be time consuming
- 20:14 click the Check Marked button to enter your new password
- Top
- 20:18 The Copyright Notice is displayed
- again click it's Check Marked button
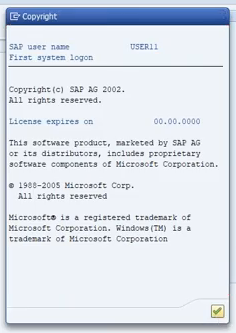
- 20:23 With the next screenshot he says he is ready to log in
(24) Logging Out of SAP
- Top
- 20:28 he is demonstrating how to Log Out of the system
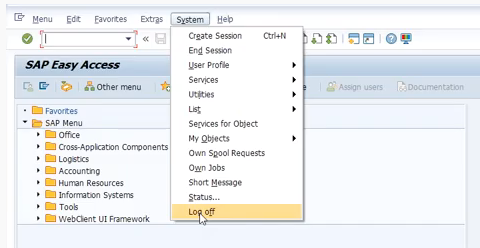
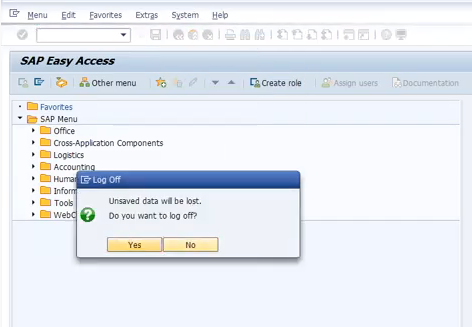
- 20:34 Loging off wants to make sure that is what you want to do
- Top
- 20:35 He clicks the yellow Yes button, SAP Easy Access screen disappears, and his email is now displayed on his desktop.
- Top
- 20:40 Note in the email it states that the user id will only work for 3 months
- 20:52 he says that after 3 months the user id will expire
- 20:54 he selects SAP Logon 740 from the Task Bar
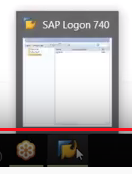
- 20:56 the SAP Logon 740 screen is displayed on his desktop
- Top
- 21:05 he clicks the Close button for the SAP Logon 740 screen, now all we see is his desktop
(25) Logging In After Setup
- Top
- 21:06 He double clicks on SAP Logon icon from his desktop
- Top
- 21:06 the splash screen is briefly displayed
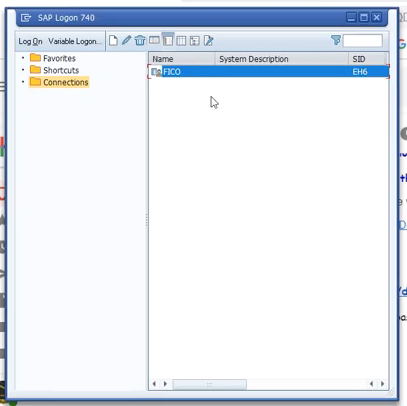
- 21:10 the SAP Logon 740 screen is displayed
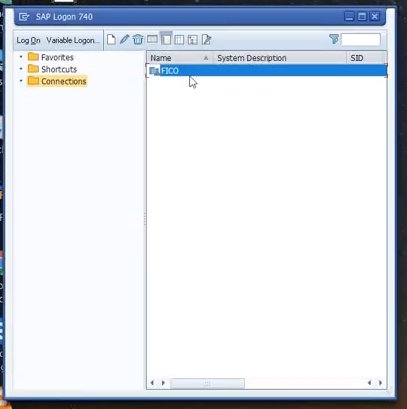
(26) The SAP Logon 740 screen
- Top
- 21:14 to Logon, you can either double click on FICO or click the Log On button from the toolbar
- to display the SAP Log On screen
- Top
- 21:25 on the User text box. press the Space button from the keyboard to display current user names, select yours
- type in your password, and press Enter
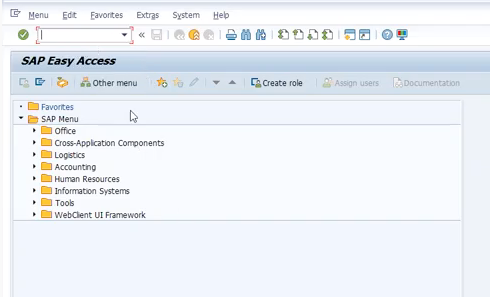
- 21:46 the SAP Easy Acess screen is displayed

(27) You have installed your SAP successfully
- Top
- 21:57 He says "You have installed your SAP successfully".
(1) Morris's Email for the Download
- Top
- From: morris@pataky.org
- To: bprupis@gmail.com
- Date: Fri, Sep 6, 2019 at 12:38 PM
- Subject: Login
- Body:
(2) Morris's Email for the Video Instruction's Link
- Top
- From: morris@pataky.org
- To: bprupis@gmail.com
- Date: Fri, Sep 6, 2019 at 1:26 PM
- Subject: High
- Body:
(3) How to Uninstall SAP GUI
- I saw references to v7.10, v7.20, v7.30, and v7.50, we have v7.40
- Reserve
(4) Morris' Document Link Issues
- Top
- Running Morris's Spreadsheet
- Path: SAP Class / Global Corp / Global Corp 1.xlsx
- There are two tabs: FI and CO
- Click on Define Create Company link
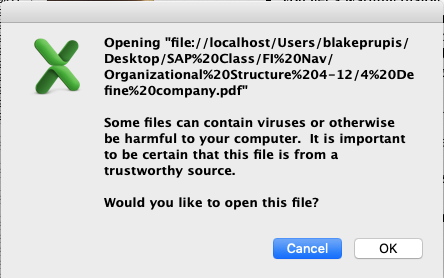
- Adobe Acrobat Pro DC comes up displaying the 4 Define company.pdf file
- Links within that document are not working
- example from the pdf
- company - from the first line
- you get a warning dialog box saying:
- titled: Security Warning
- This document is trying to connect to:
- SAPEVENT:DOCU_LINK%5CGL:company
- If you trust this site, choose Allow. If you do not trust this site, choose Block
- [x] Remember this action for this site for all PDF documents
- buttons: Allow Block Cancel
- When I press the Allow button, I get a web page stating:
- The address wasn't understood
- you might have to install other software to open this address
Copying the SAP Class folder that contain's Morris's Documents to the Flash Drive and the Apple
- Top
- Bought two 8 Gig Flash Drives
- One of them is named STORE N GO (the green one)
- Placed flash drive into lap top and copied the SAP Class folder to the flash drive
- Dialog box says Header: 99% complete
- Text: 653 items from Desktop to STORE N GO (D:)
- Text: 99% complete
- After copying the SAP Class folder to the flash drive
- Type: USB Drive
- File system: FAT 32
- Used space: 2,291,286,016 bytes - 2.13 GB
- Free space: 13,325,942,784 bytes - 12.4 GB
- Capacity: 15,617,228,800 bytes - 14.5 GB
- Drive D:
- My Apple has 724.07 GB available of 3 TB
- my apple was able to see the folder & it's files
- copied folder & files to "Desktop"
- Now I'll try the same steps I documented on the Lap Top.
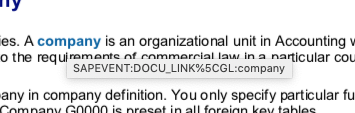
- When I attempt to click "company" from the pdf document, I get a beep from the apple computer.
- When I hoover over "company" I get a tool tip displaying: SAPEVENT:DOCU_LINK%5CGL:company
- there is a screenshot of this below
- on the apple, Preview is being used to display the pdf document named: 4 Define company.pdf (page 1 of 5)
- reserve
- reserve
Some Solutions to the Problem
- Top
- Buy Adobe Acrobat Pro DC
- Find out what software is displaying Morris's pdf file
- What is the path of the next document it is trying to display
- Screenshot below is " Finder's" view of the SAP Class folder from the apple's desktop.
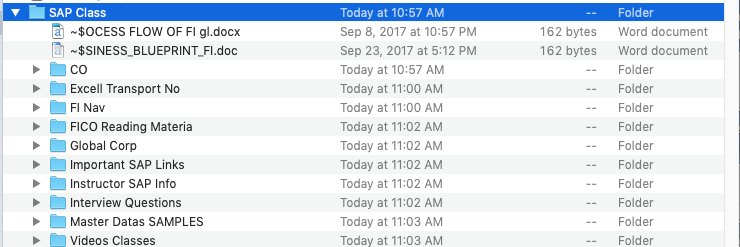
- Top
- The screenshot below displays a message from Excel before opening the "Global Corp 1.xlsx" file.
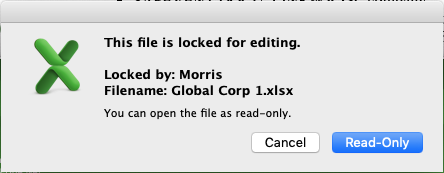
- Top
- After clicking the link "Define Create Company" in the Excel spreadsheet, the following msg box is displayed
- Top
- After hoovering over the link "company" in Preview which is displaying the pdf document,
- the following tool tip is displayed
(5) Summary
- Top
- Steps 1 thru 4 are all about downloading the zipped file named SAPgui 7.40.zip and saving it to your desktop.
- Steps 5 and 6 : double-clicking the zipped file to get to the Open option, forces File Explorer to act on the zipped file
- and displaying a folder within the zipped file named BD_NW_7.0_Presentation_7.40_Co...
- Steps 7 thru 9 : drills down further into the zipped file, starting with the first visible folder named BD_NW_7.0_Presentation_7.40_Co...
- let me use the phrase, zipping thru a series of folders named, PRES1, GUI, WINDOWS,
- and WIN32 which is where you find the SetupAll file
- within Step 9 he right-clicks the SetupAll file, revealing the Open option,
- which reveals a dialog box titled "Compressed (zipped) Folders" with the grey button named Extract All
- Steps 10 thru 12 : he clicks on the Extract All button which displays a Extract Compressed (Zipped) Folders dialog box
- this dialog box displays a suggested path: C:\Users\Kundan Kamar\Desktop\SAPgui 7.40 for the extracted files to be stored
- however, instead of keeping the suggested path, he changes it by clicking the Browse button within the dialog box
- opens another dialog box where he can change the suggested path to another path
- he changes the suggested path to Desktop, with a simple click
- which places the folder's name Desktop into the Folder text box near the bottom of the screen
- Now that the path was changed to Desktop, he clicks the Select Folder button
- another dialog box is displayed confirming where the extracted files will be placed
- using the path: C:\Users\Kundan Kamar\Desktop
- He leaves the path alone, he clicks on the dialog box's Extract button
- a status dialog box shows "Copying 5,978 items from SAPgui 7.40 to Desktop"
- and displays the percent complete and the progress bar
- Step 13 displays the BD_NW_7.0_... which is a folder on the Desktop
- the original file, SAPgui 7.40.zip is still on the desktop
- he double clicks the BD_NW_7.0_... folder from the desktop, which automatically opens File Explorer
- which reveals the PRES1 folder
- double-clicking the PRES1 folder, reveals the GUI folder
- again we click thru the WINDOWS folder, and the WIN32 folder, which contain the SetupAll file
- he double-clicks on the SetupAll file
- Steps 14 thru 17 : The Front-End Installer
- the Splash screen, on the next screen click Next
- List Box screen, click on Select All, then click Next
- Choose the path to the SAP Netweaver Business Client 5.0 installation directory, then click Next
- asking for a target directory for the "SAP GUI for Windows 7.40", then click Next
- asking for a target directory for the "Engineering Client Viewer 7.0", then click Next
- the percent bar is now displayed as the Front-End Installer actually starts the installation
- the Front-End Installer asks for a reboot, then click Close
- the desktop now displays the File Explorer window when we had last clicked SetupAll
- we can now close File Explorer
- Step 18 : Four New Desktop Icons
- he creates a new folder to store some of the new desktop icons
- Step 19 : SAP Logon
- double clicks on the SAP Logon icon from his Desktop
- a Splash screen is displayed
- The logon screen is displayed, the right pane is empty
- Step 20 thru 22 : Creating a new System Connection Parameters record
- from the SAP Logon screen, click on the New button to display a Create New System Entry dialog box, then click Next
- Description, Application Server, Instance Number, System ID are added to the screen,
- then click Next, and Next again, and finally click Finish
- reserve
- Step 23 : the New Password screen
- he double-clicks on FICO
- the message Connecting to EH6 please wait... is displayed briefly in a Message Box on the Desktop
- the SAP New Password screen is displayed
- enter the User ID and Password from the email
- the screen to enter and confirm your now password is displayed
- click the check marked button to continue
- The Copyright Notice is displayed, again click it's Check Marked button
- the SAP Easy Access screen is displayed
- Step 24 : Logging Out of SAP
- Step 25 thru 26 : Logging In After Setup
- clicking SAP Login from the desktop
- the splash screen is briefly displayed
- the SAP Logon 740 screen is displayed
- you can either double click on FICO or click the Log On button from the toolbar
- to display the SAP Log On screen
- enter your user id and password, press Enter
- the SAP Easy Acess screen is displayed
- Step 27 : You have installed your SAP successfully
Reserve