WordPress Learning Document
Research
- Top
- Four Things to Learn
- Learn GoDaddy's version of WordPress using the account that already exists
- Learn Sheri's Homepage updating WordPress Issue, used within GoDaddy
- Learn Morris's WordPress Issues
- does BlueHost support it ?
- credentials ?
- Re-learn WordPress Family Tree site
- reserve
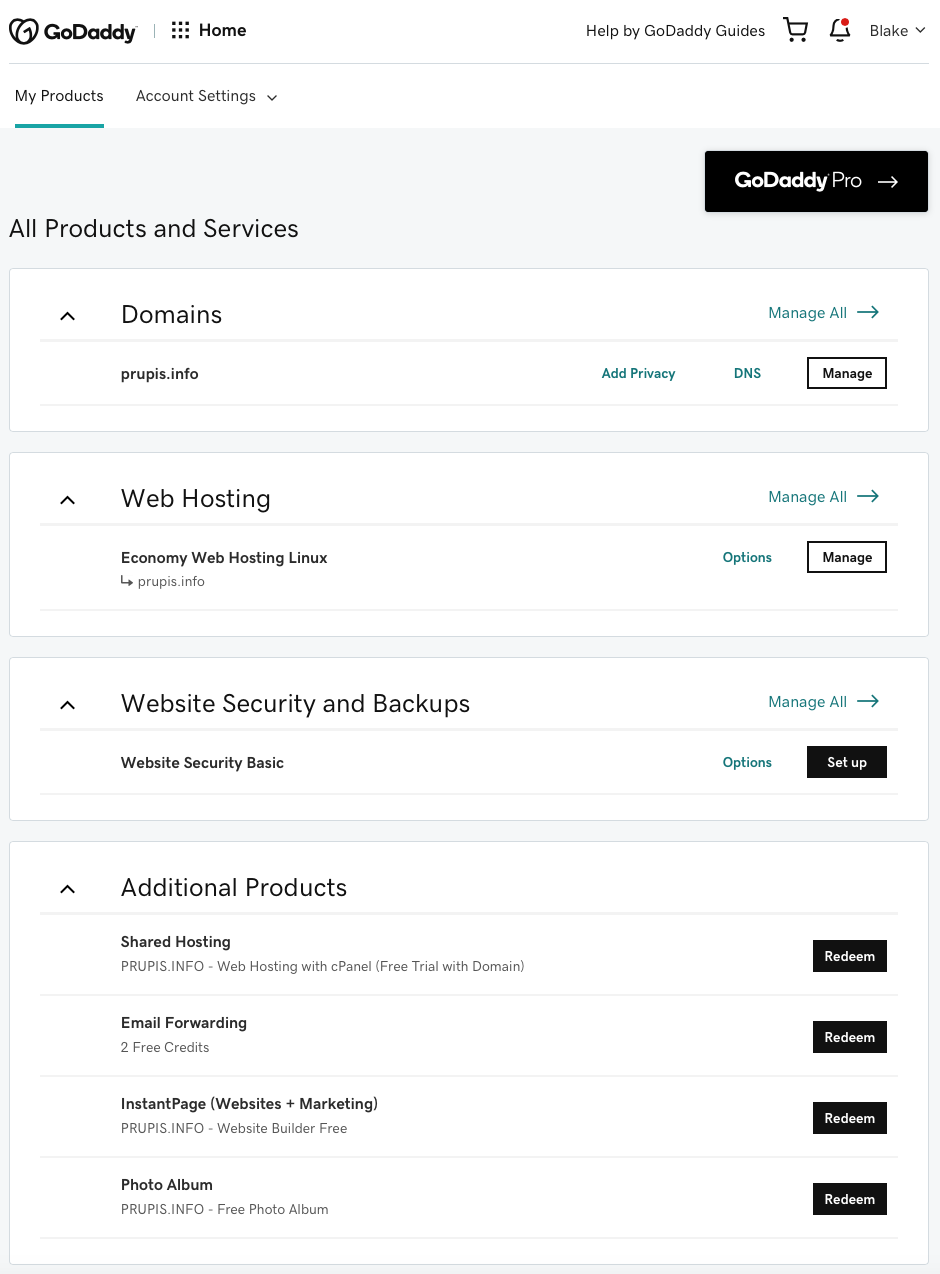
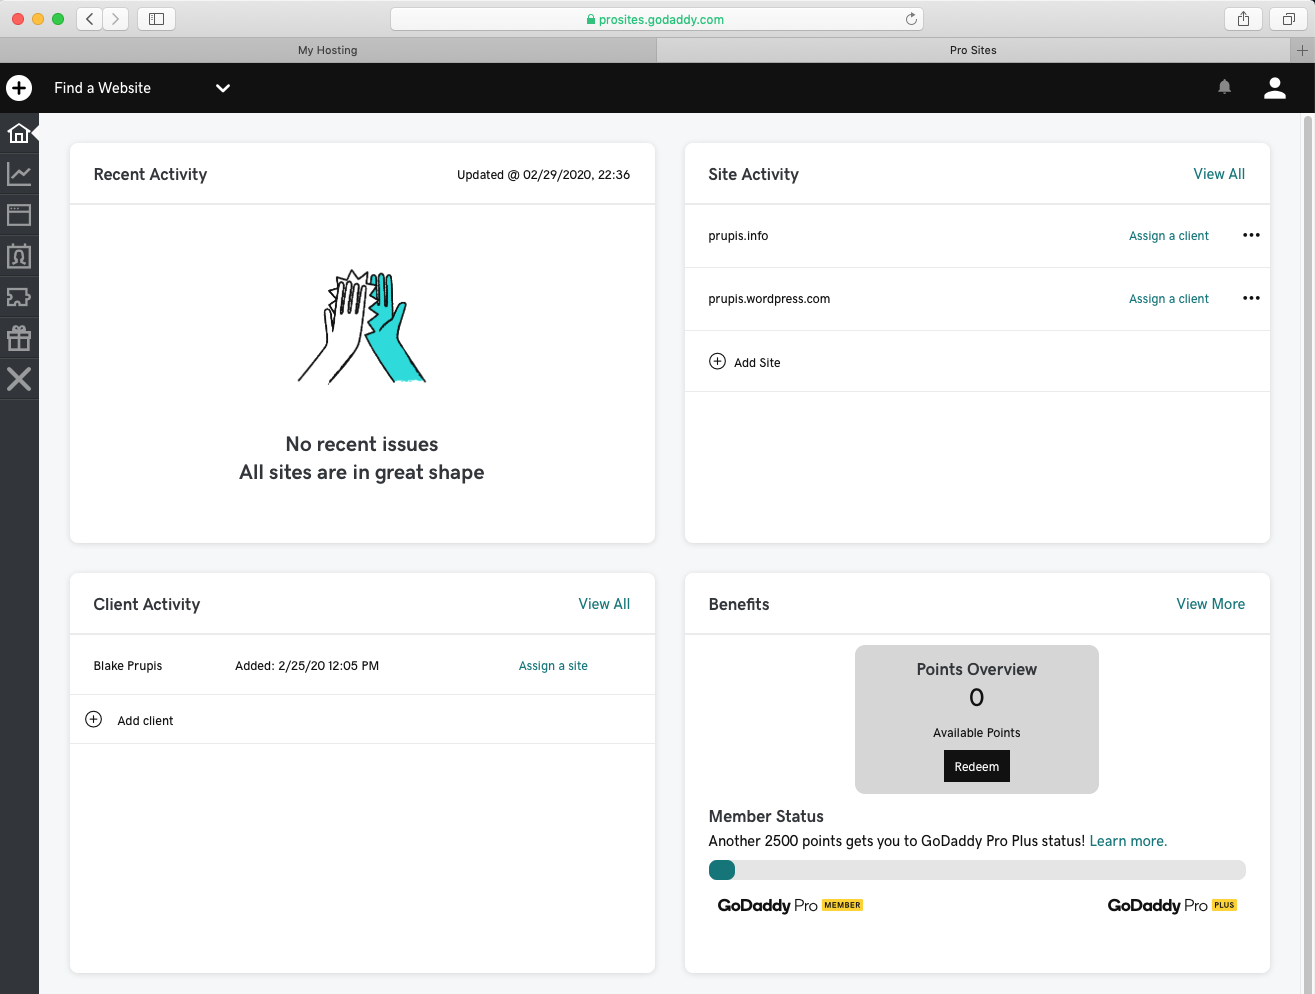
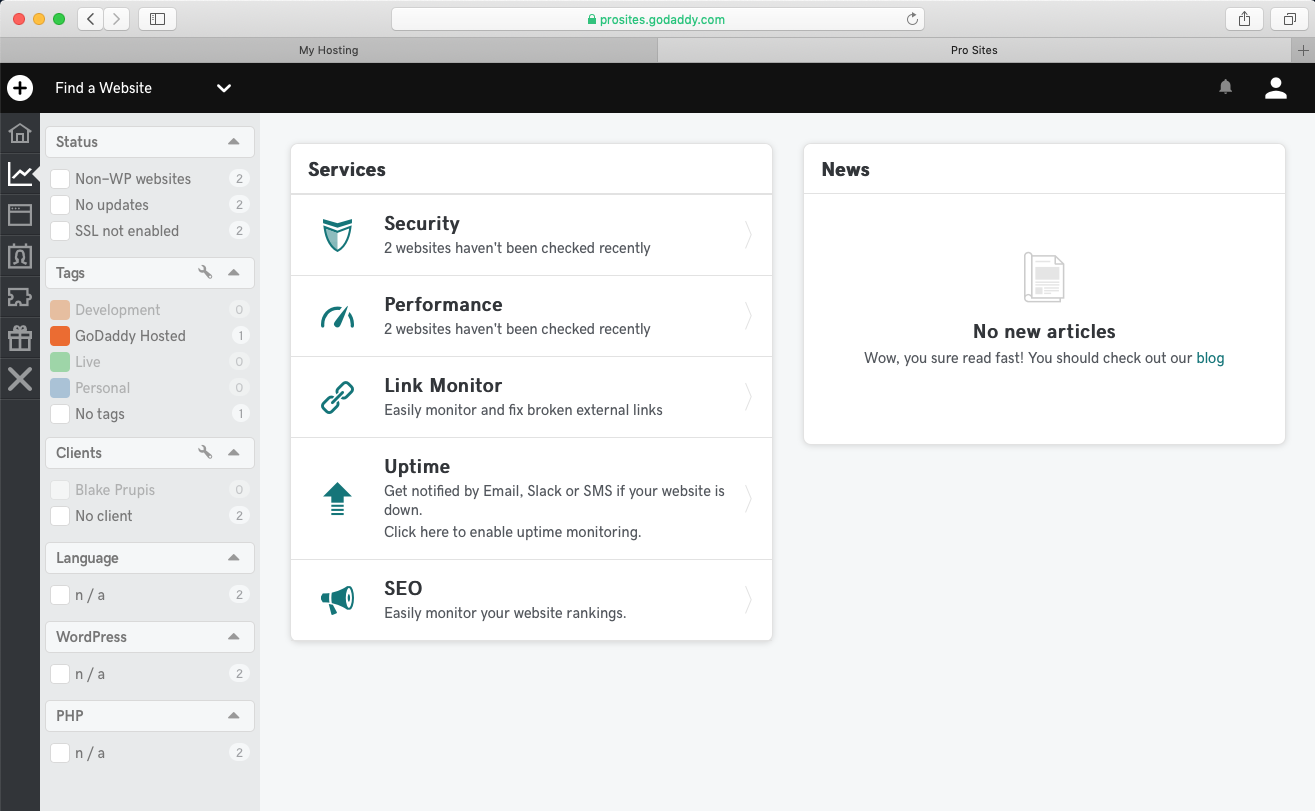
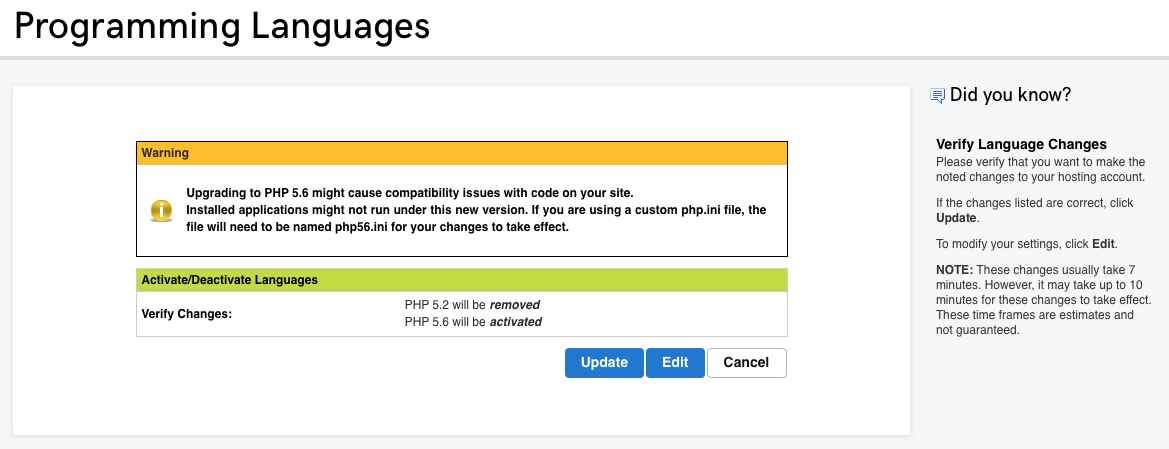
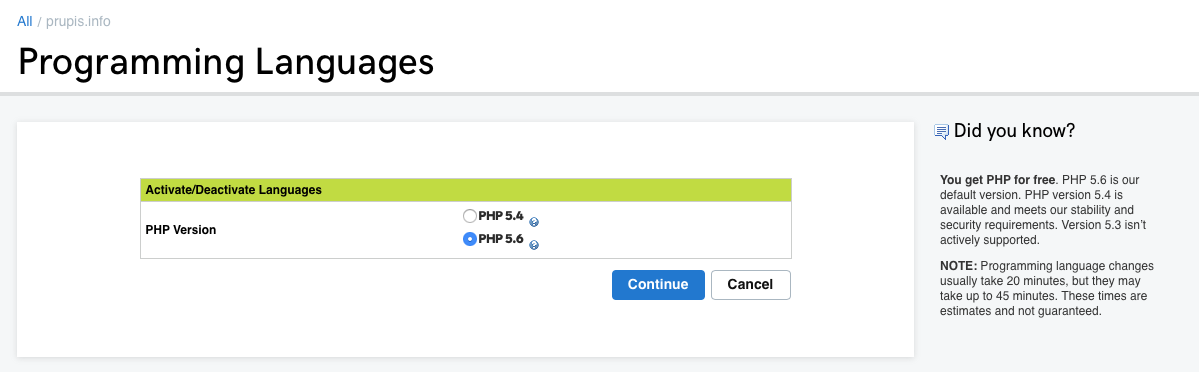
GoDaddy's version of WordPress
- Top
- Either by clicking Blake in the top left corner and clicking Pro Dashboard from the submenu.
- Top
- After clicking Pro Dashboard from the submenu.
- Top
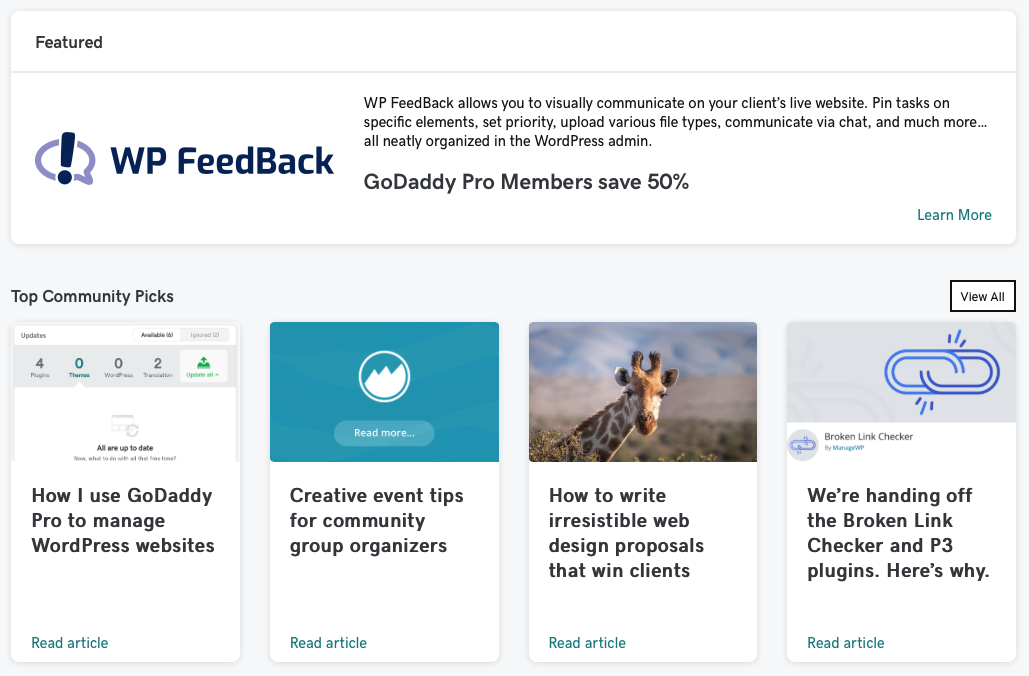
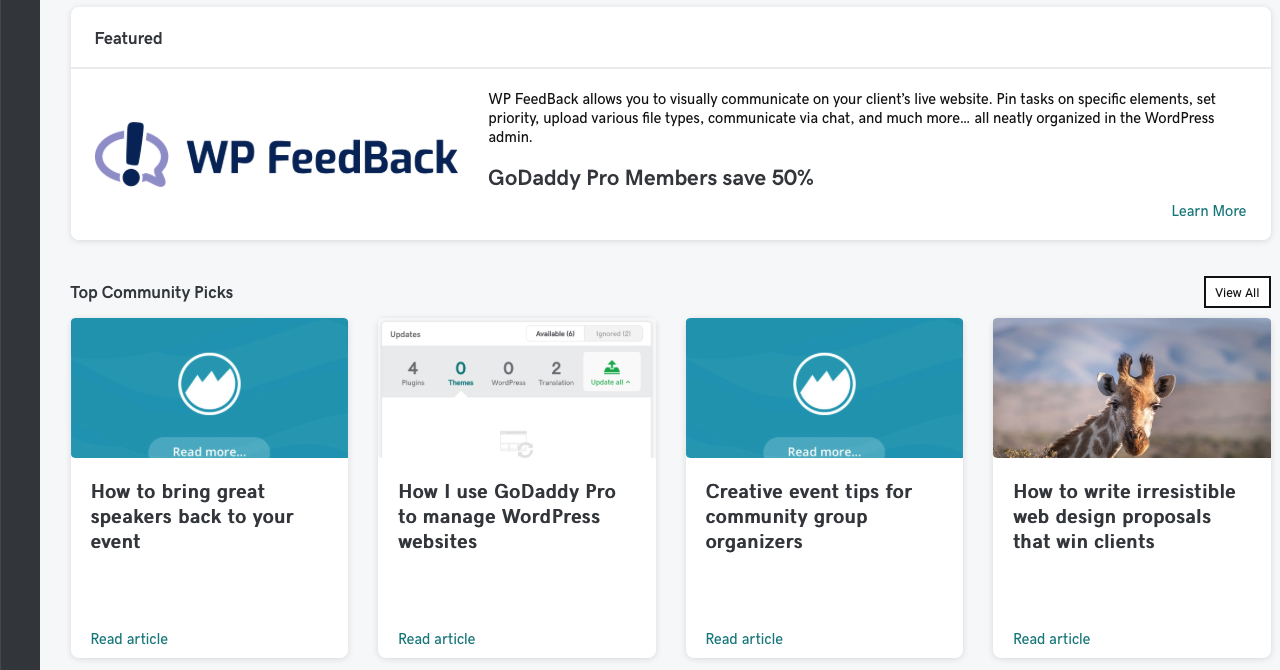
- Read the "How I use GoDaddy Pro to manage WordPress websites" article.
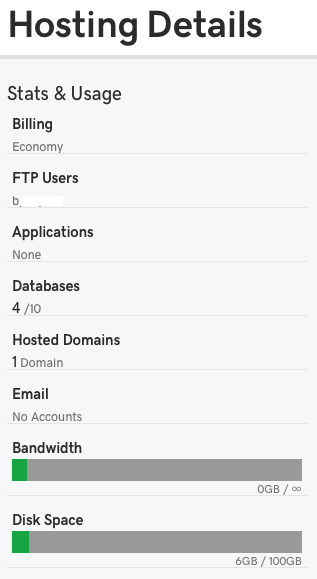
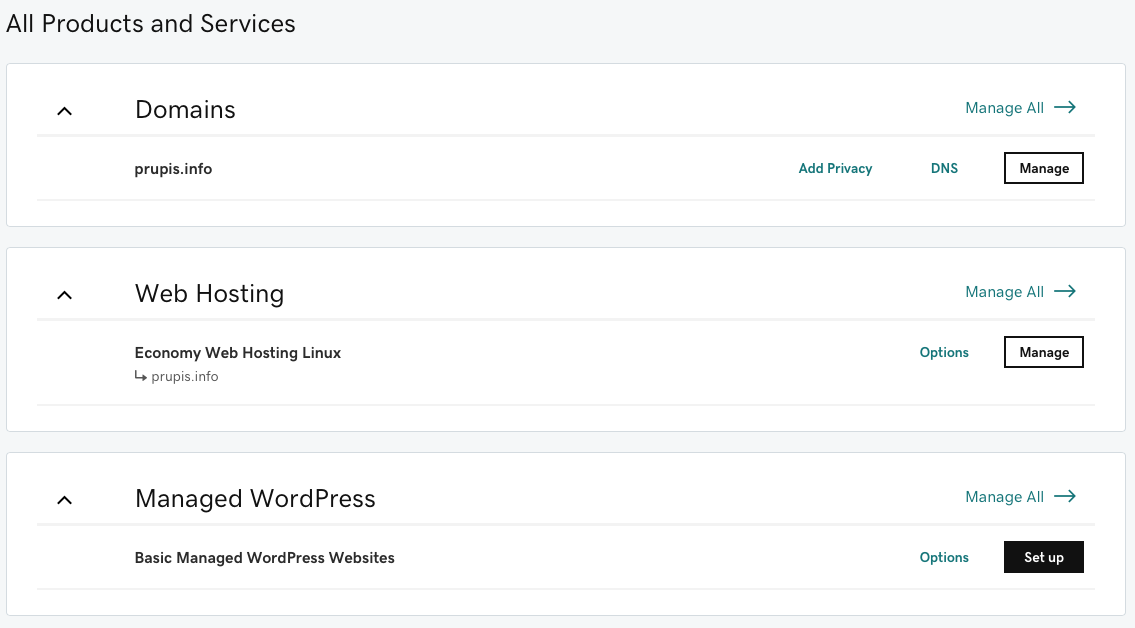
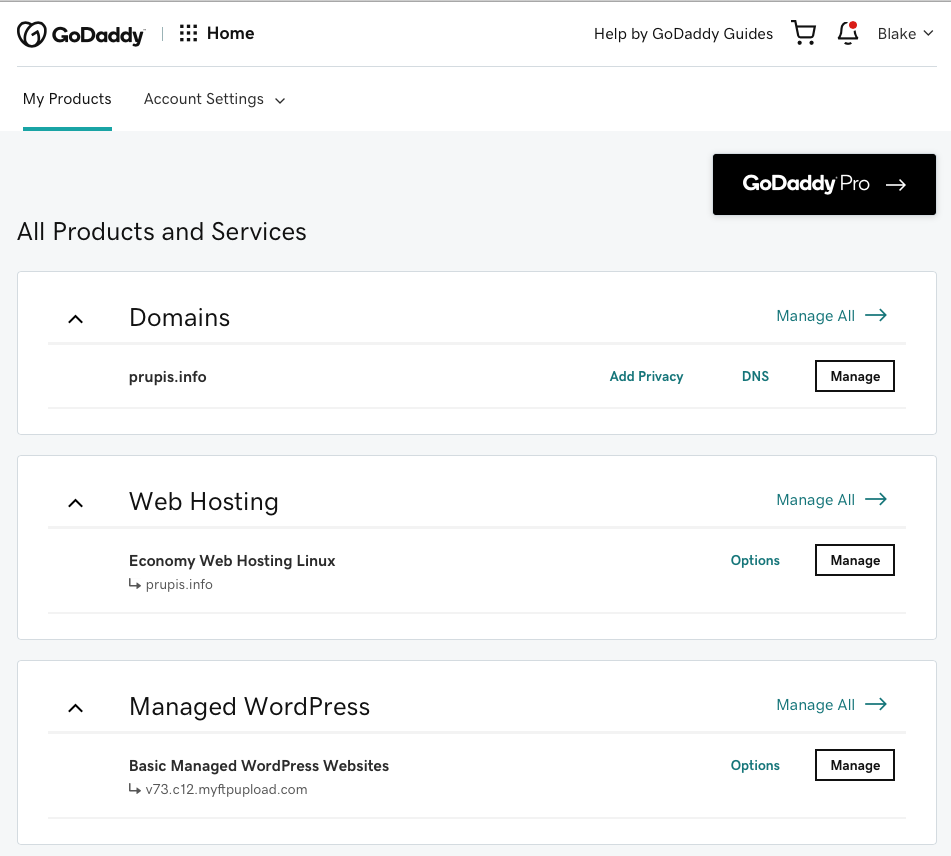
From the "Web Hosting" Panel
- Top
- Click the Manage button.
GoDaddy Pro Button
- Top
- First Time - Pressing the GoDaddy Pro button
- Top
- the following screen is displayed
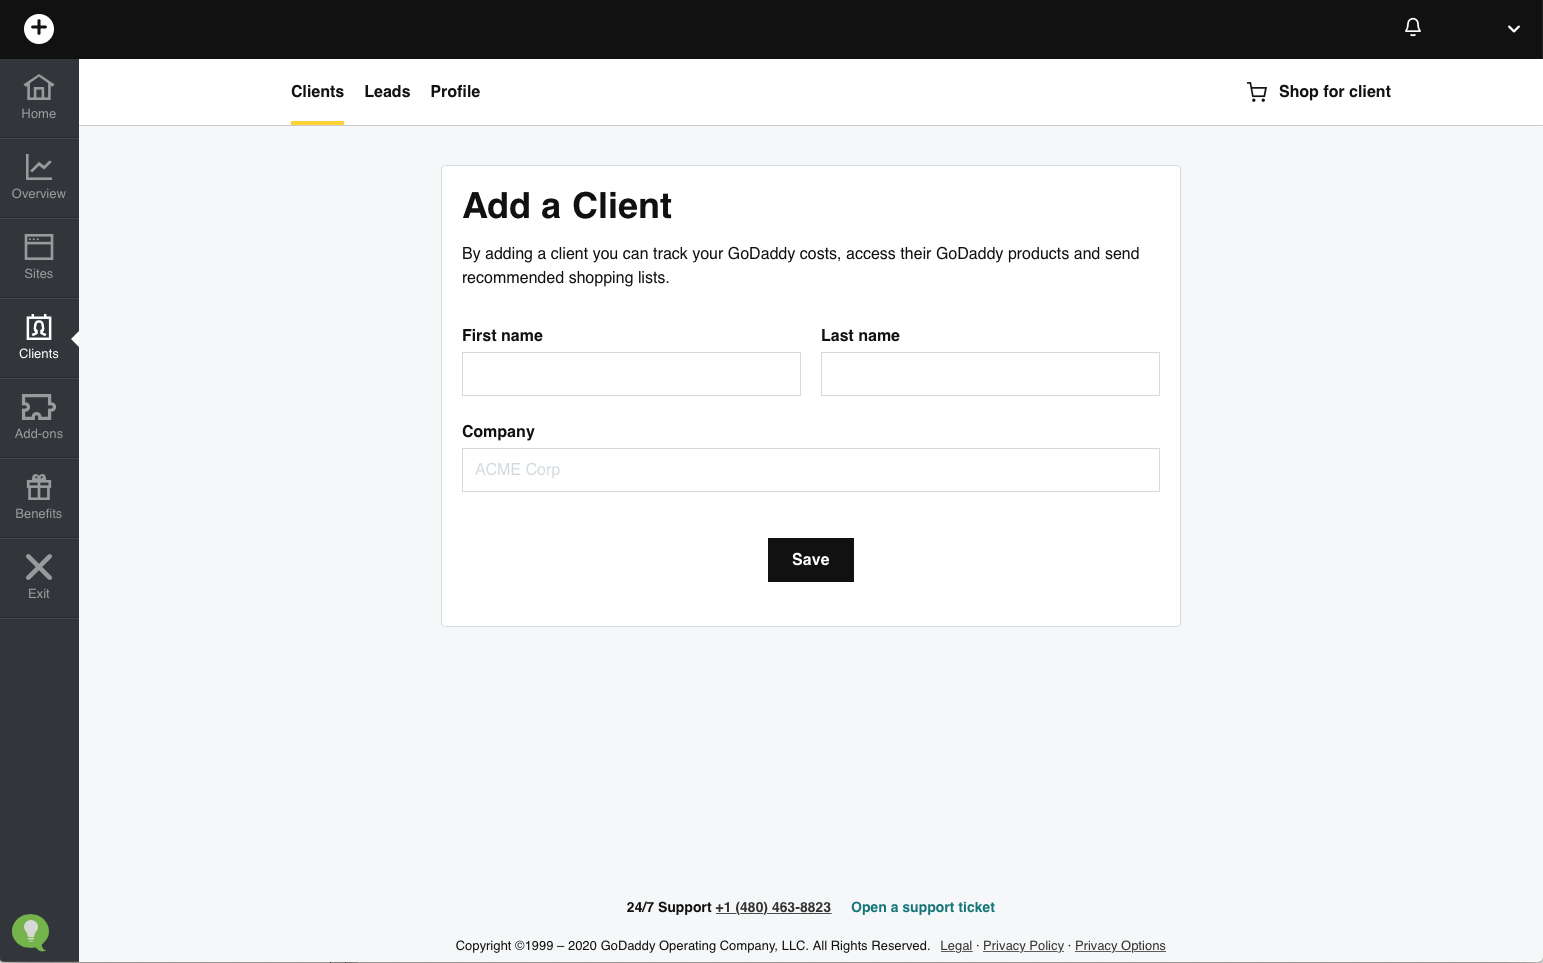
- Top
- after filling out the Add a Client screen

- Top
- after clicking the Save button
- Top
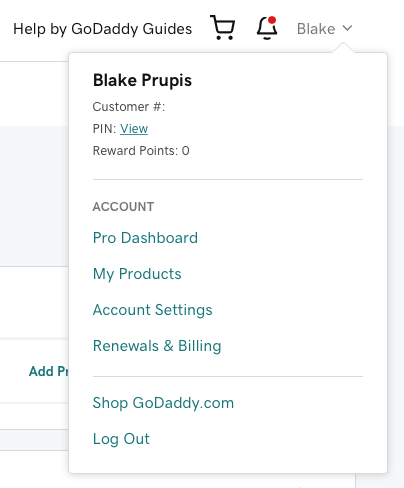
- after pressing the White Down Arrow button from the top right corner, the following submenu is displayed.
- Top
- After clicking Help Center, a new tab is created in the browser displaying the following screen.
- Top
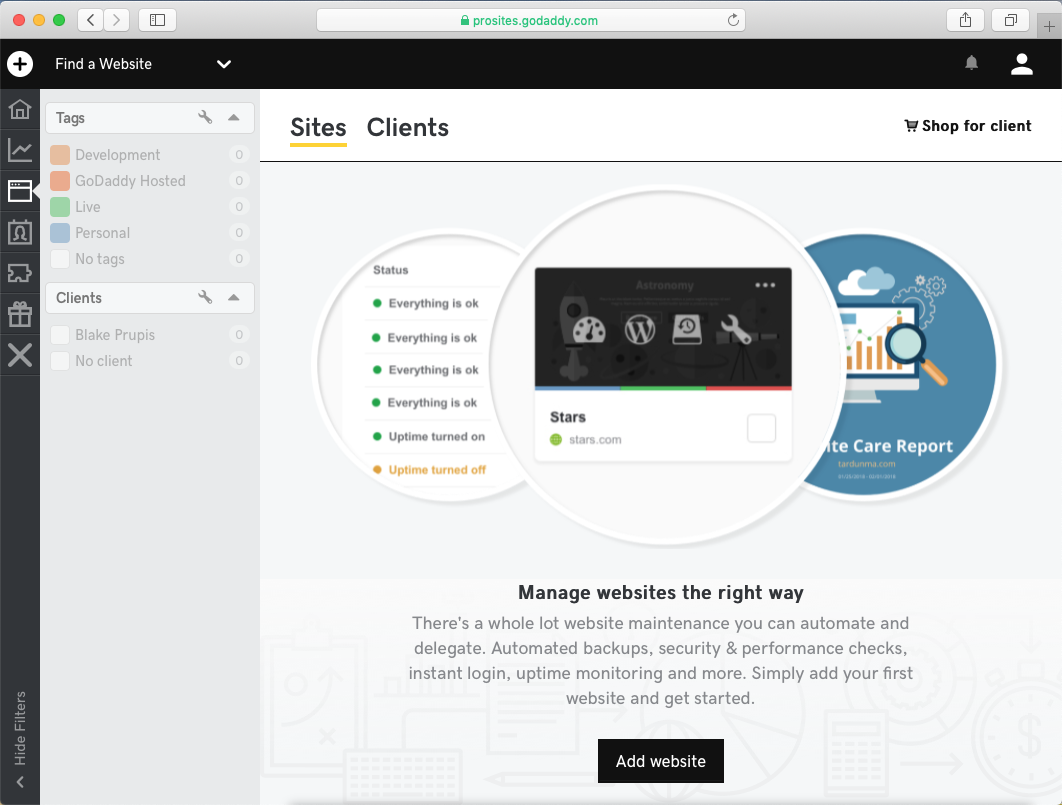
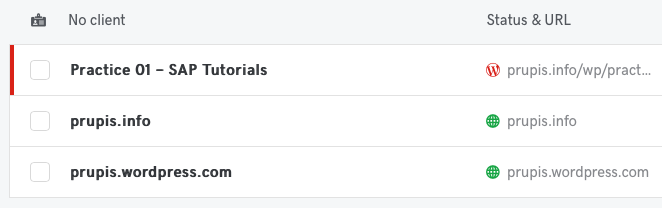
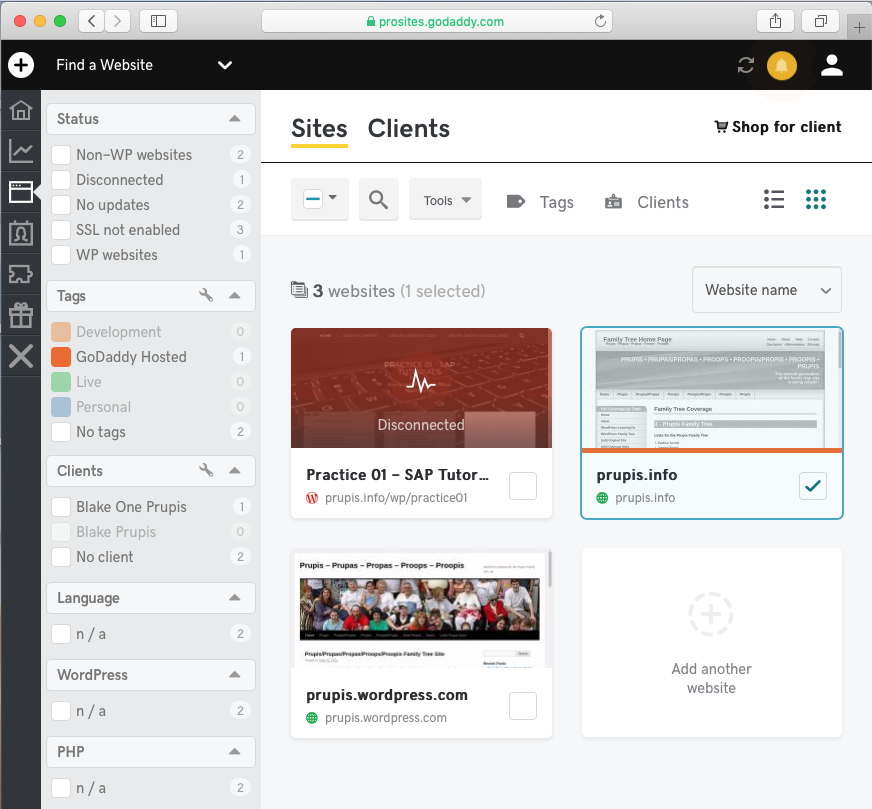
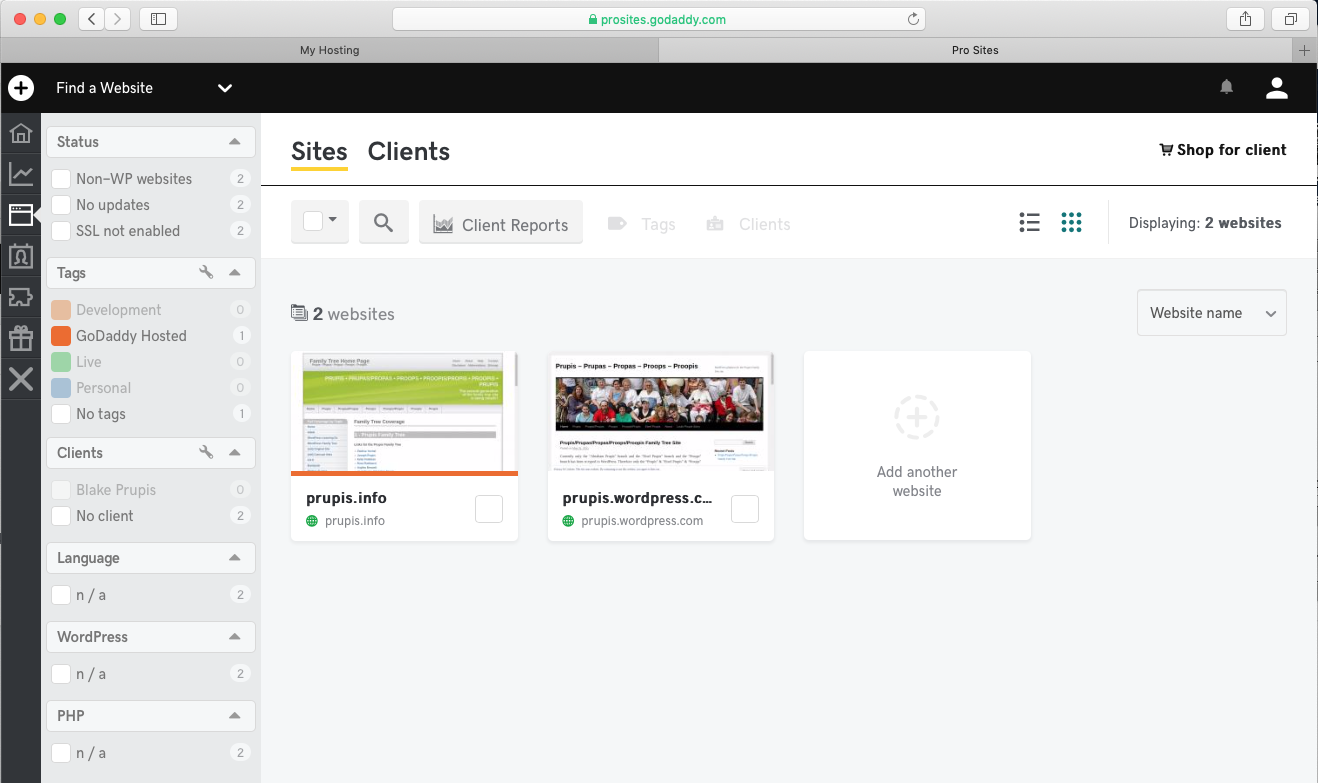
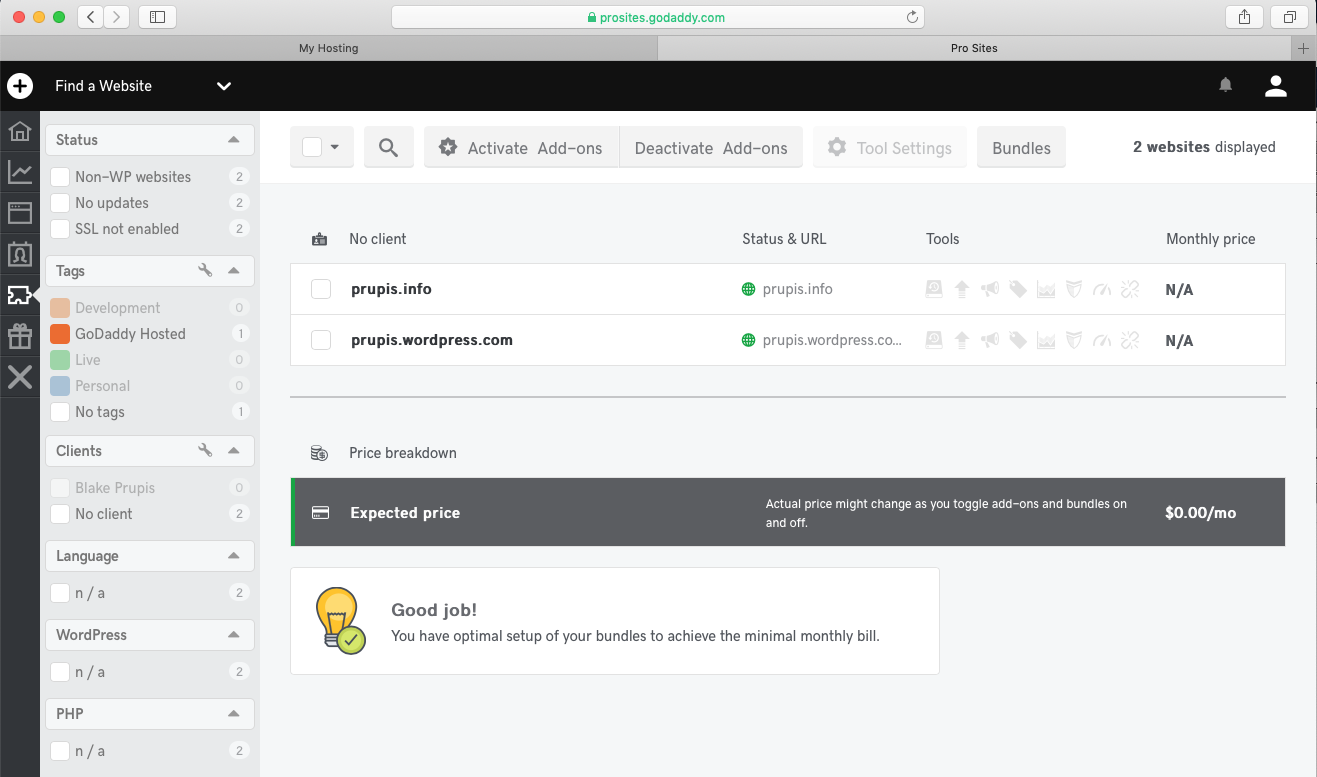
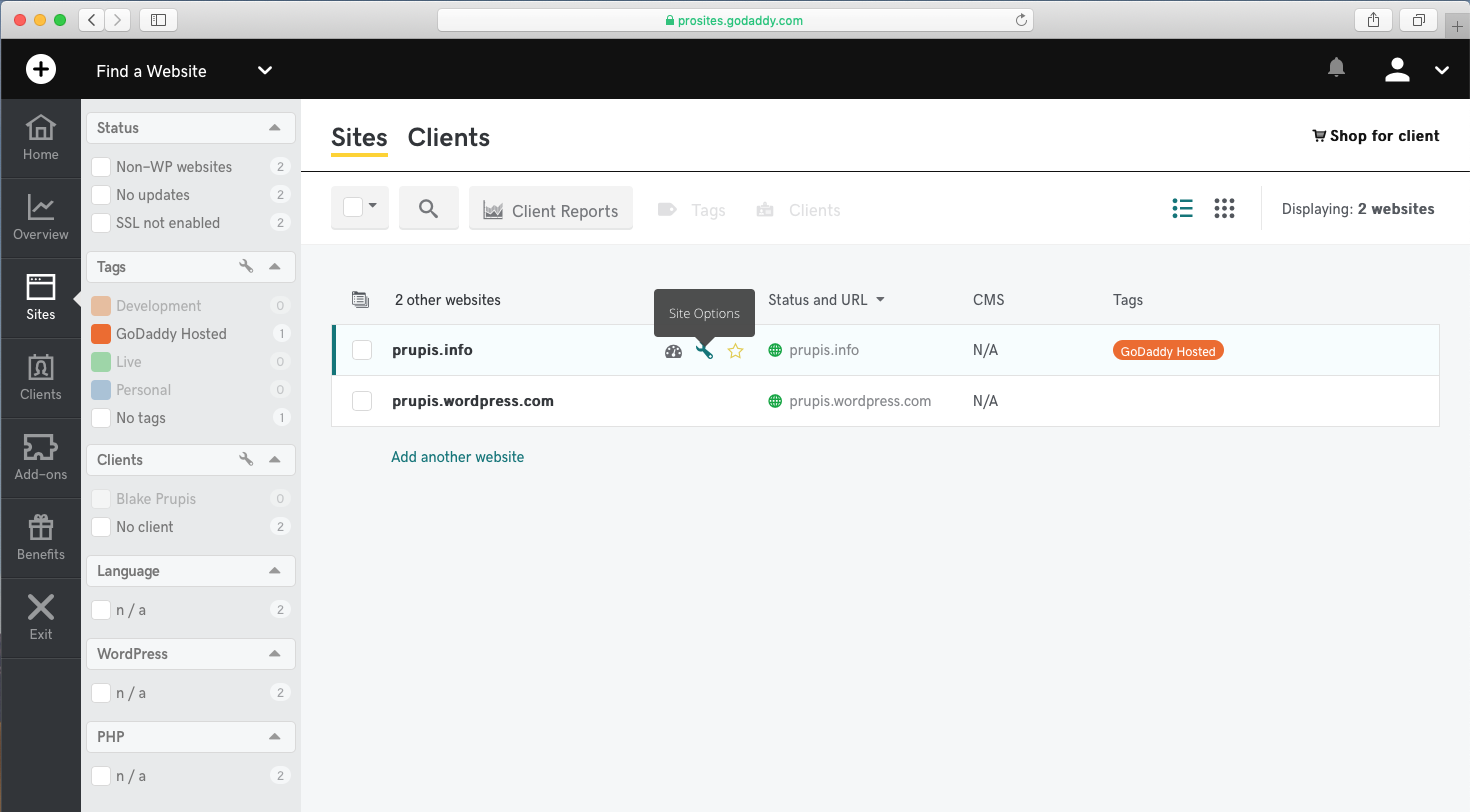
- After clicking Sites from GoDaddy Pro's left hand side column, the following screen is displayed.
- Top
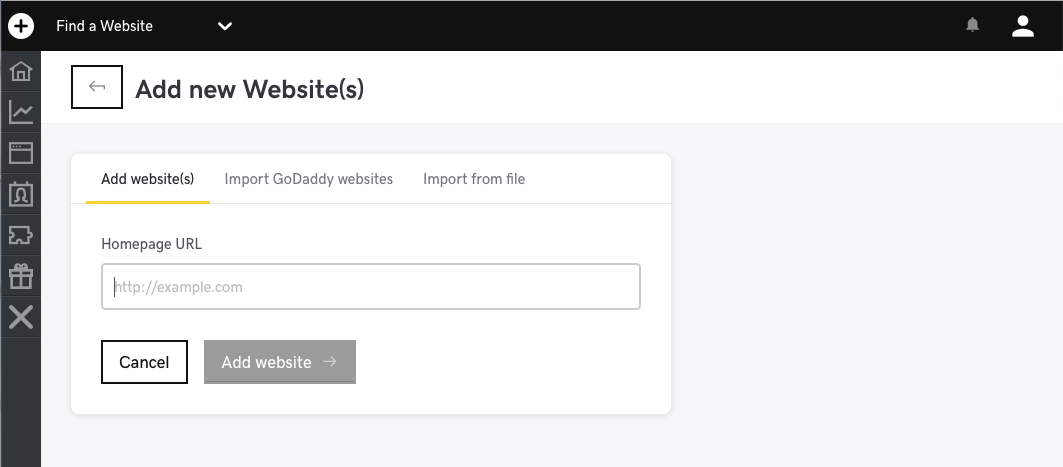
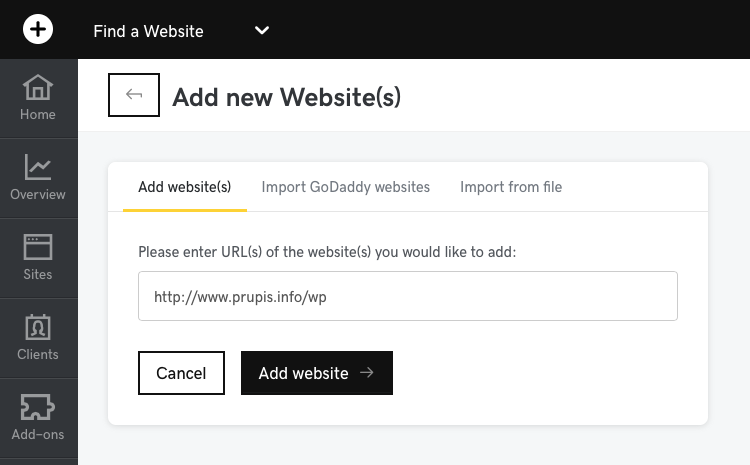
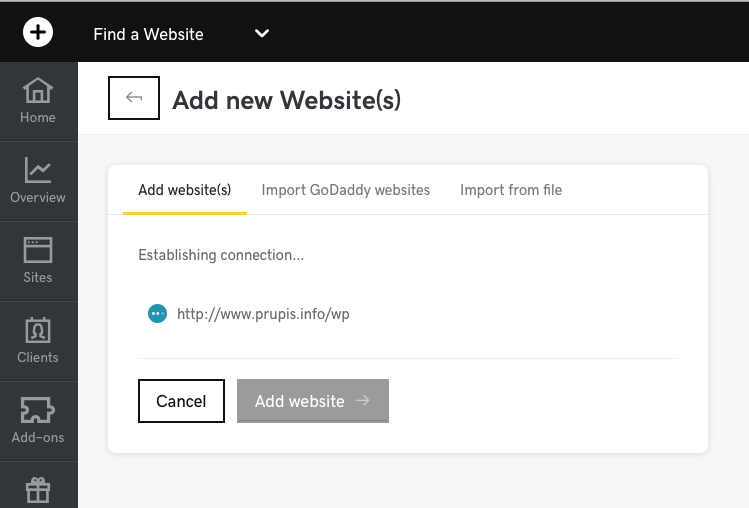
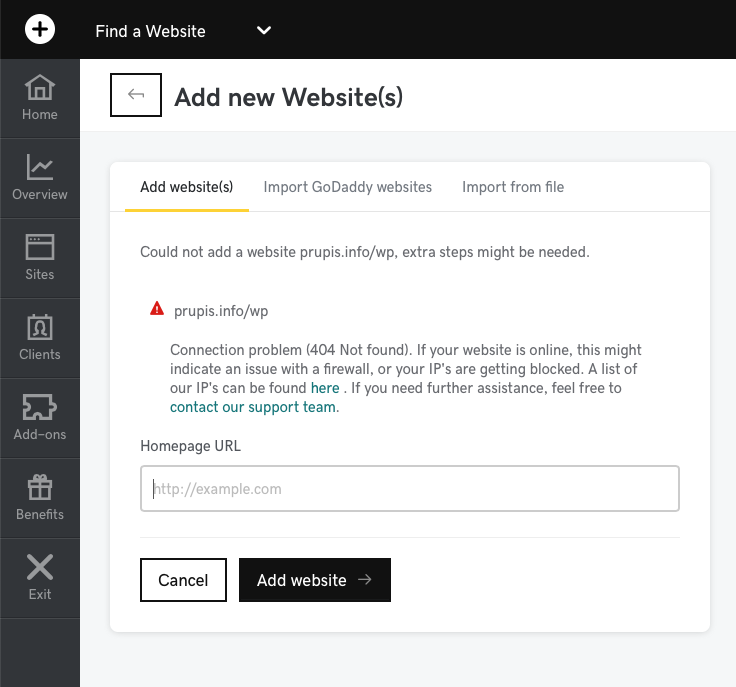
- after clicking the Add website button
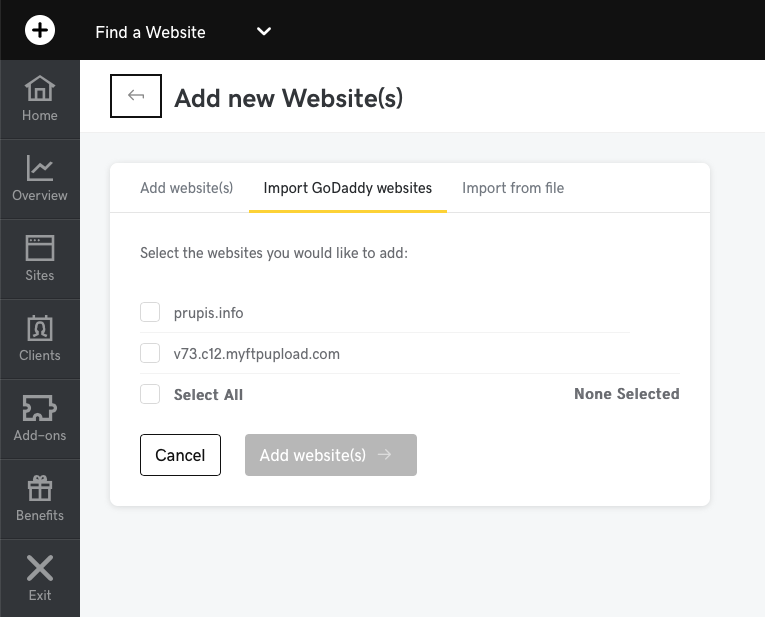
- Top
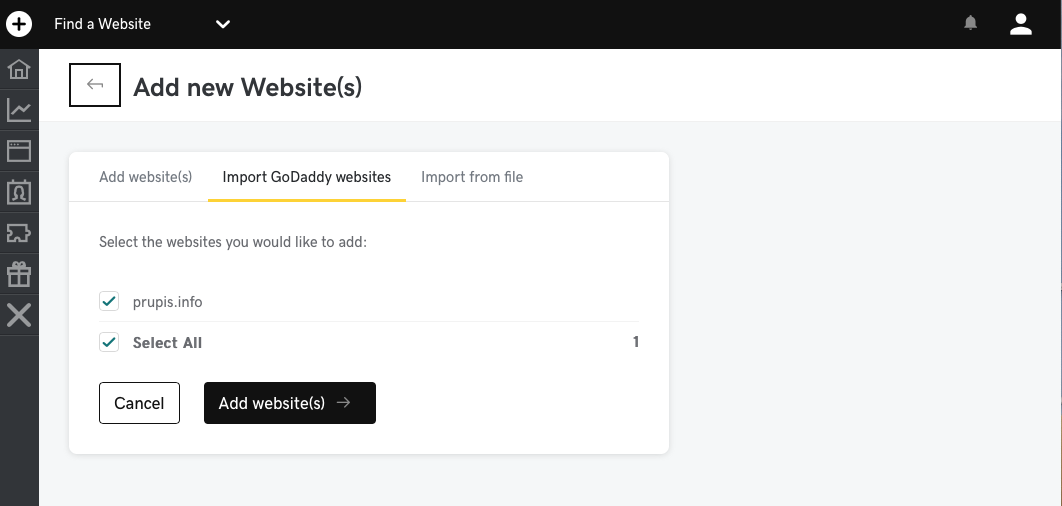
- After selecting the Import GoDaddy websites tab

- Top
- after clicking the checkbox for prupis.info
- Top
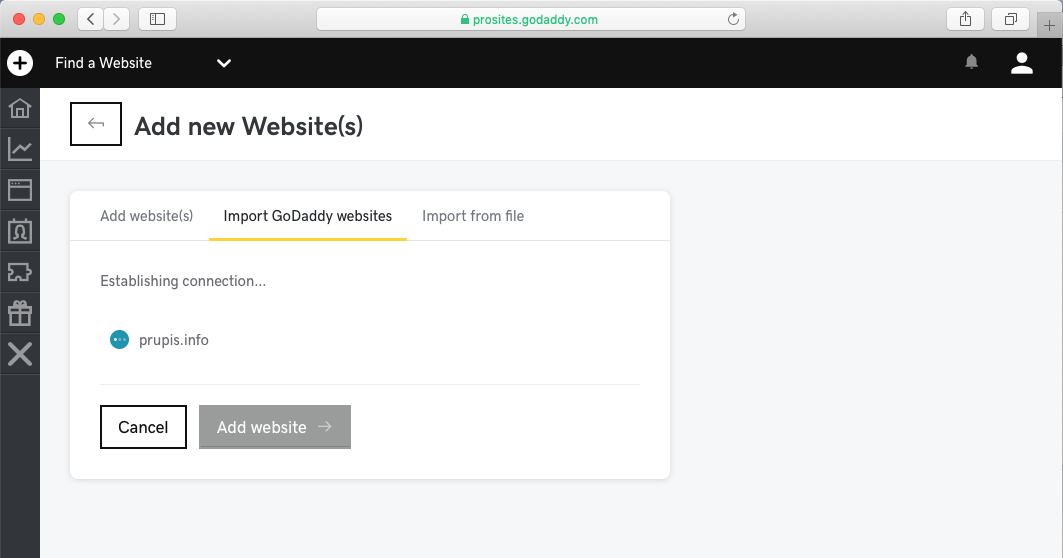
- after clicking the Add website(s) button
- Top
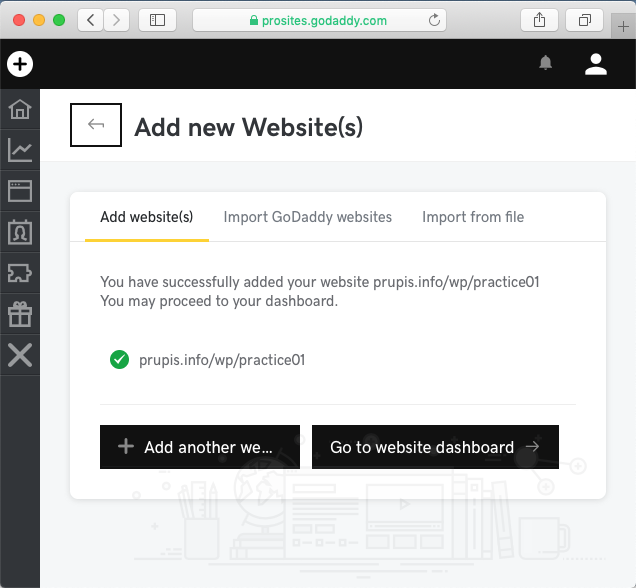
- and after a few moments ...
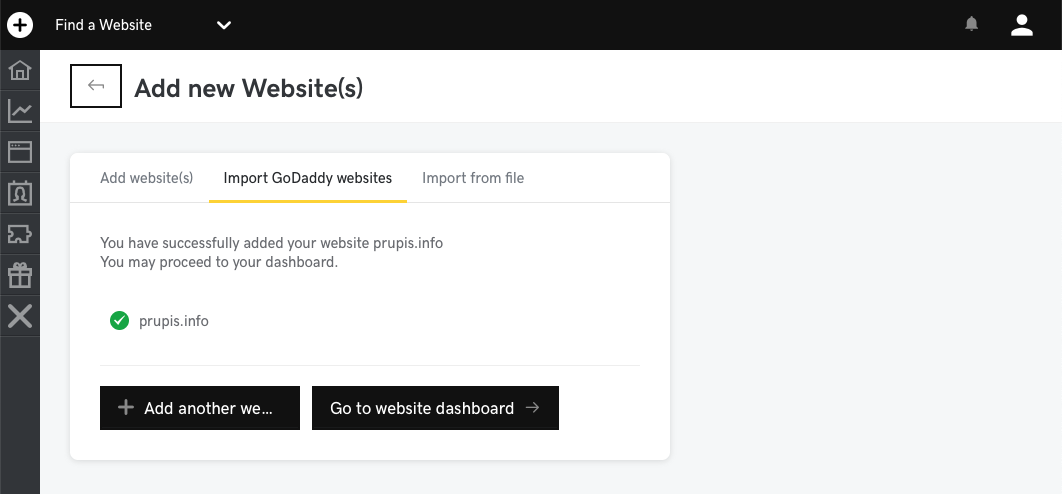
- Top
- after clicking the Go to website dashboard button
- Top
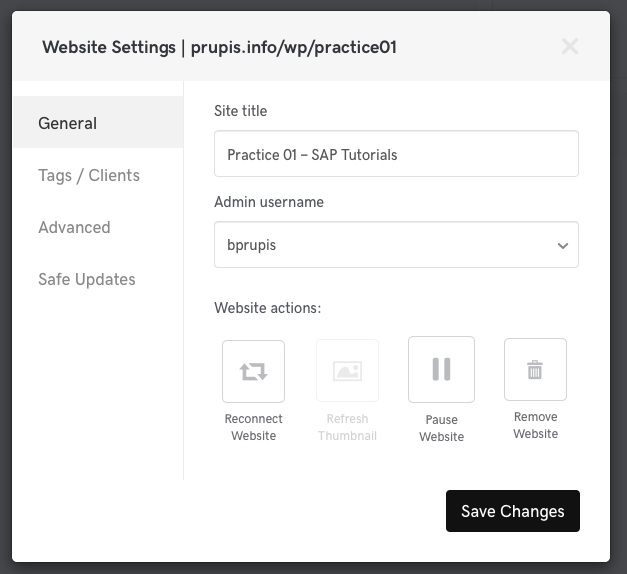
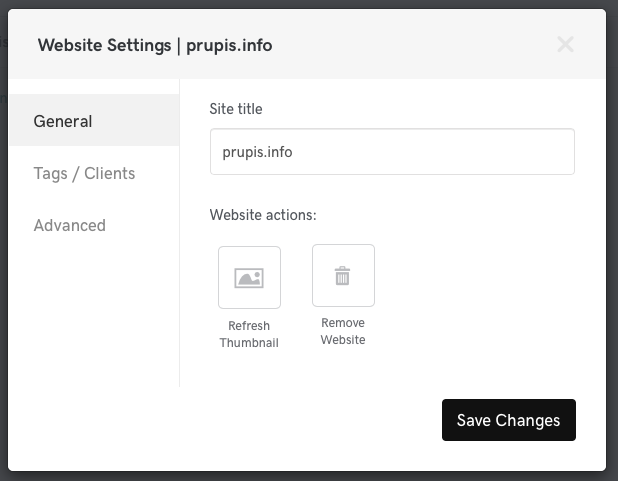
- after clicking the Settings button
- Top
- after clicking the Tags / Clients link
- Top
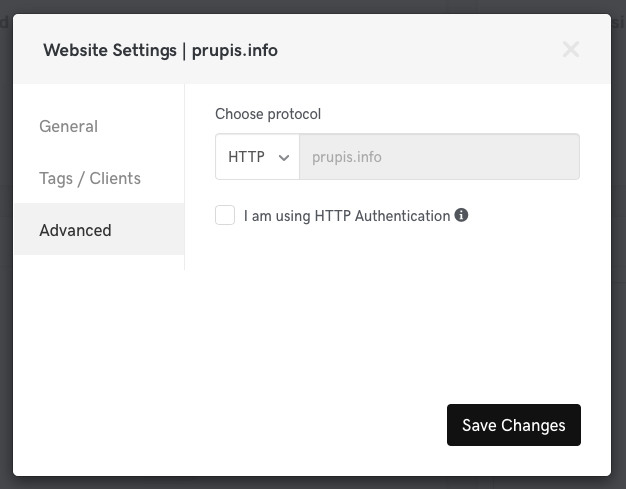
- after clicking the Advanced link
Successfully added wp/practice01 to GoDaddy Pro
- Top
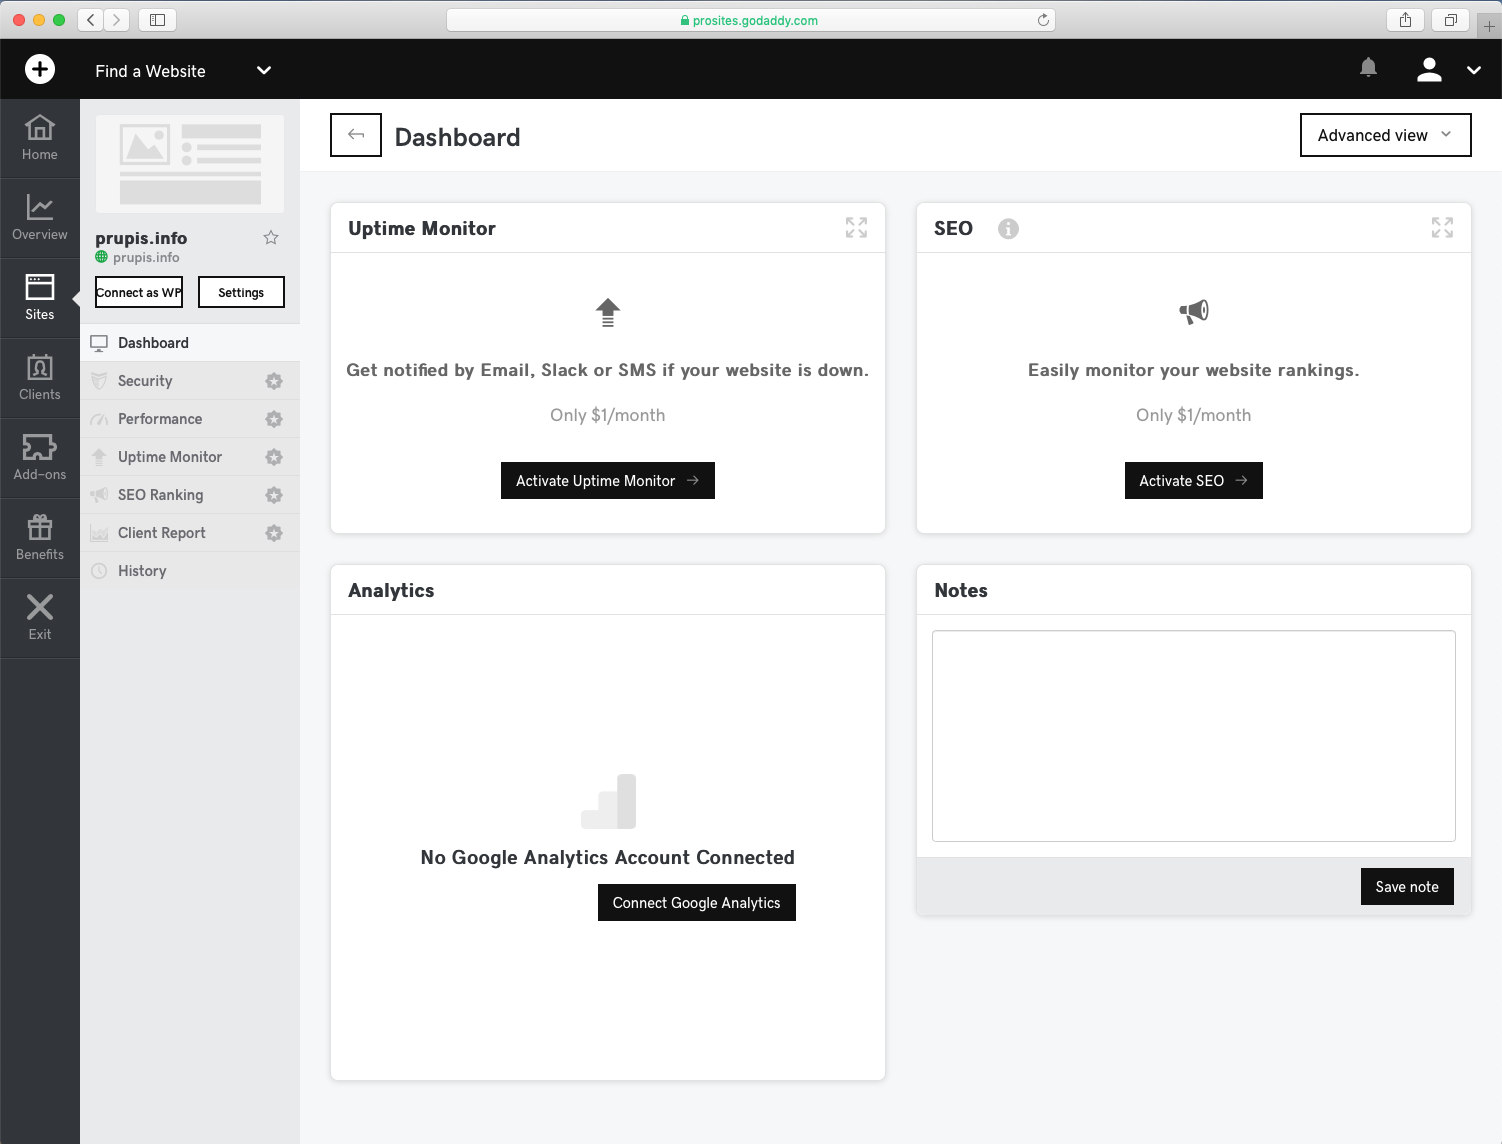
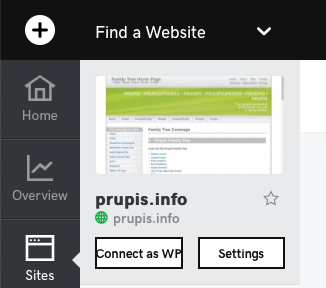
- I went back to click the Sites button from the left column.
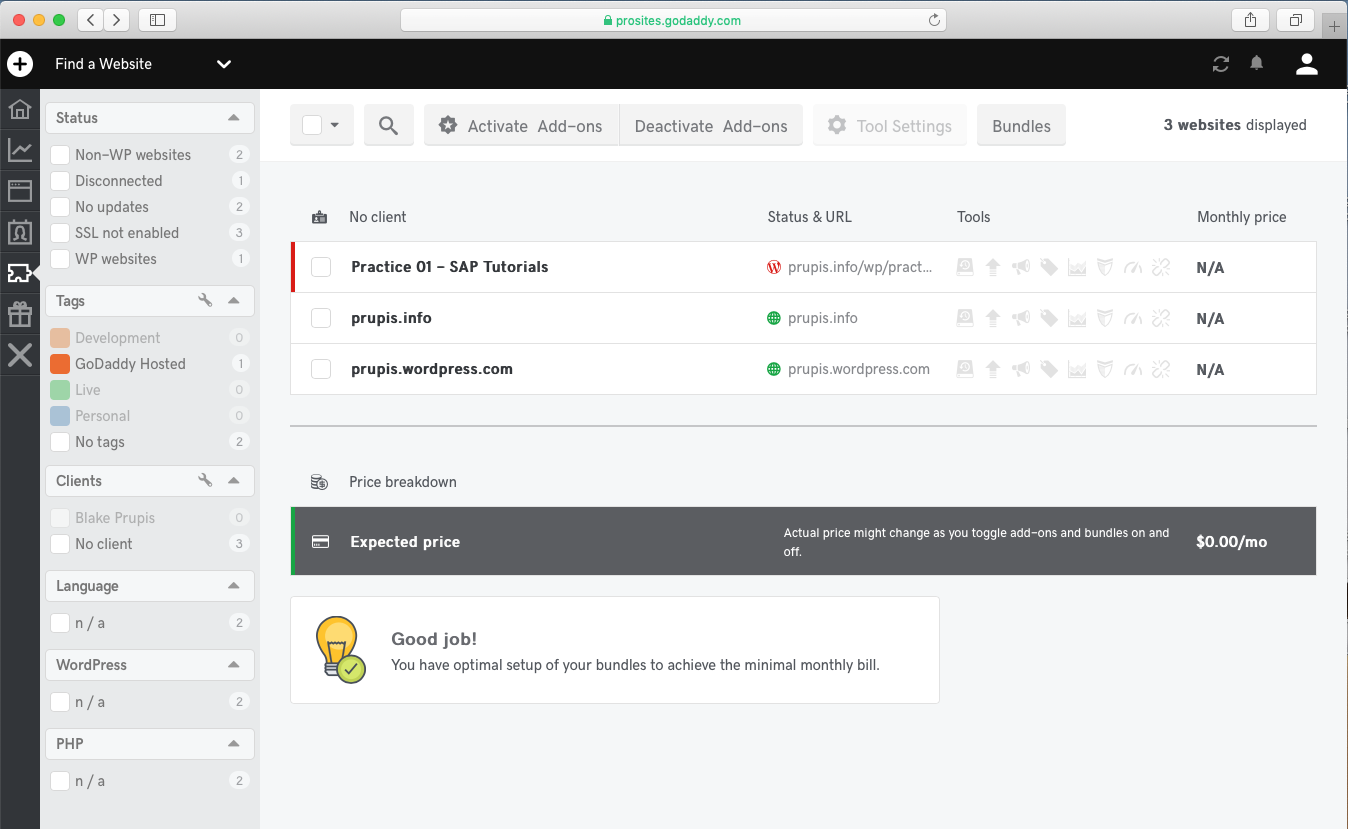
- Top
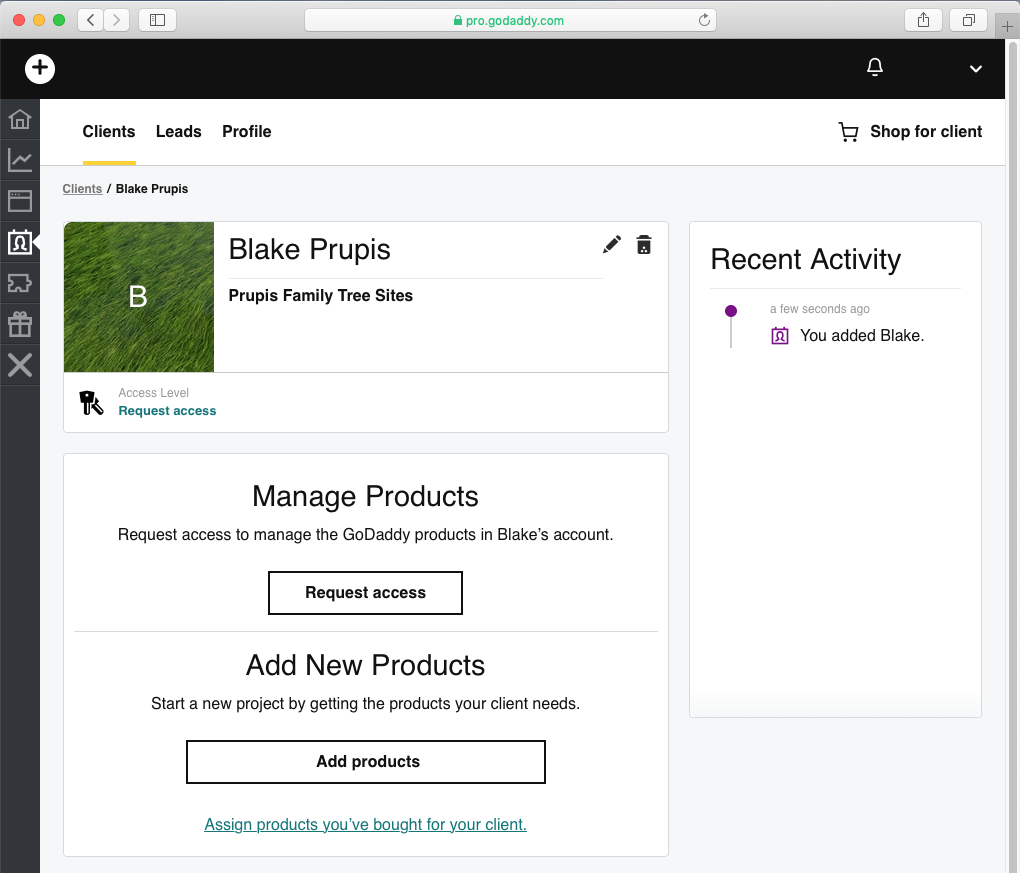
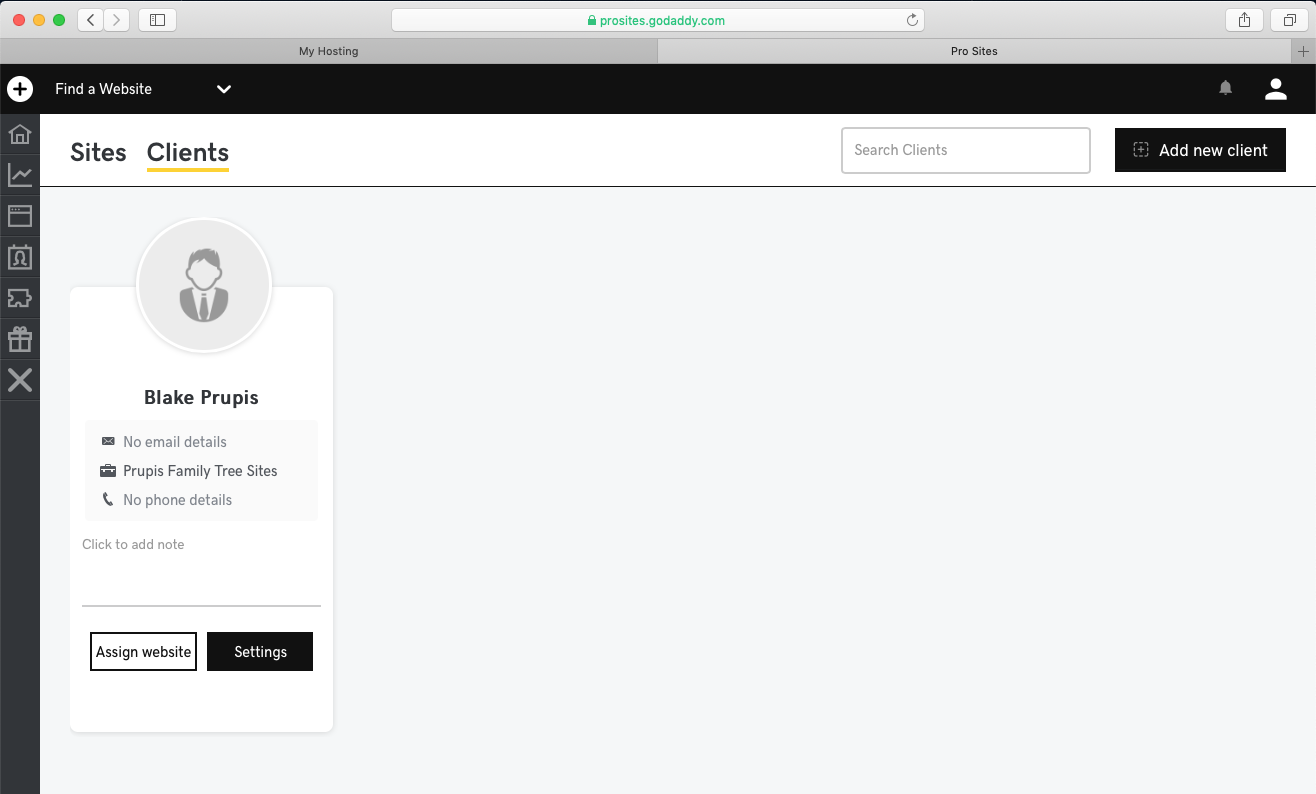
- There are two clients,
- I want to attach Blake One Prupis as the client to practice01.
- Top
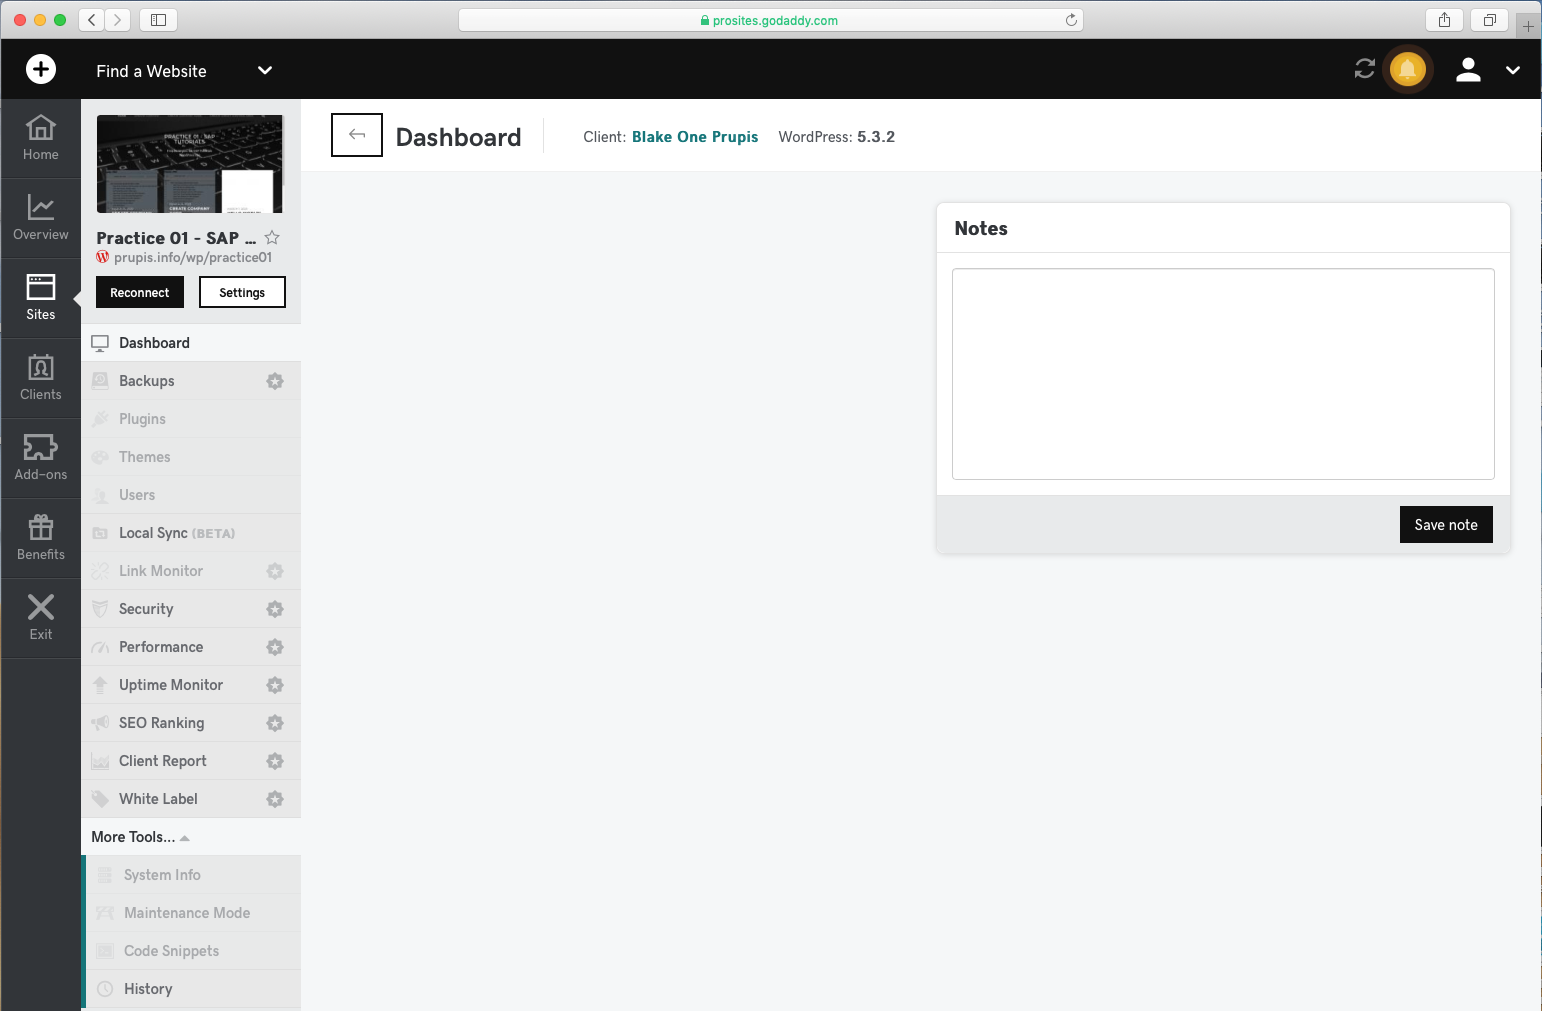
- I will click on the Practice 01 - SAP Tutorials link from the Sites button
- Top
- after clicking on the Practice 01 - SAP Tutorials link, the following screen is displayed
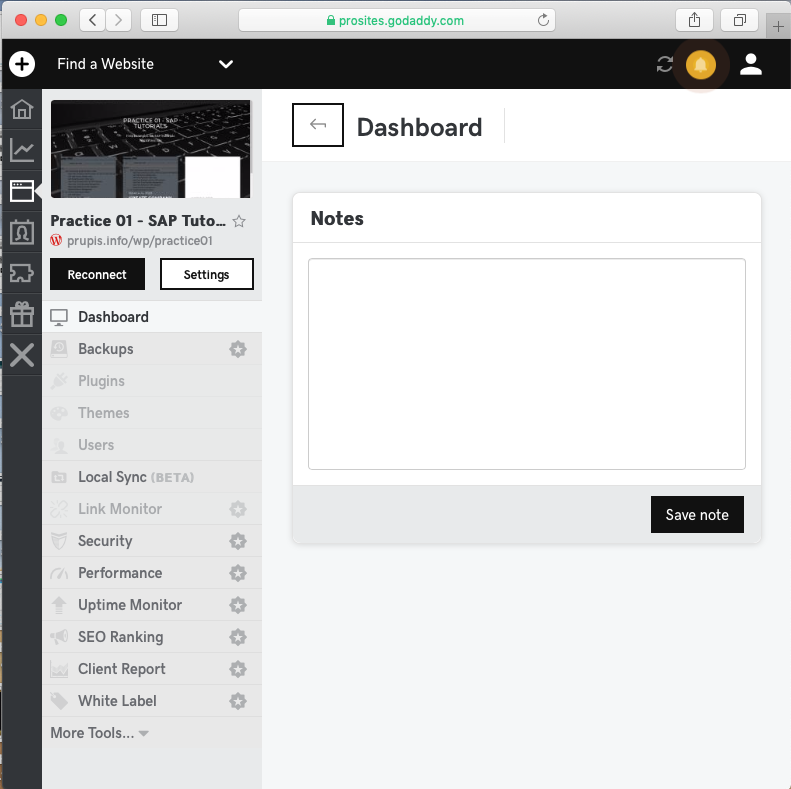
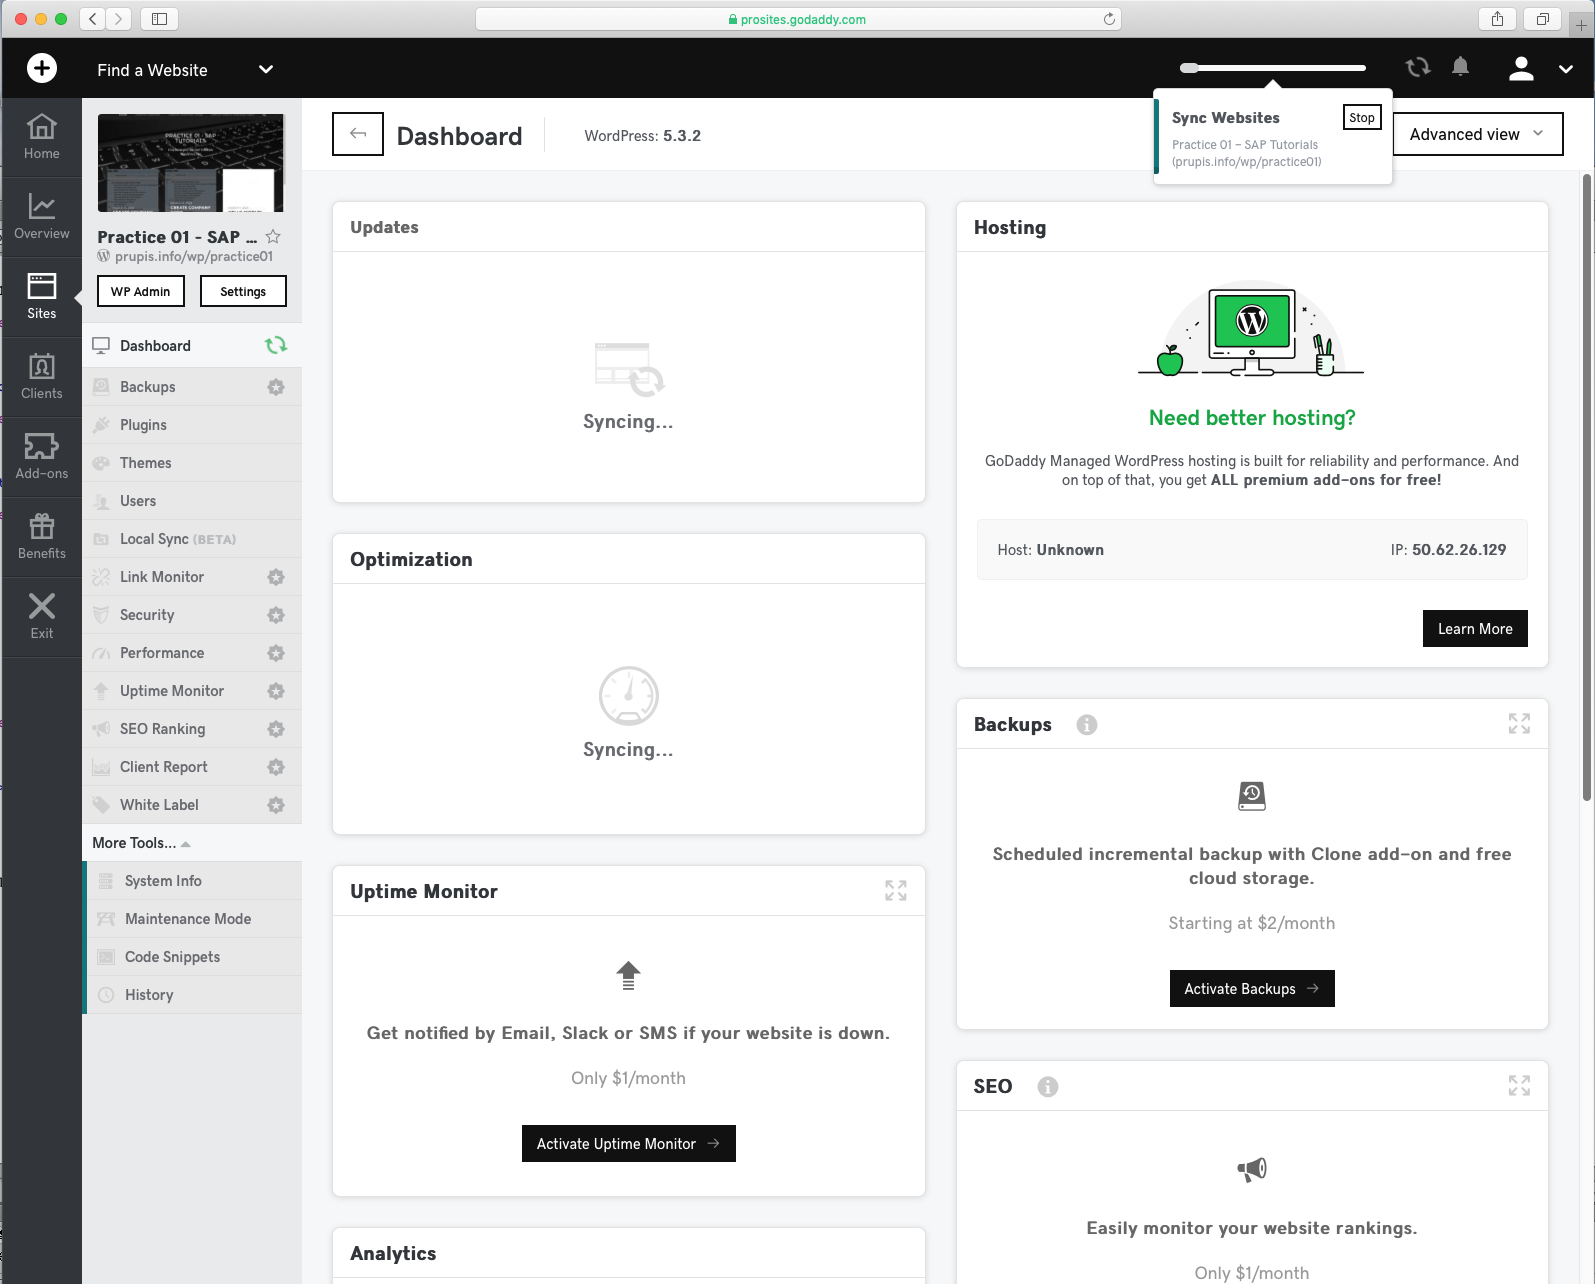
- Top
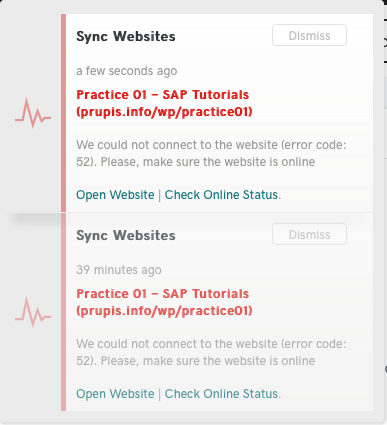
- after clicking the yellow Alert button the following message box is displayed
- this is where I saw the two links for
- Open Website
- and Check Online Status
- reserve
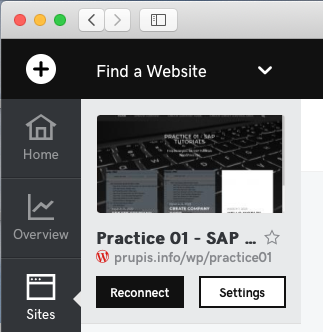
Reconnecting to prupis.info/wp/practice01

- Top
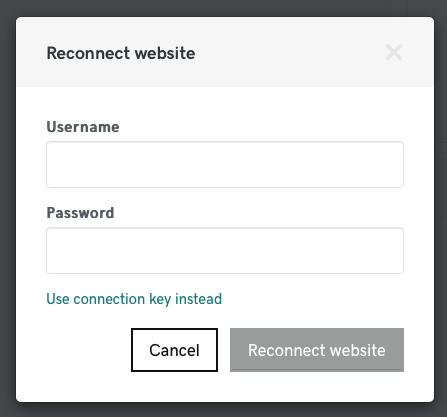
- after clicking the Reconnect button, the following screen is displayed
- I enter my practice01 WordPress credentials
- Top
- after I enter my practice01 WordPress credentials
- the following screen is displayed for a few moments
- than it disappears with the Reconnect button active again
- Top
- after briefly displaying the previous screen shot, the screen now displays this
Adding Blake One Prupis as a client to prupis.info/wp/practice01/
- Top
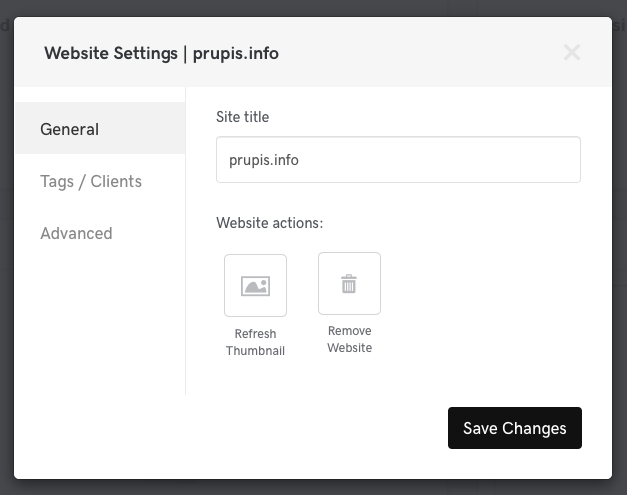
- after pressing the Settings button
- The General tab is displayed
- Top
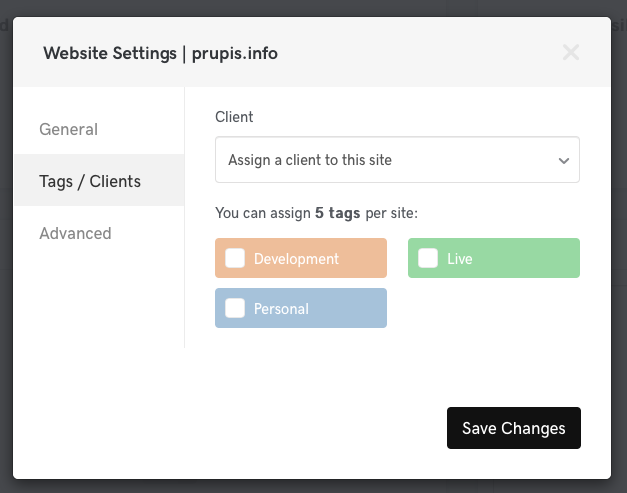
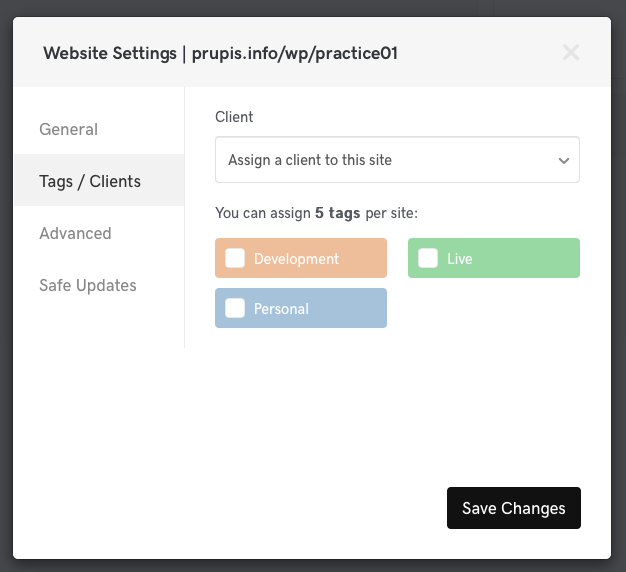
- I switched to the Tags / Clients tab
- Top
- I click the down arrow button for Client
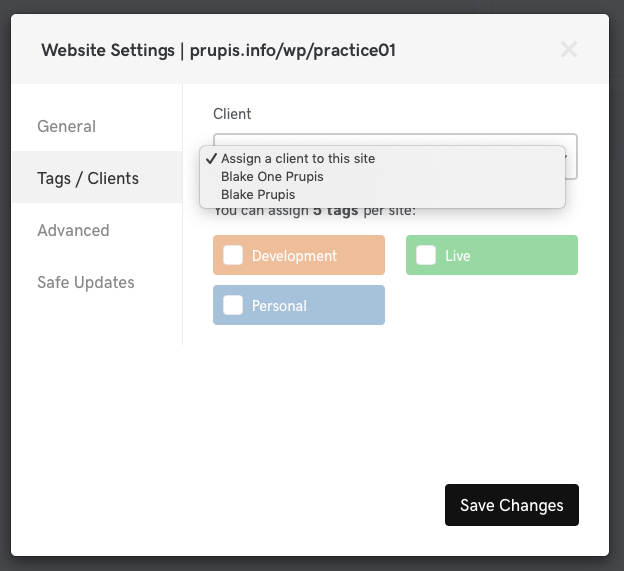
- Top
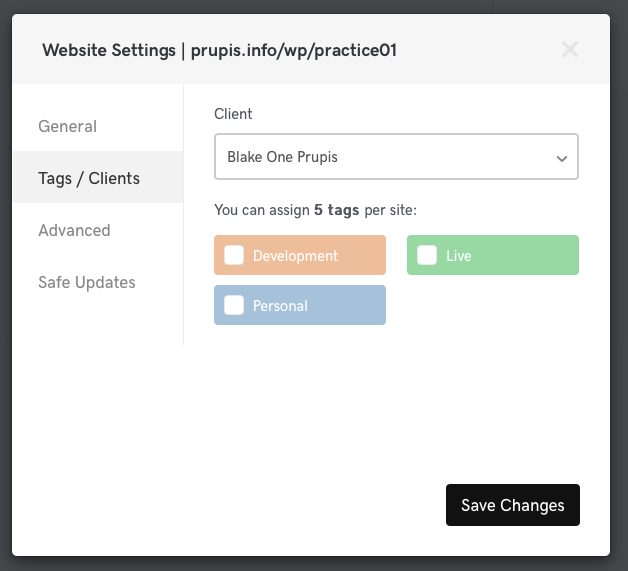
- I select Blake One Prupis

- Top
- I will click the Save Changes button
- Top
- After clicking the Save Changes button
- we now see Blake One Prupis as the client of Practice 01 - SAP ...
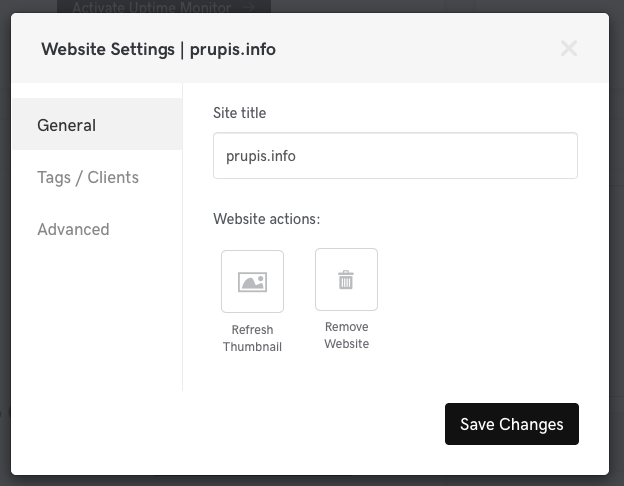
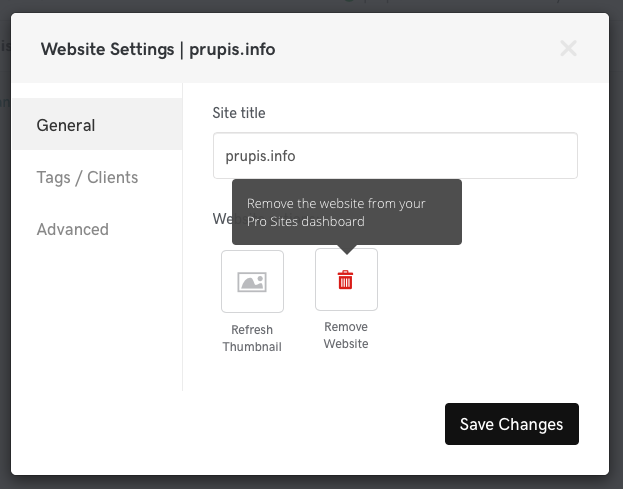
Removing prupis.info from GoDaddy Pro
- Top
- I will press the Settings button
- Top
- press the Remove Website button
- Top
- hoovering over Remove Websites displays the following warning ...
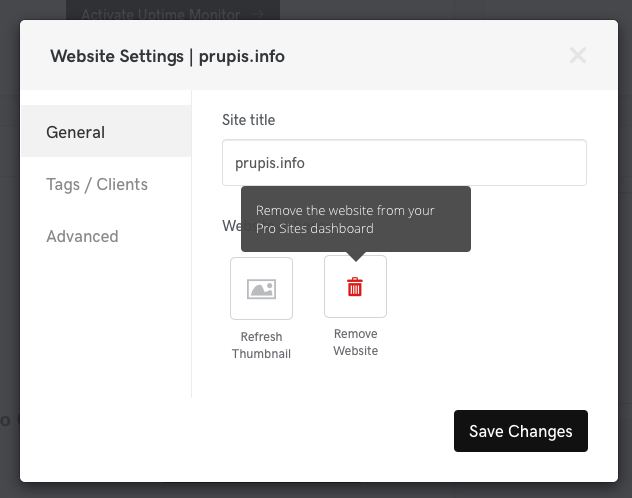
- Top
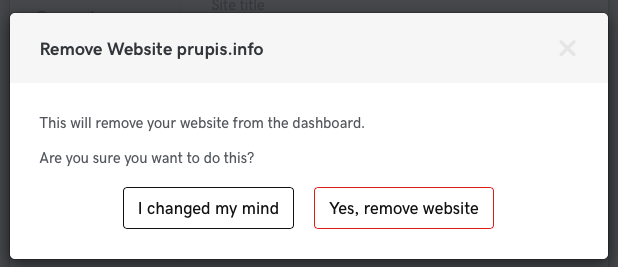
- clicking the Remove Website displays the following message box
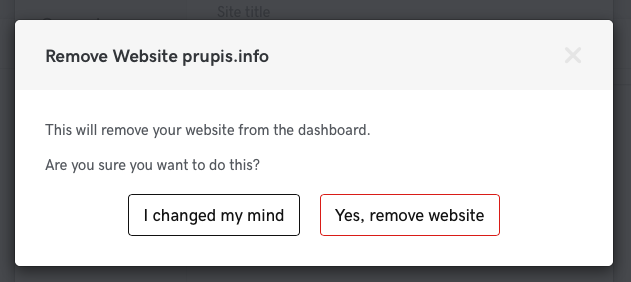
- Top
- after clicking the Yes, remove website button
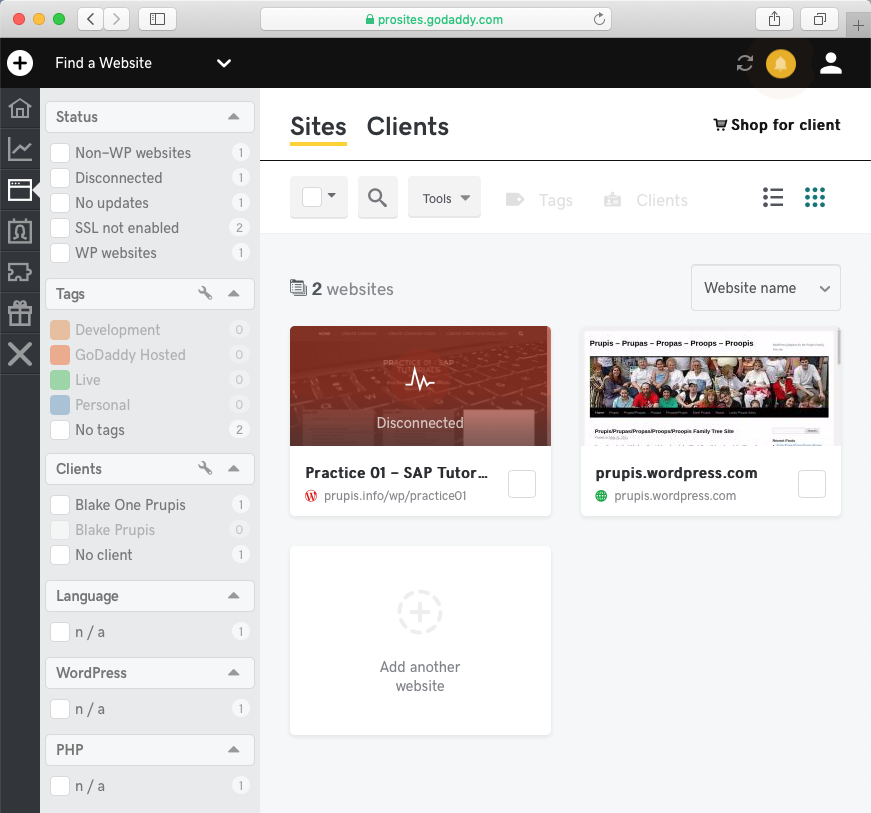
- displayed without prupis.info as a site
- Top
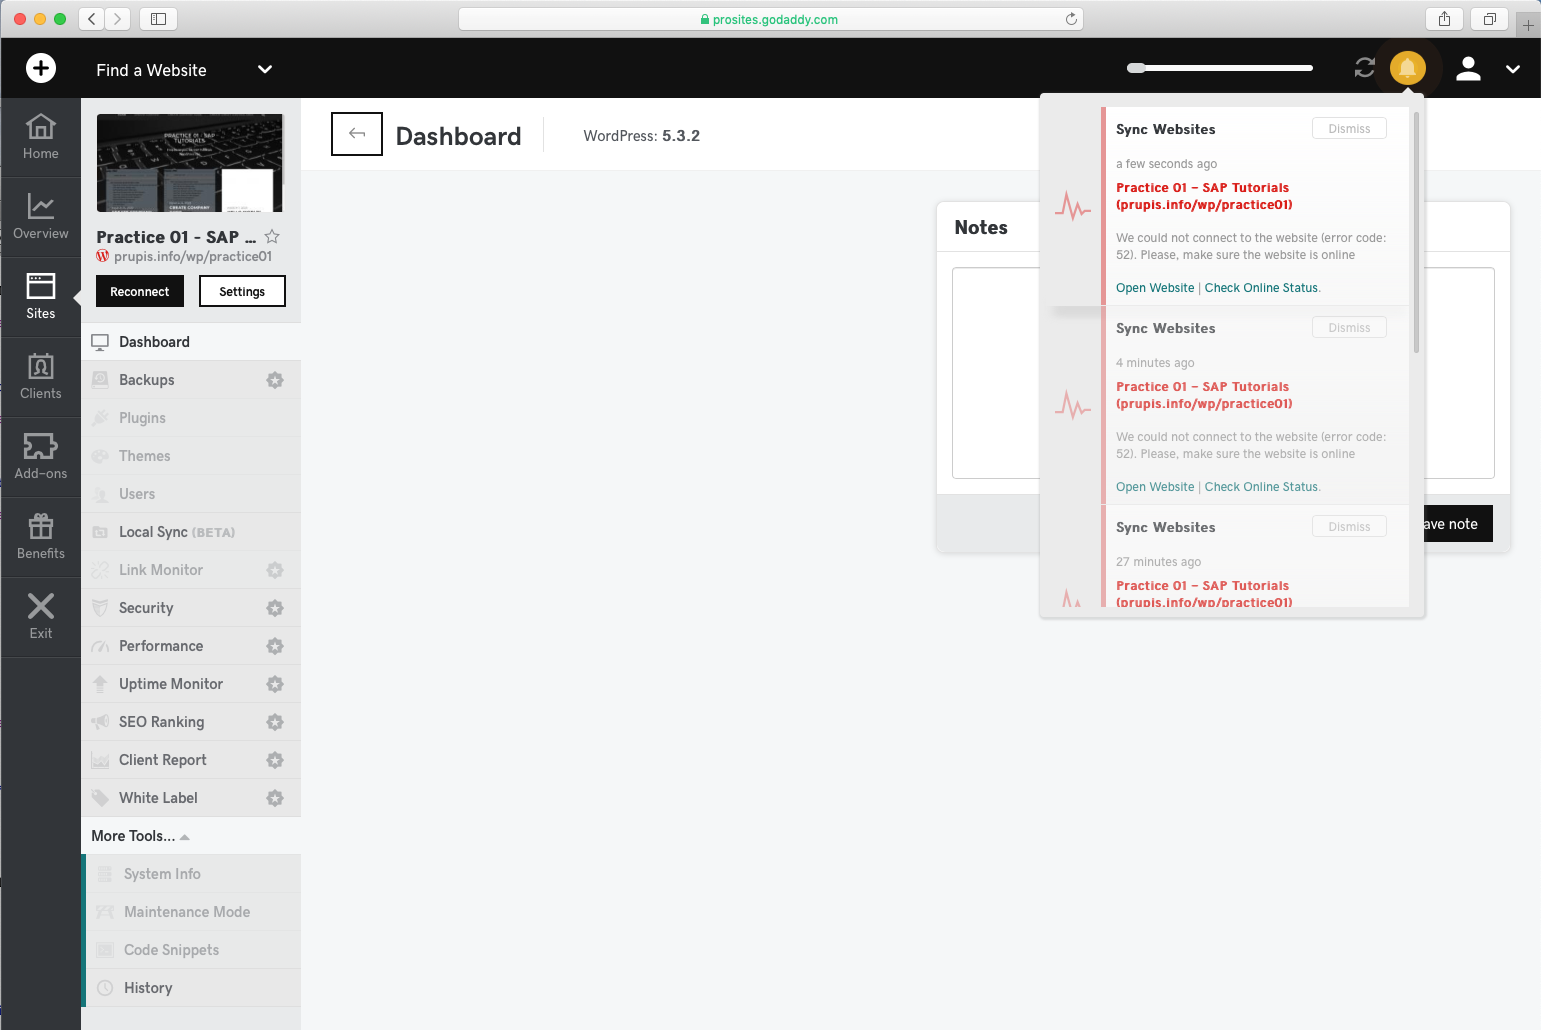
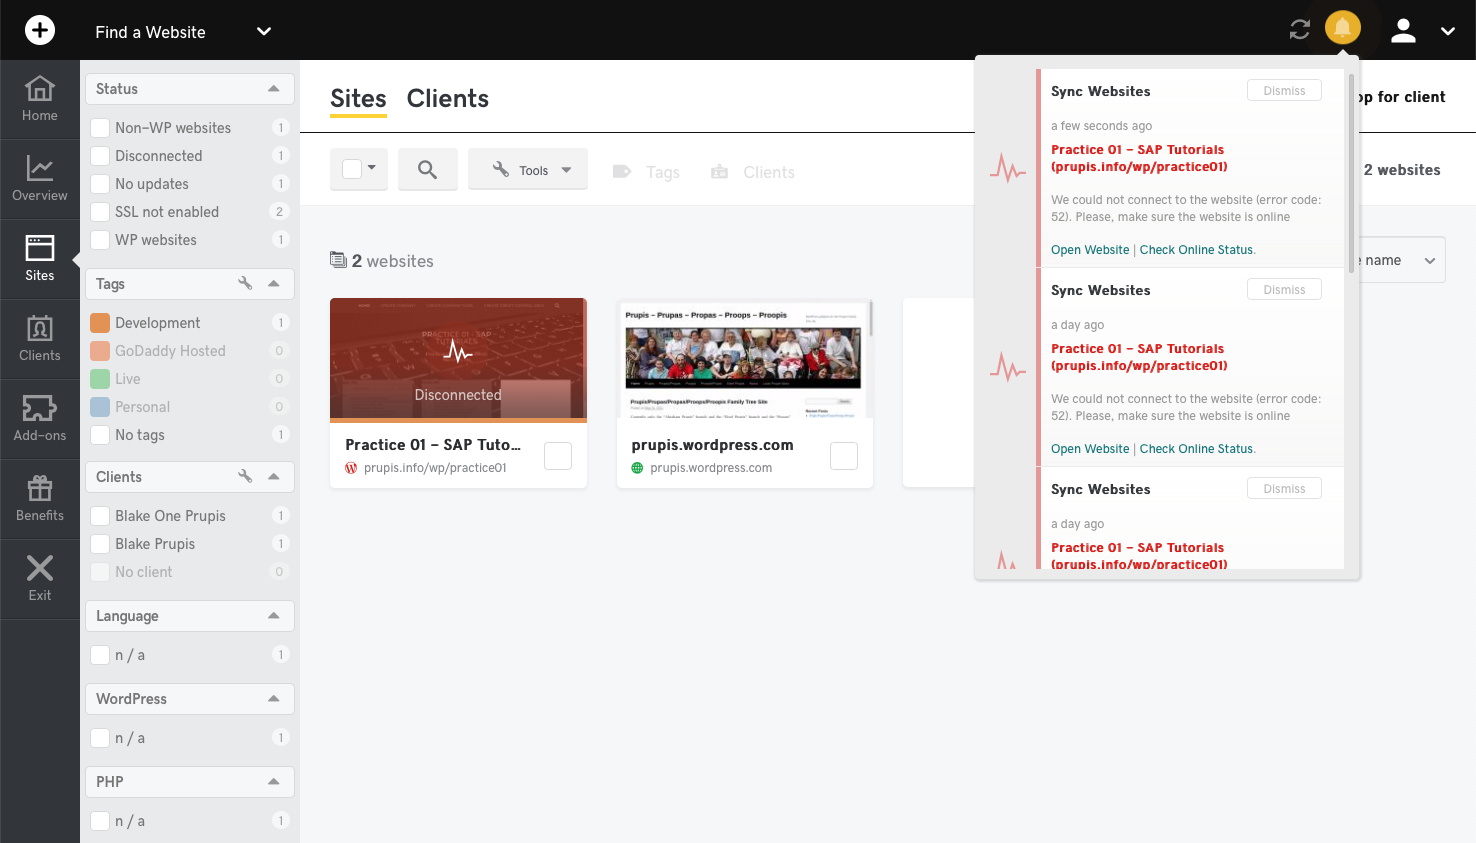
- GoDaddy Pro issue
- prupis.info/wp/practice01 is still having trouble getting connected in GoDaddy Pro
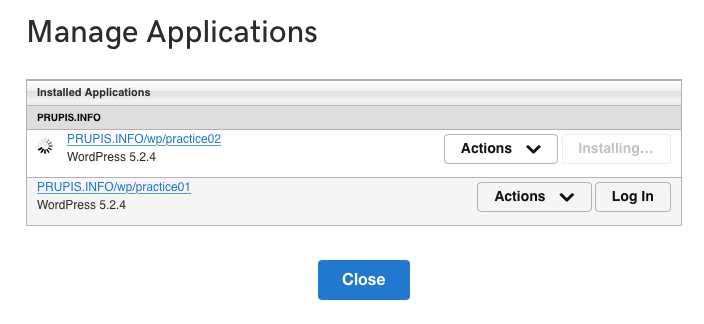
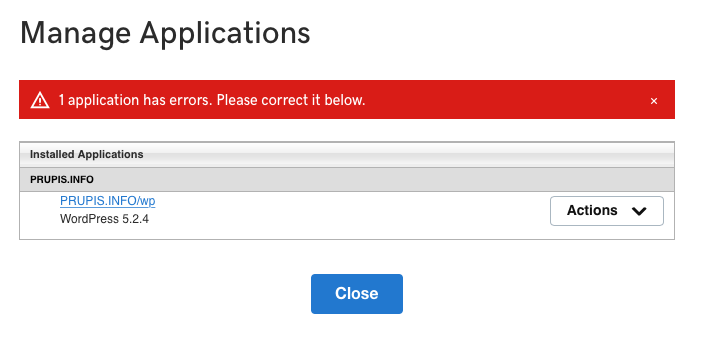
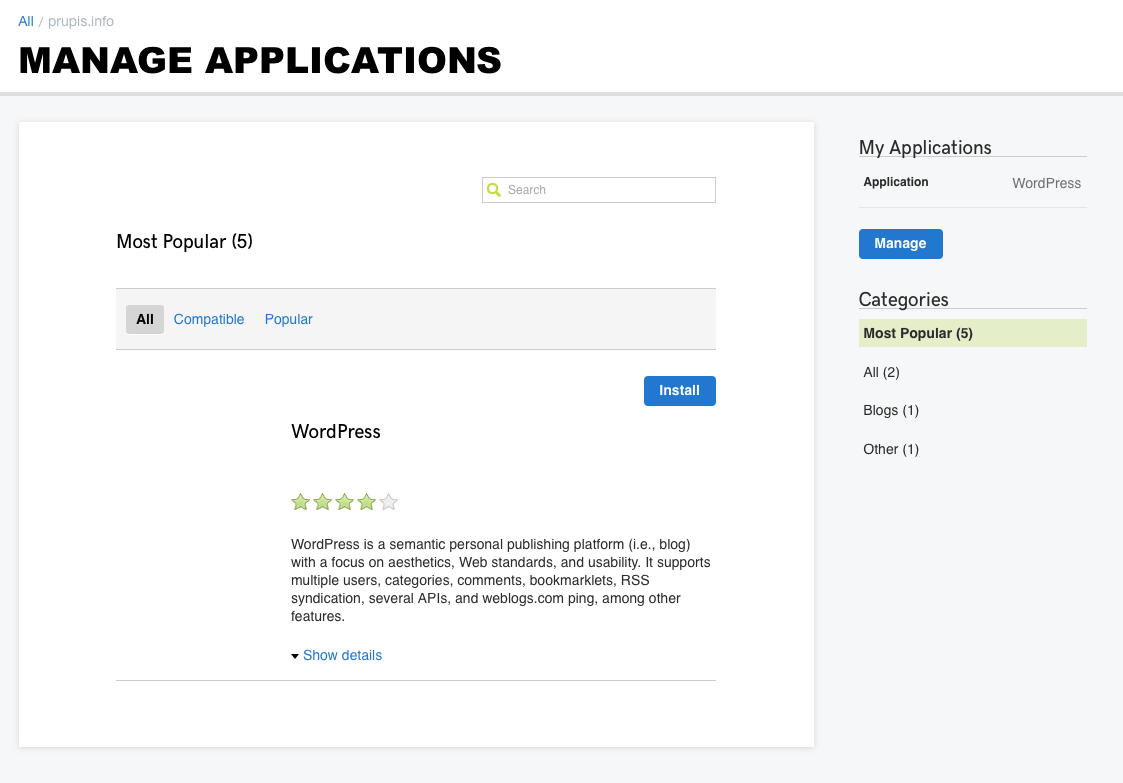
WordPress is still trying to install after three days
- Top
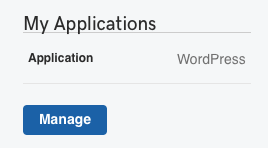
- I'm going to click the Manage button.
- Top
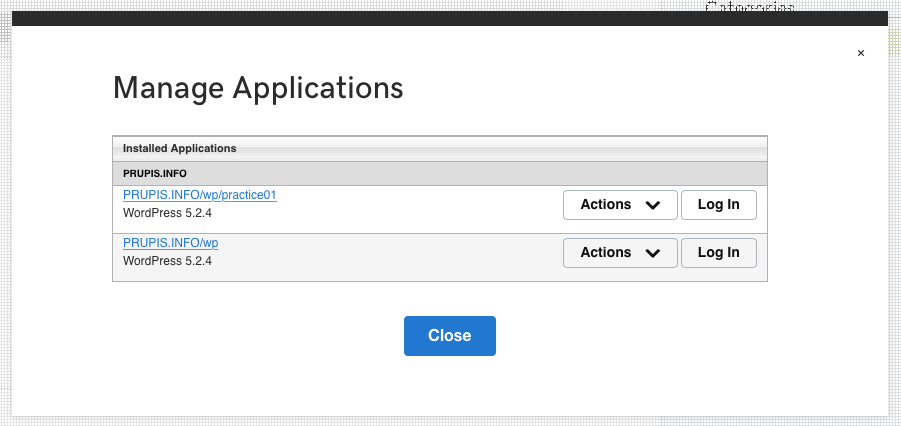
- Note that the Manage Applications screen displays WordPress version 5.2.4 after it had me update to 5.3.2
- Top
- for wp/practice01
- I selected the Actions button
- it's submenu is displayed
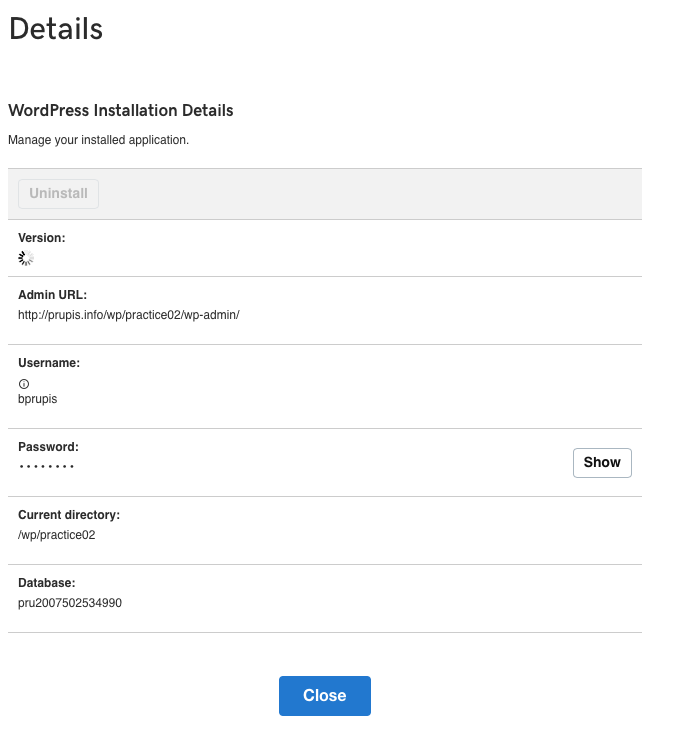
- Top
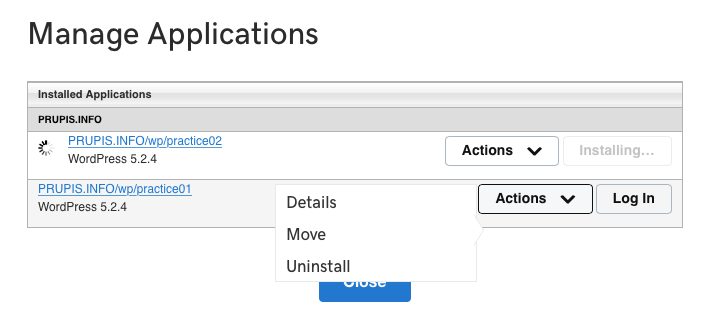
- for wp/practice01
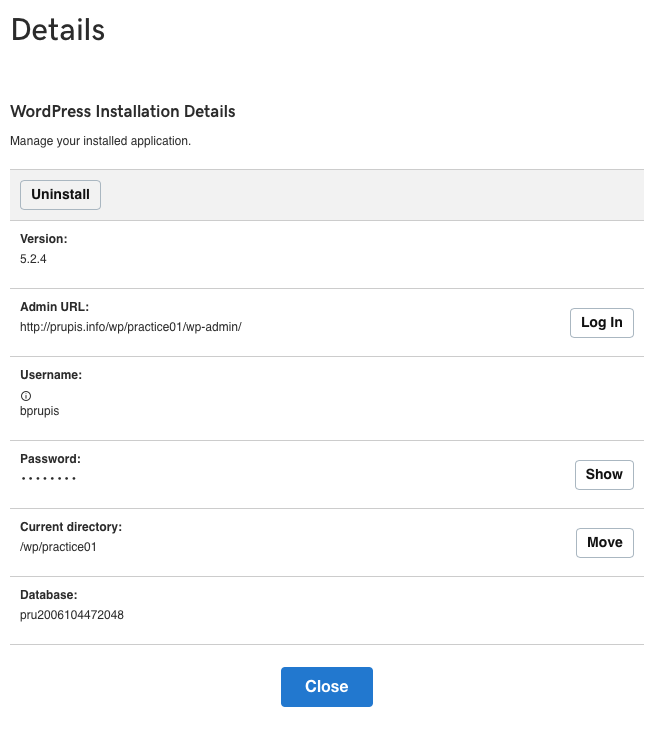
- after selecting Details from the submenu
- the Details screen is displayed
- Top
- for wp/practice02
- after selecting the Actions button
- it's submenu only consist of one of the three items that usually show up, Details
- the Move and Uninstall menu items were not displayed
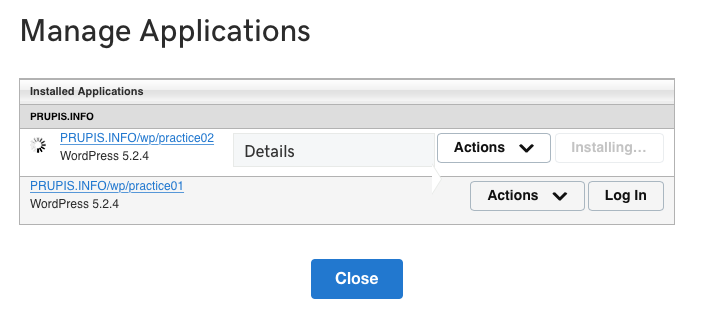
- Top
- for wp/practice02
- after three days, WordPress is still trying to install
- the Uninstall button is greyed out, therefore it's unusable
- the WordPress Log In button is not visible
Back in GoDaddy Pro's Dashboard
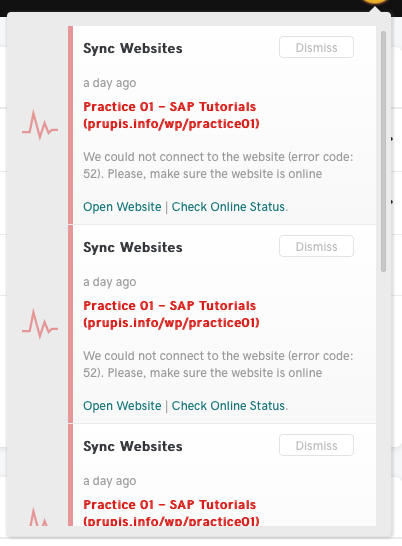
- Top
- trying to reconnect to wp/practice01
WordPress inside of GoDaddy
- Top
- after paying 6.99 for 3 years, it is now included in My Products
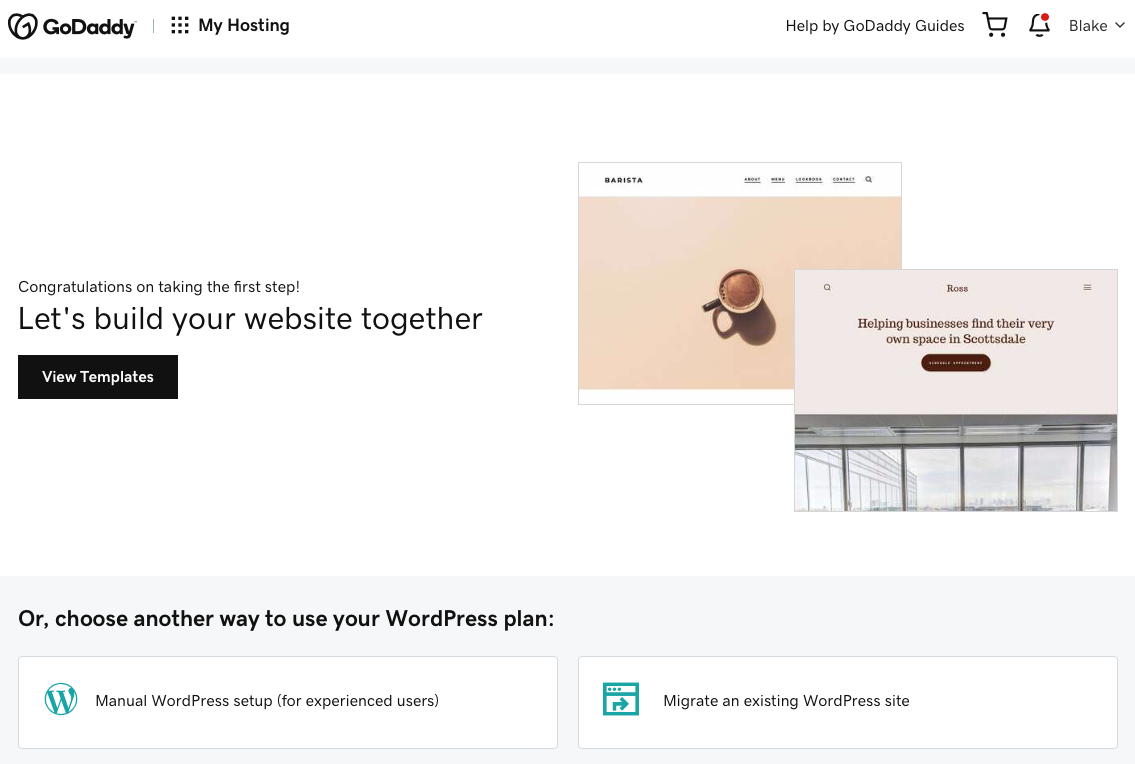
- Top
- after clicking the Set up button
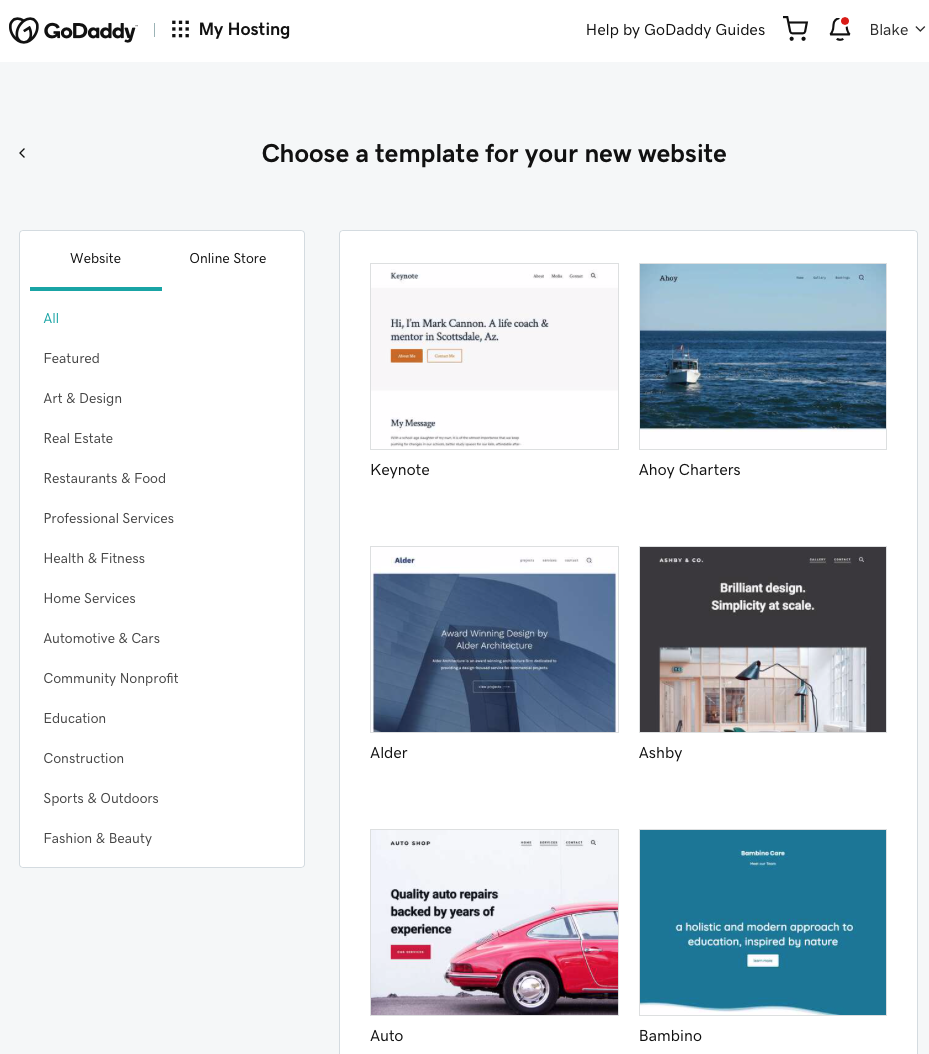
- Top
- after clicking the View Templates button
- Top
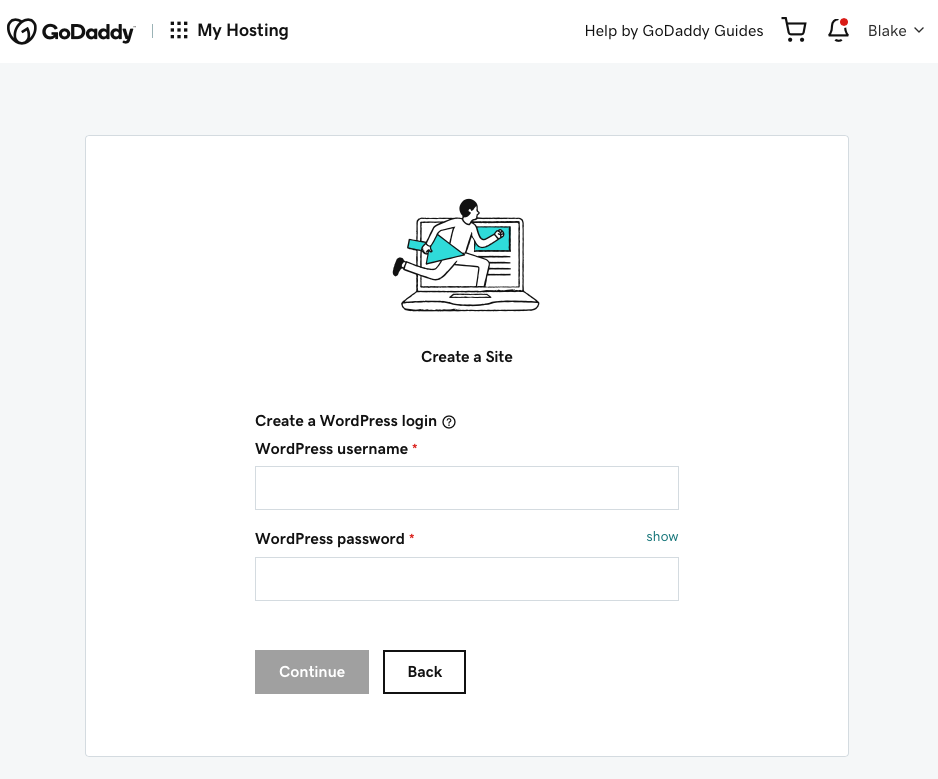
- Back to the Let's build your website together screen
- instead of clicking the View Templates screen
- I want to use the manual setup

- Top
- after selecting manual setup, the following screen is displayed
- Top
- after filling out the screen
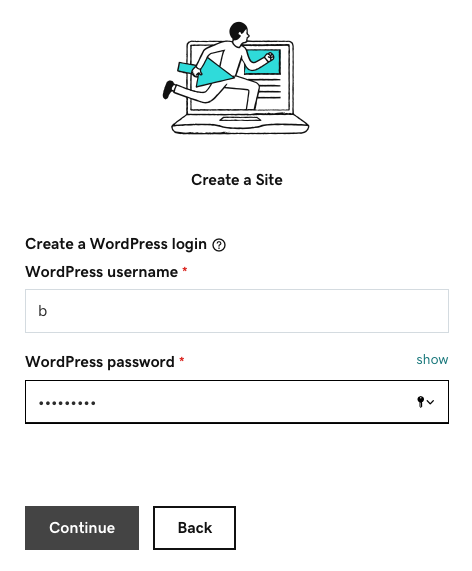
- Top
- after clicking the Continue button
- Top
- after clicking the Continue button
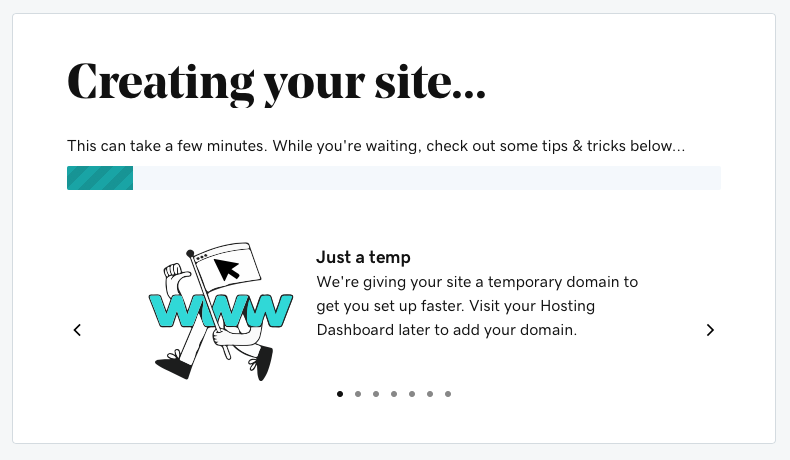
- Top
- I had to wait literally 2 minutes, and the next screen was displayed

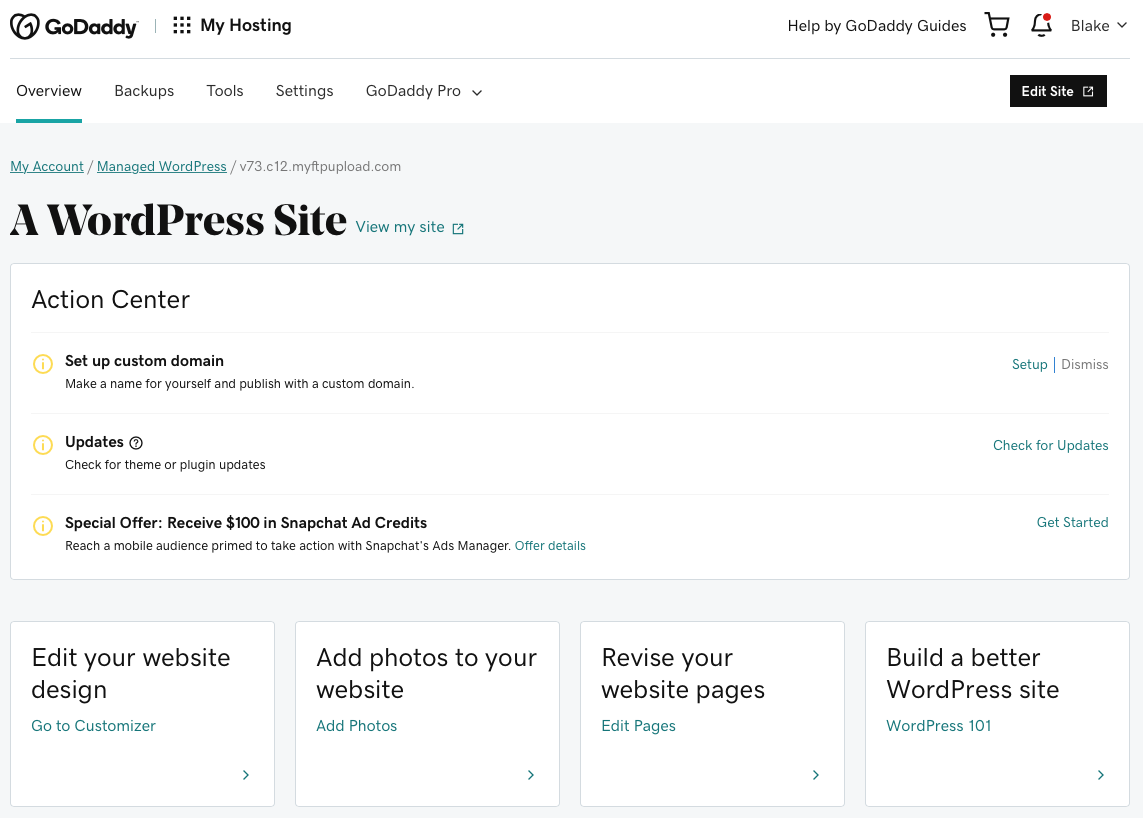
- Top
- I'm going to select Explore Dashboard instead
- the following screen got displayed
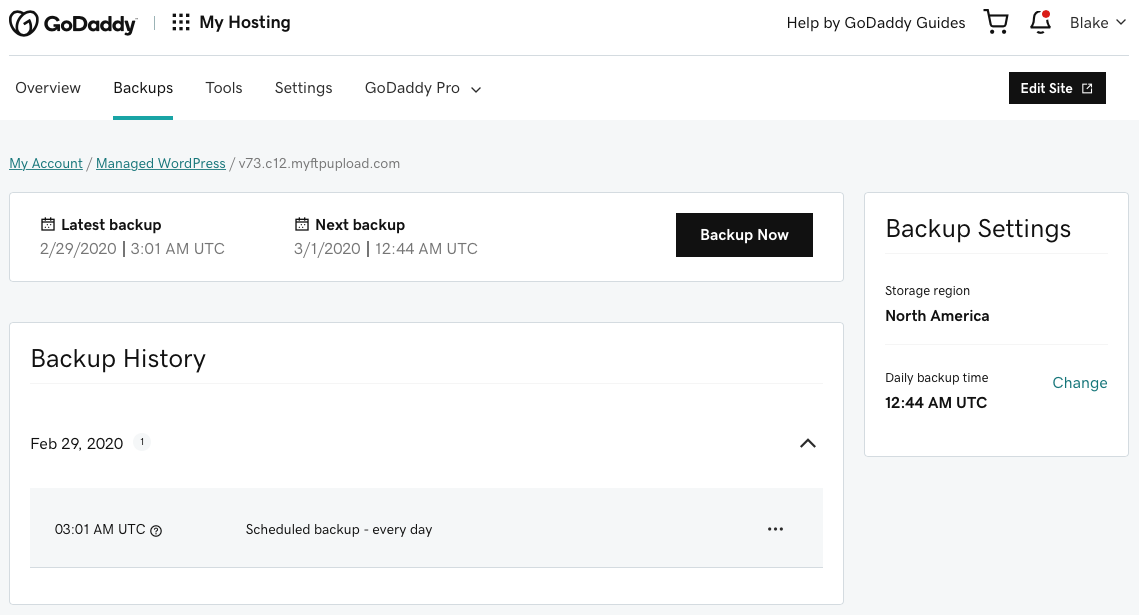
- note the focus is on Overview
- Top
- the focus is on Backups
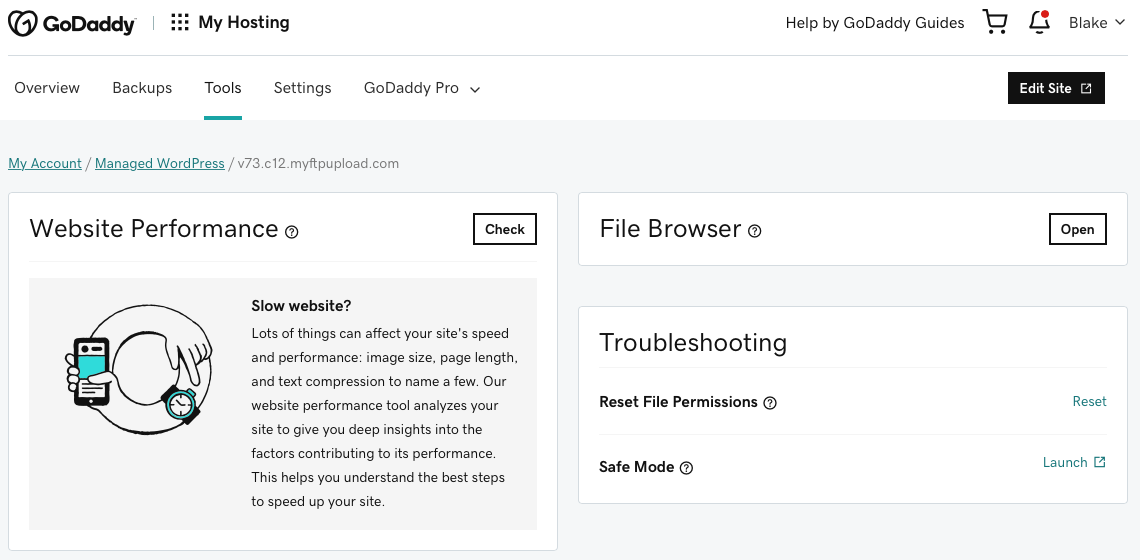
- Top
- the focus is on Tools
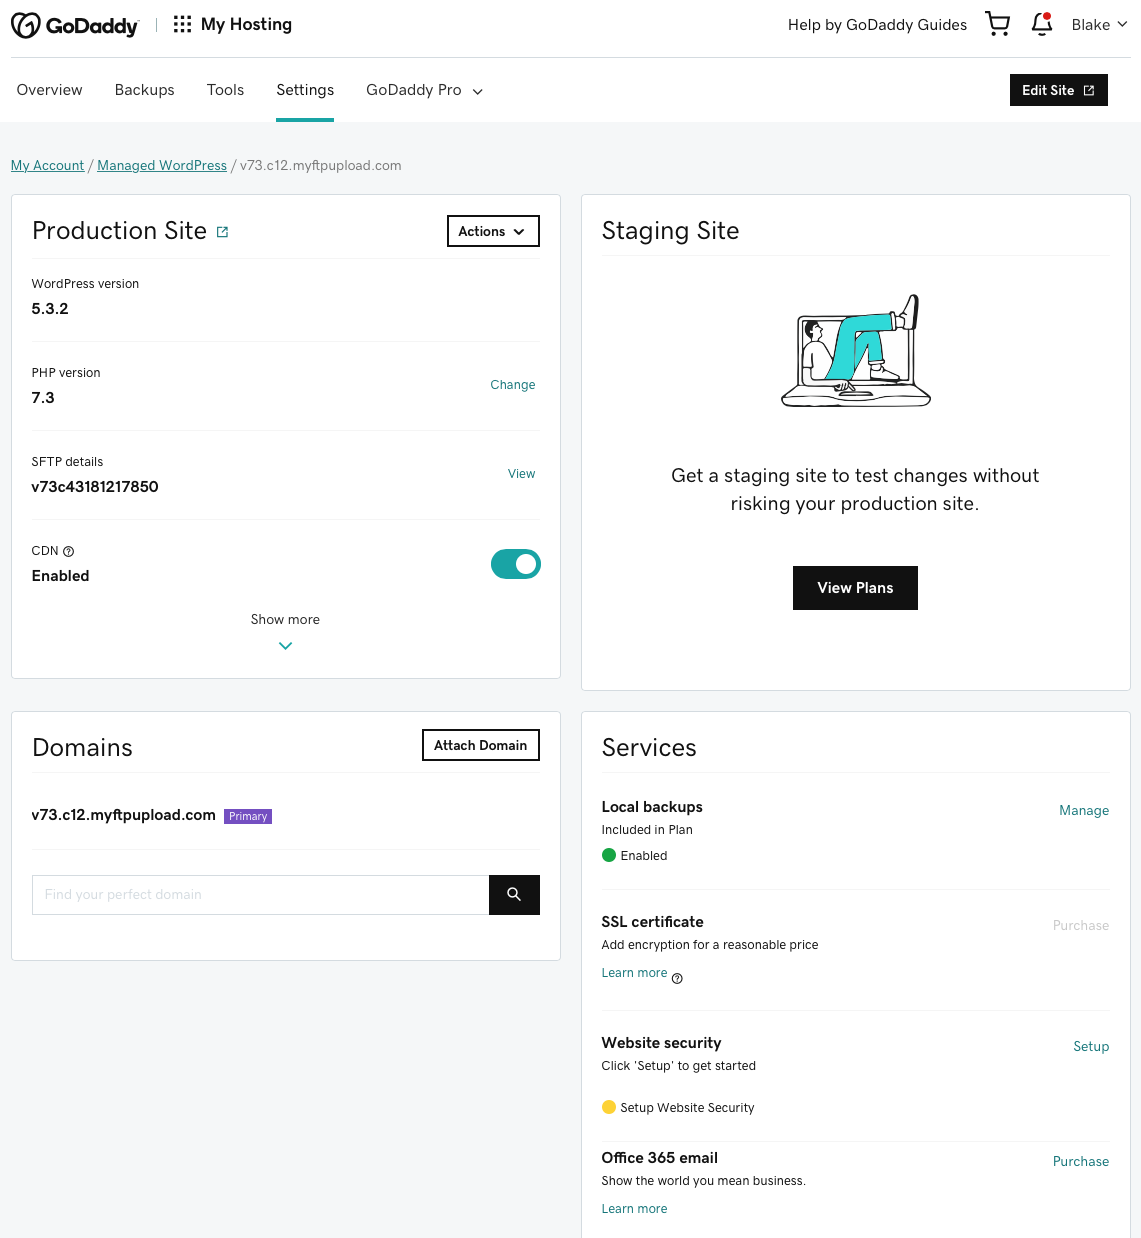
- Top
- the focus is on Settings

- Top
- clicking the down arrow button for GoDaddy Pro
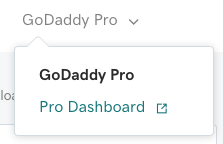
- Top
- after clicking on Pro Dashboard
- the following screen was displayed
- that first Icon on the left is for Home
- Top
- the next screen is displayed
- the second Icon on the left is for Overview
- Top
- the next screen is displayed
- the third Icon on the left is for Sites
- the page appears to have two tabs, Sites and Clients
- Sites has the focus for this page
- Top
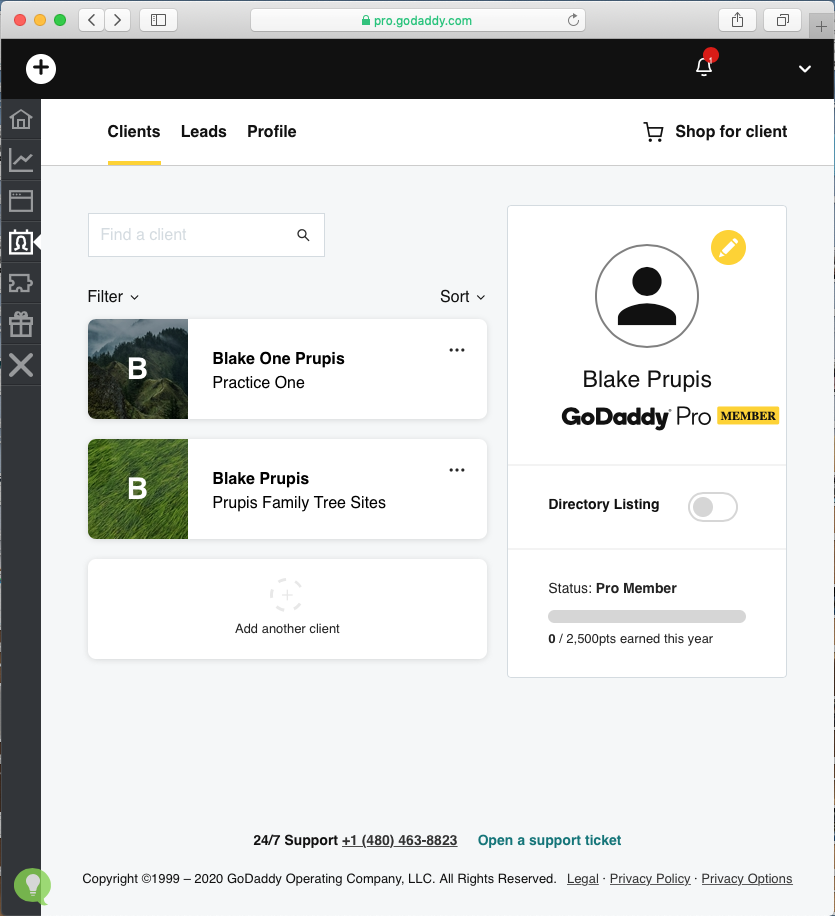
- Clients has the focus for this page
- Top
- the next screen is displayed
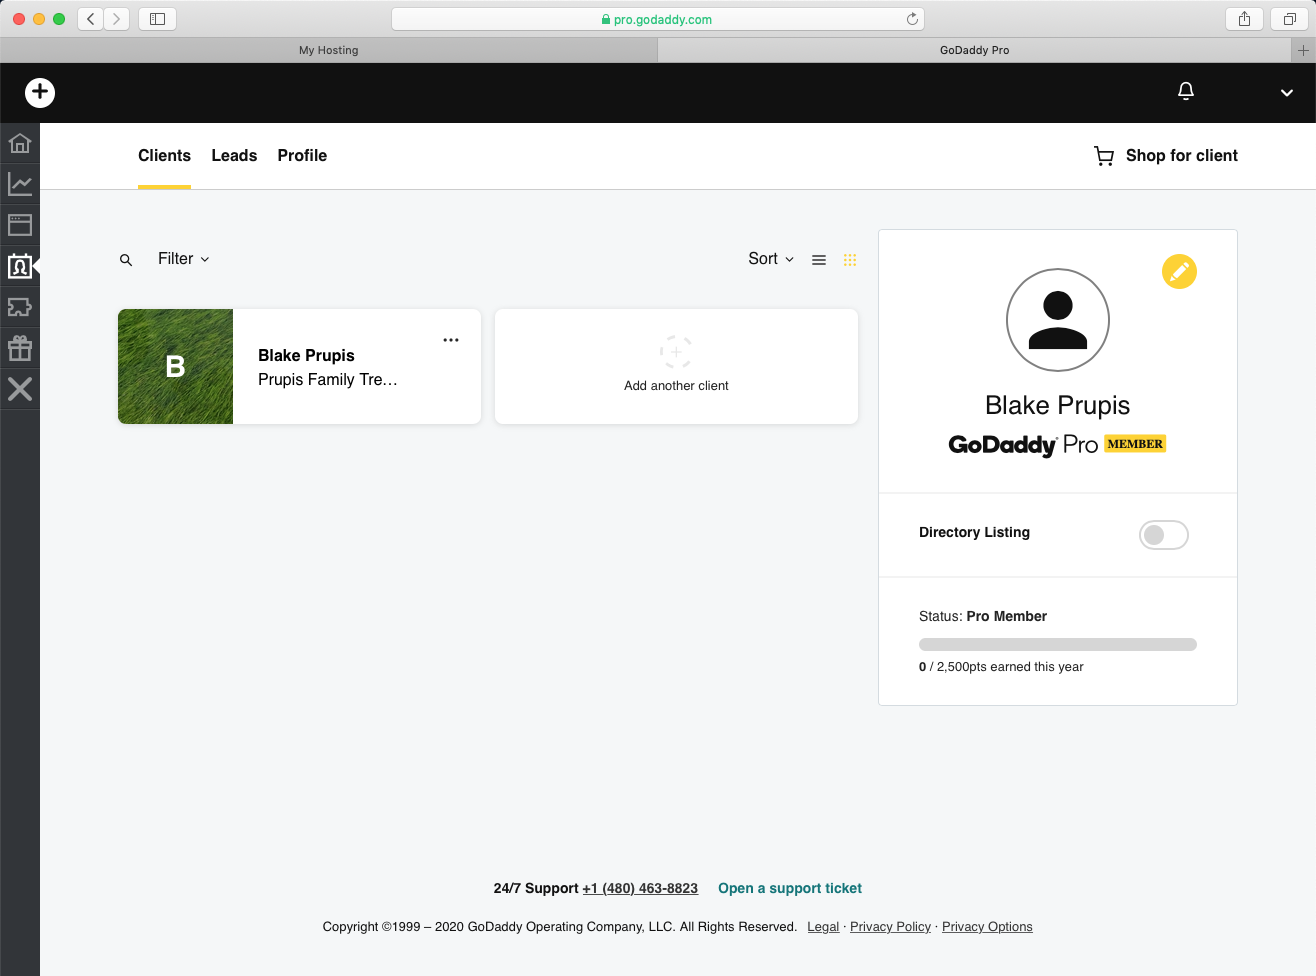
- the fourth Icon on the left is for Clients
- the page appears to have three tabs, Clients and Leads and Profile
- Clients has the focus for this page
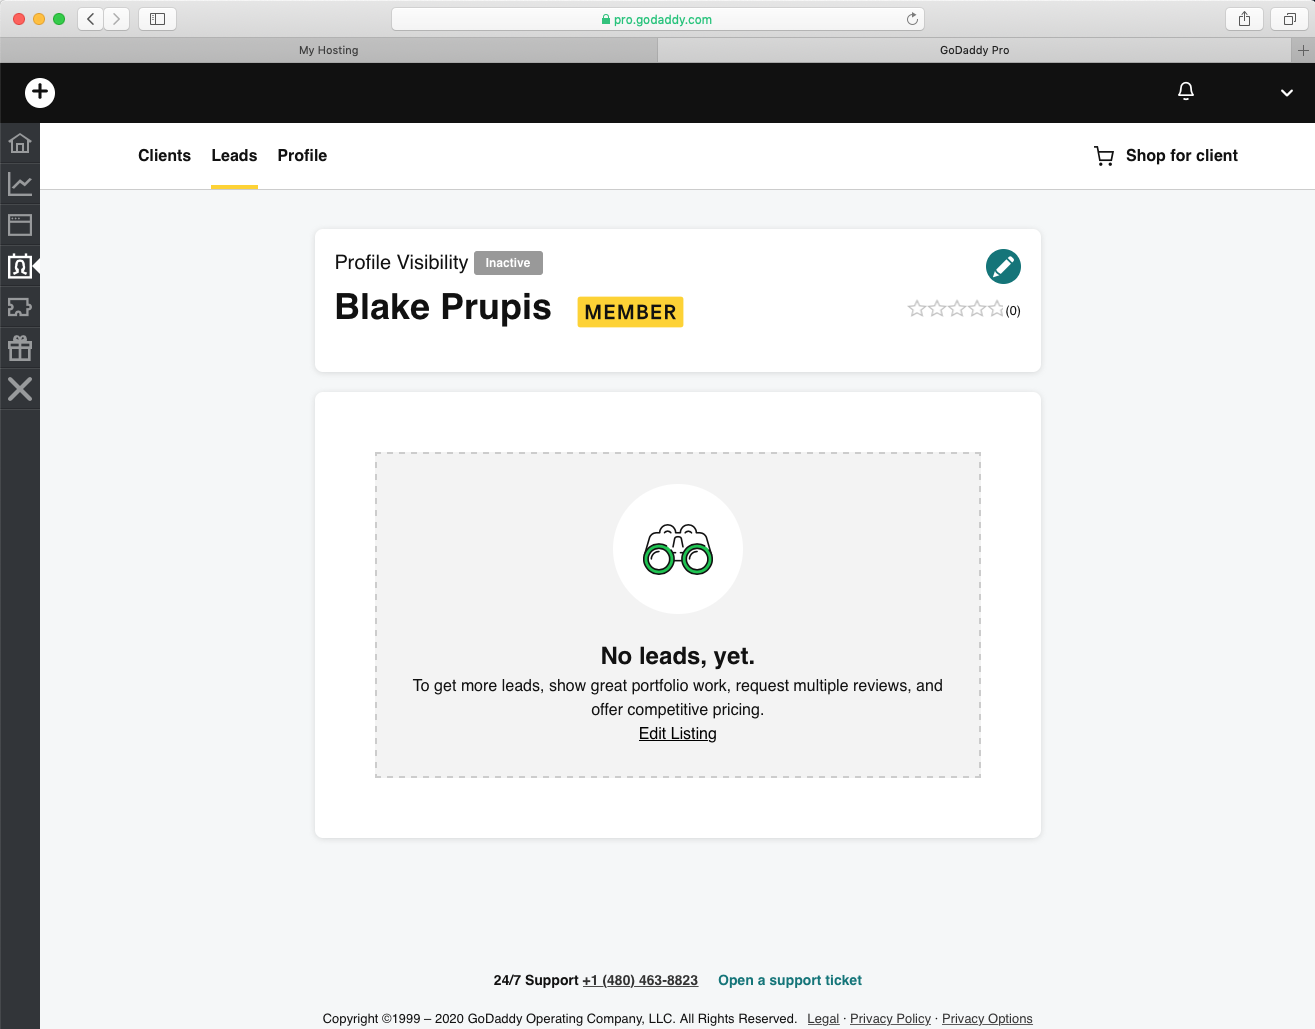
- Top
- Leads has the focus for this page
- Top
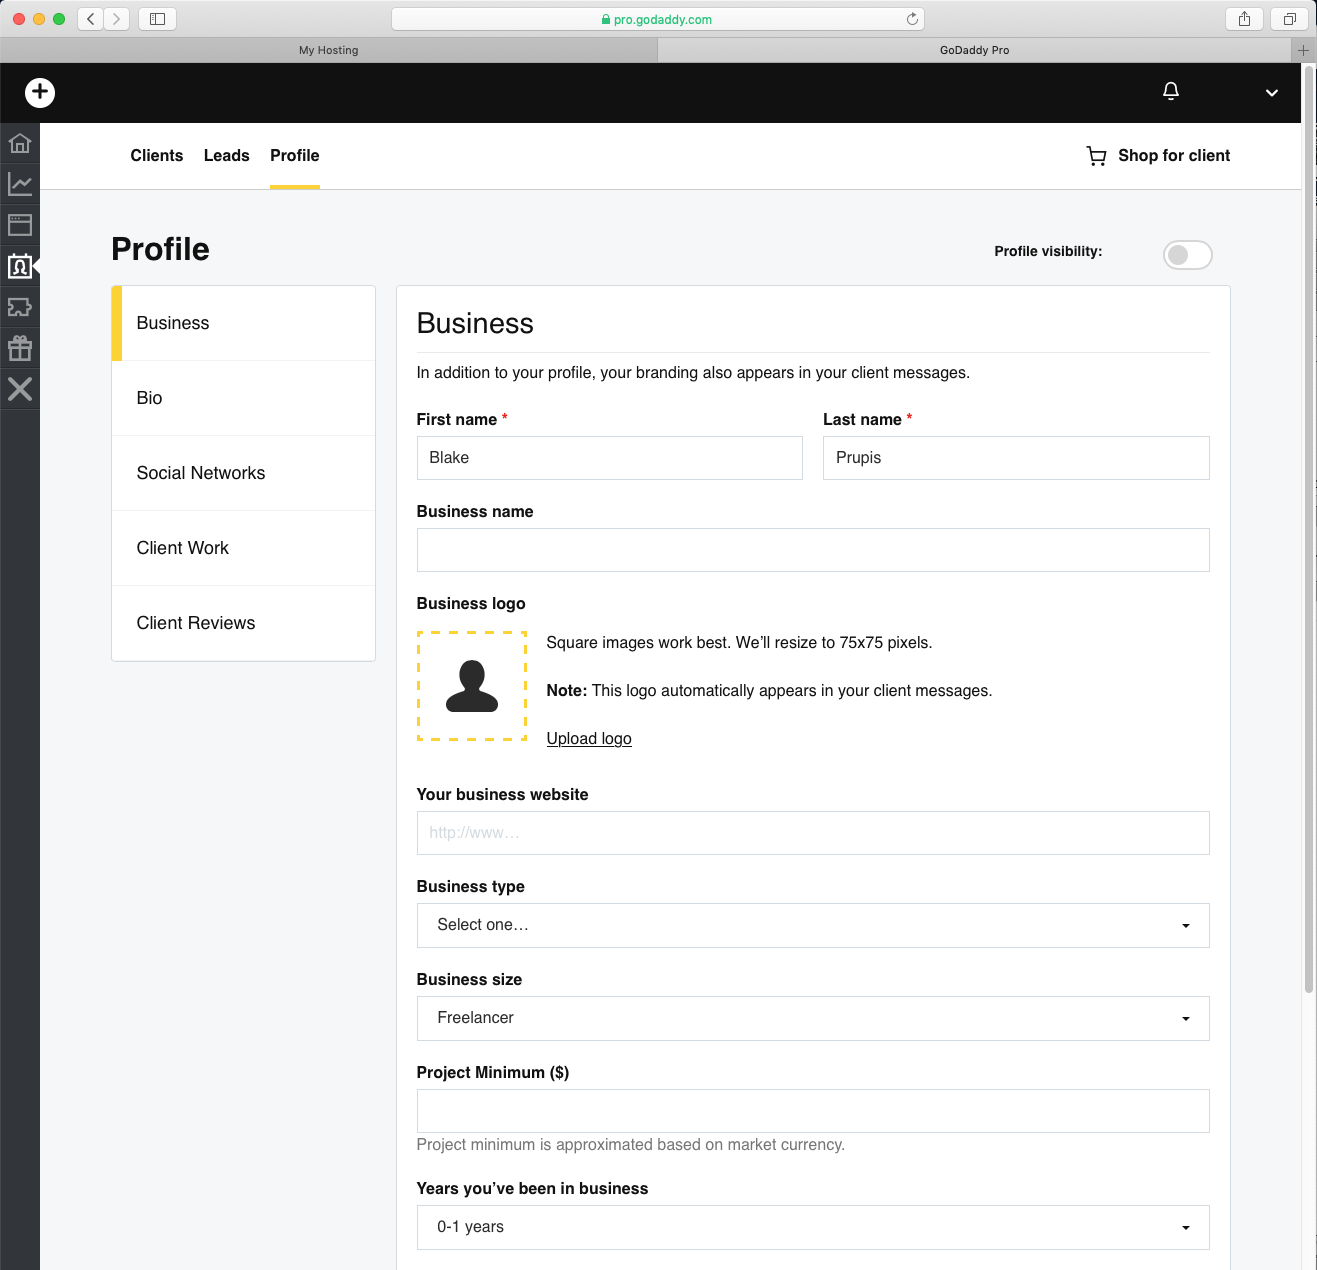
- Profile has the focus for this page
- the Profile page has 5 tabs
- Business which currently has the focus
- Bio
- Social Networks
- Client Work
- Client Reviews
- Top
- the next screen is displayed
- the fifth Icon on the left is for Add-ons
- Top
- the next screen is displayed
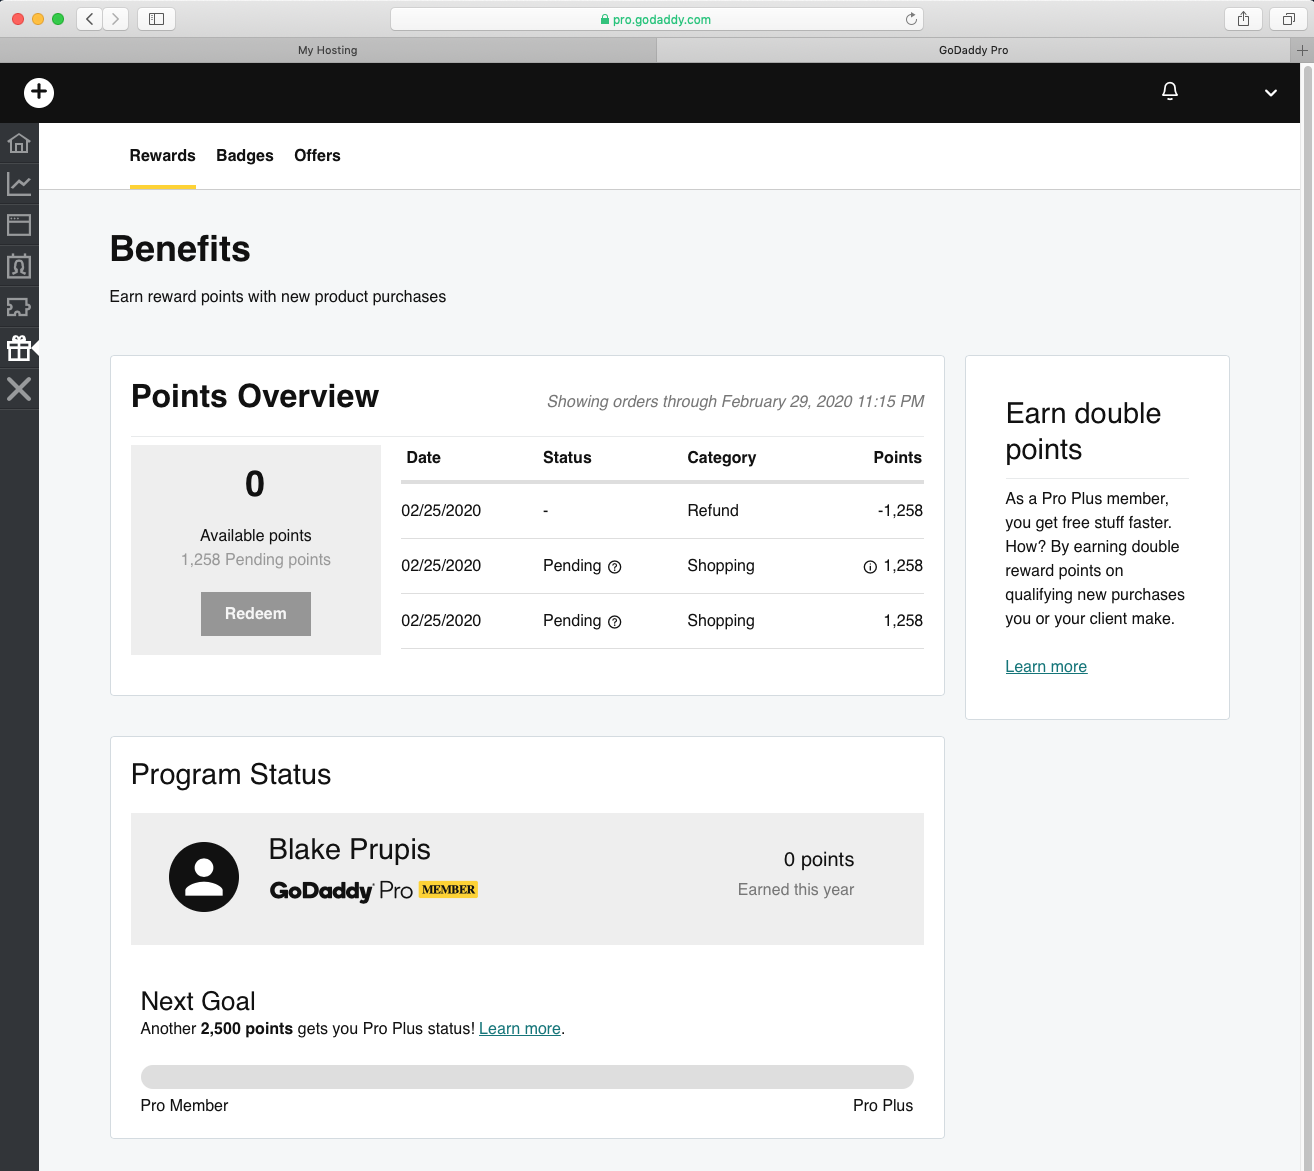
- the sixth Icon on the left is for Benefits
- the Benefits page has three tabs
- Rewards, Badges, and Offers
- Rewards has the focus
Start Over
- Top
- Since GoDaddy Pro has prupis.info pointing to prupis.info I would like to delete it and start again with it pointing to prupis.info/wp
- I want wordpress to also start from prupis.info/wp
- Two previous screenshots have me thinking that I can point to a folder
- Pro009 where I can enter the Homepage URL as http://prupis.info/wp
- Pro010 the way I originally did it, I do not want to do this again because I cannot use the folder named wp
How to remove Prupis.info so I can start again.
The Path that Failed
Try Again thru GoDaddy's WordPress instead of GoDaddy Pro
- Top
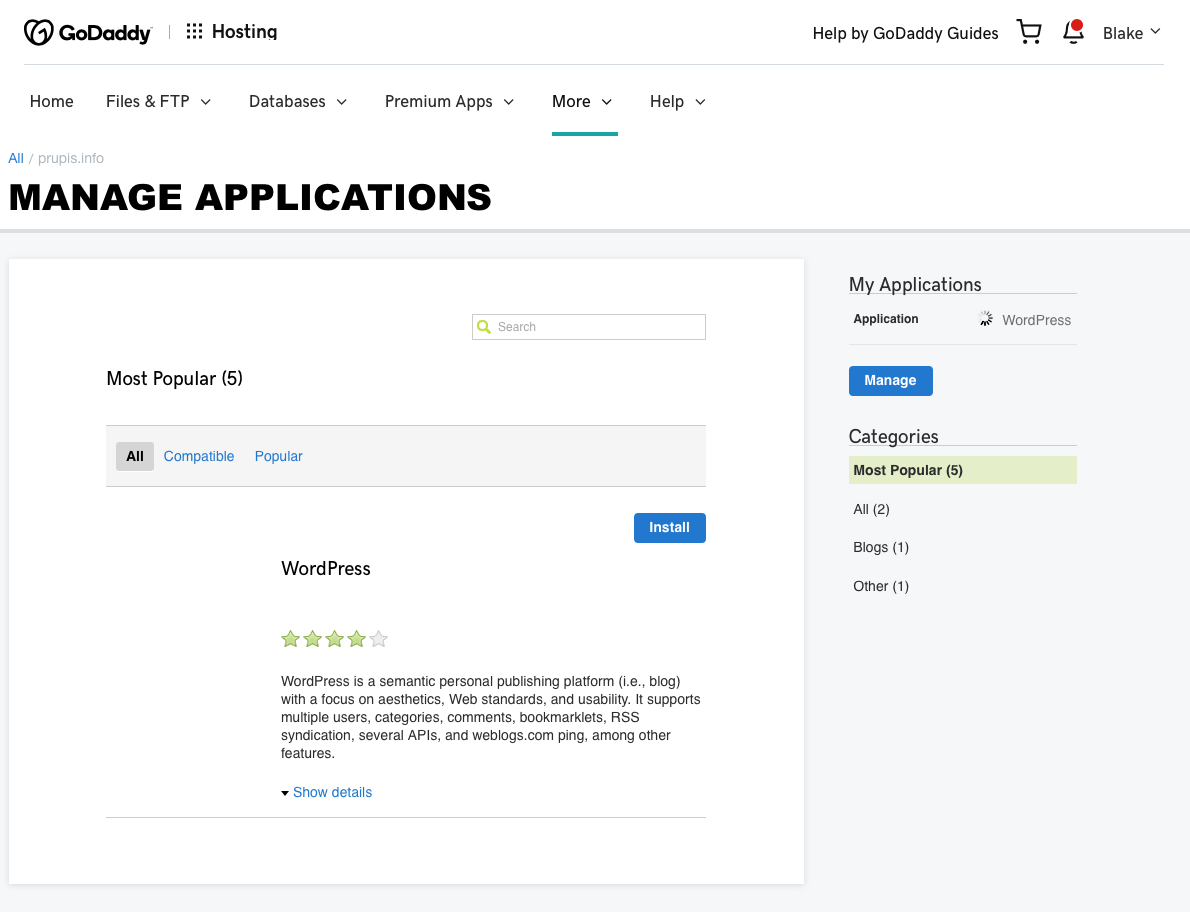
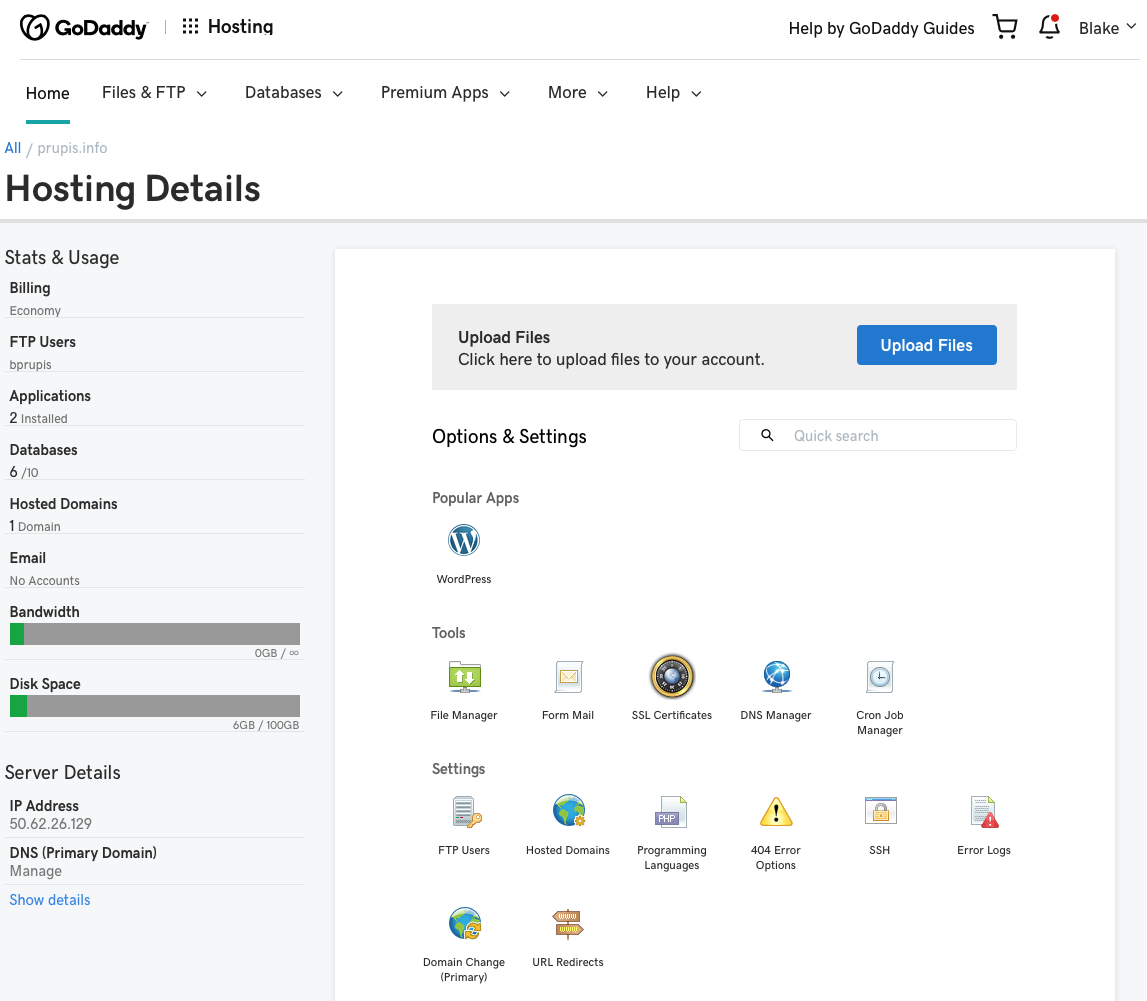
- This time I'll click the Manage button in Web Hosting
- I want to find out if I can direct WordPress to that specific folder.
- Top
- Let's see what happens when I press the WordPress Icon
- Top
- I clicked the blue Install button
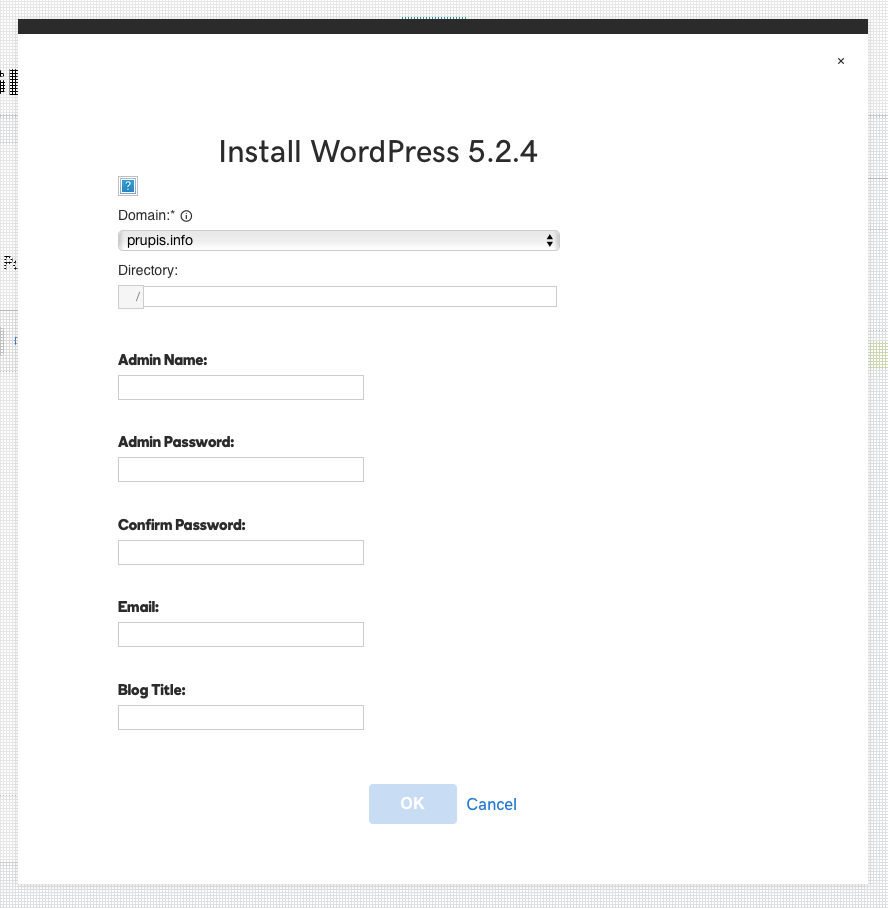
- Top
- after creating my credentials


Lets see if we can re-install WordPress
- Top
- I filled this out again
- Top
- I clicked the blue OK button
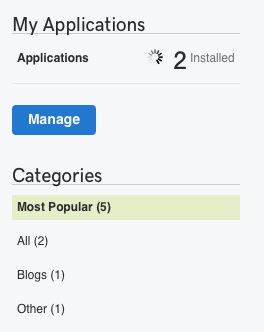
- in the My Applications section the installation symbol is going round and round.
- started at 11:45 AM, I'm still waiting.
After the re-install, I try to get in again, hoping to see the WordPress Dashboard
- Top
- I click the Manage button and the following screen is displayed
- I click the Log In button
- Top
- The Log In screen is displayed
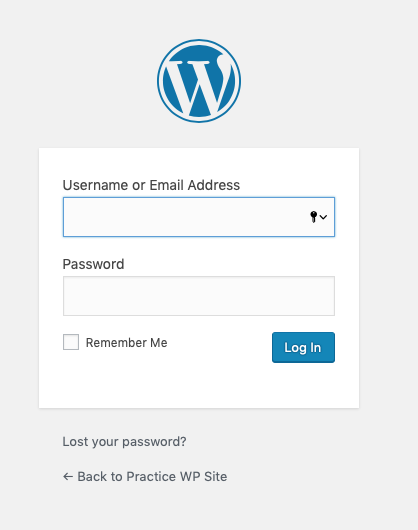
- Top
- I enter my credentials
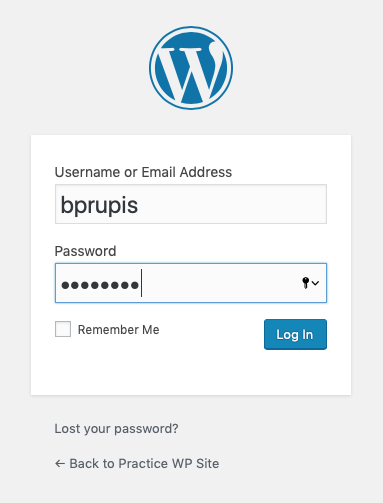
- Top
- I click the blue Log In button
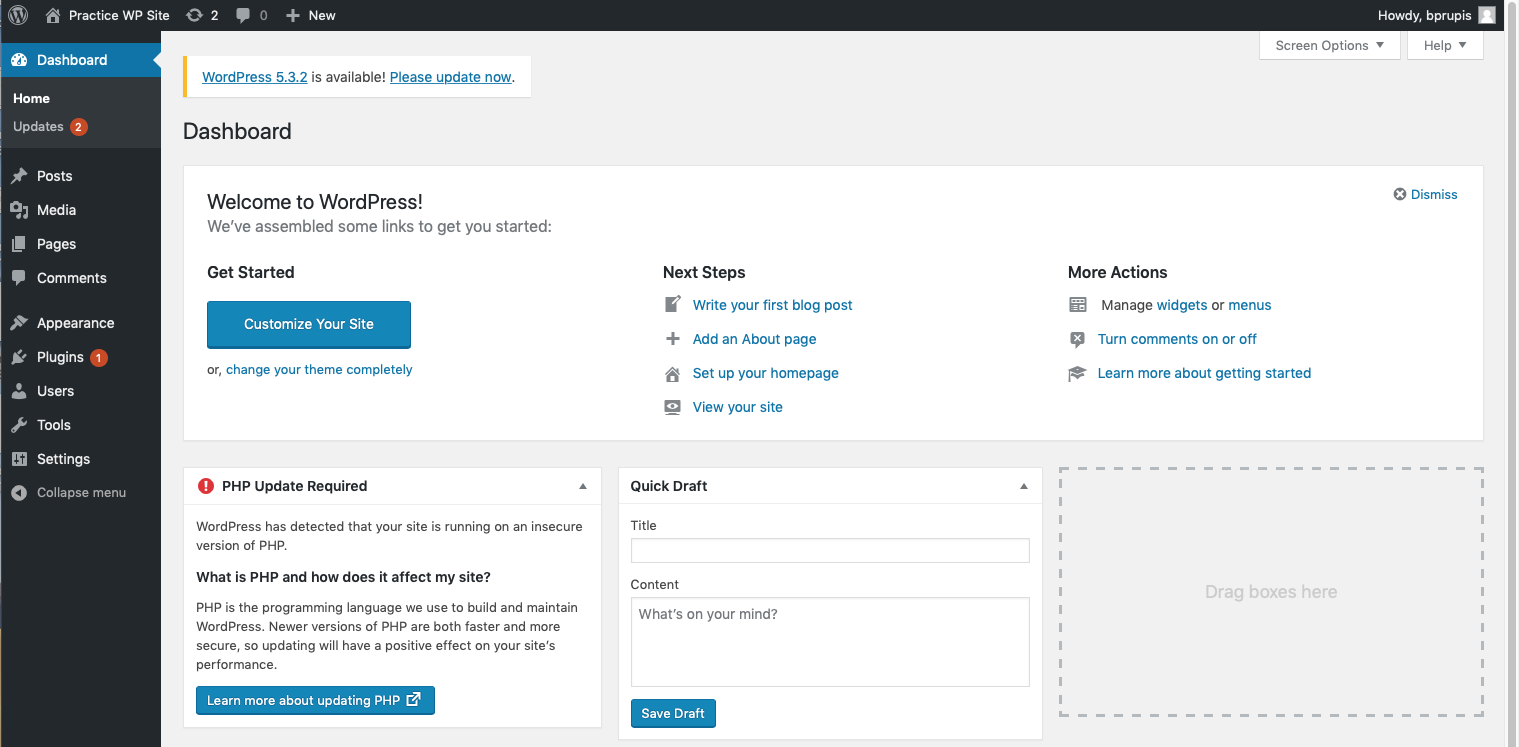
- and the WordPress Dashboard is displayed
- However, I have version 5.2.4 and they want me to update to 5.3.2 with a Please update now link.
- Top
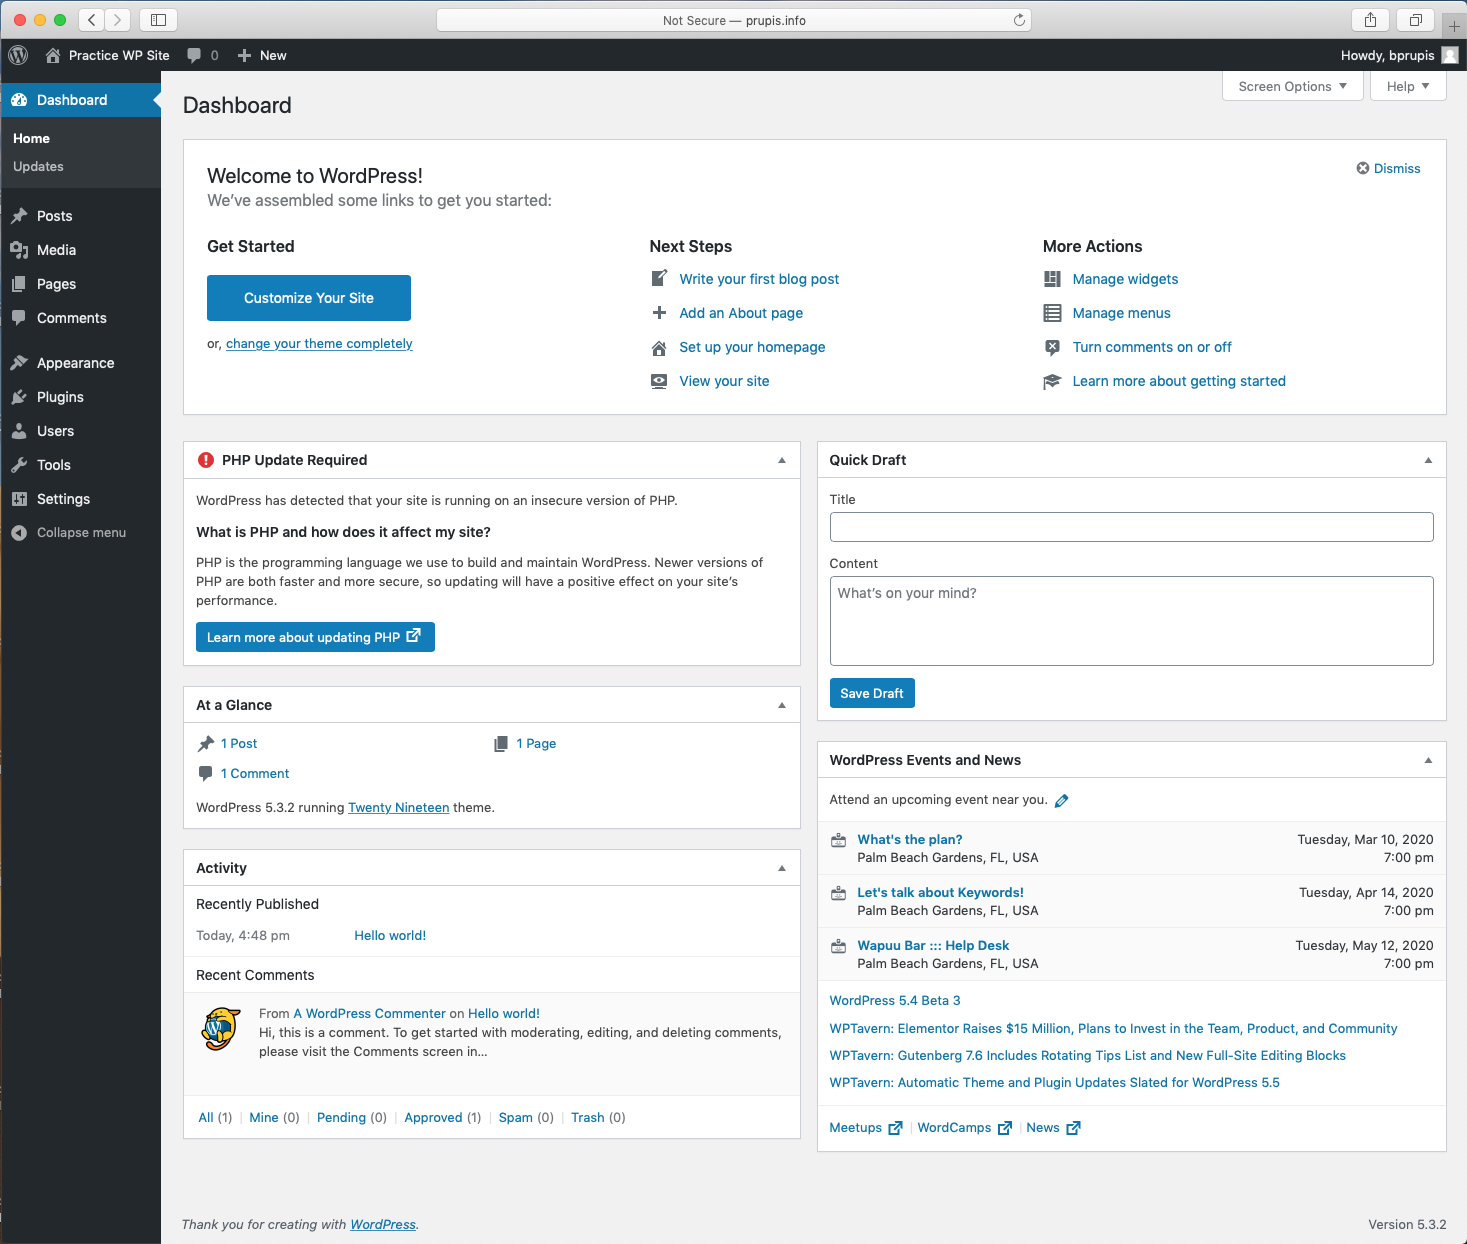
- After clicking the Please update now link
- the Dashboard no longer displays that message
- Top
- since we directed WordPress on the Installation to use /wp, this is what it added to the folder structure

- Top
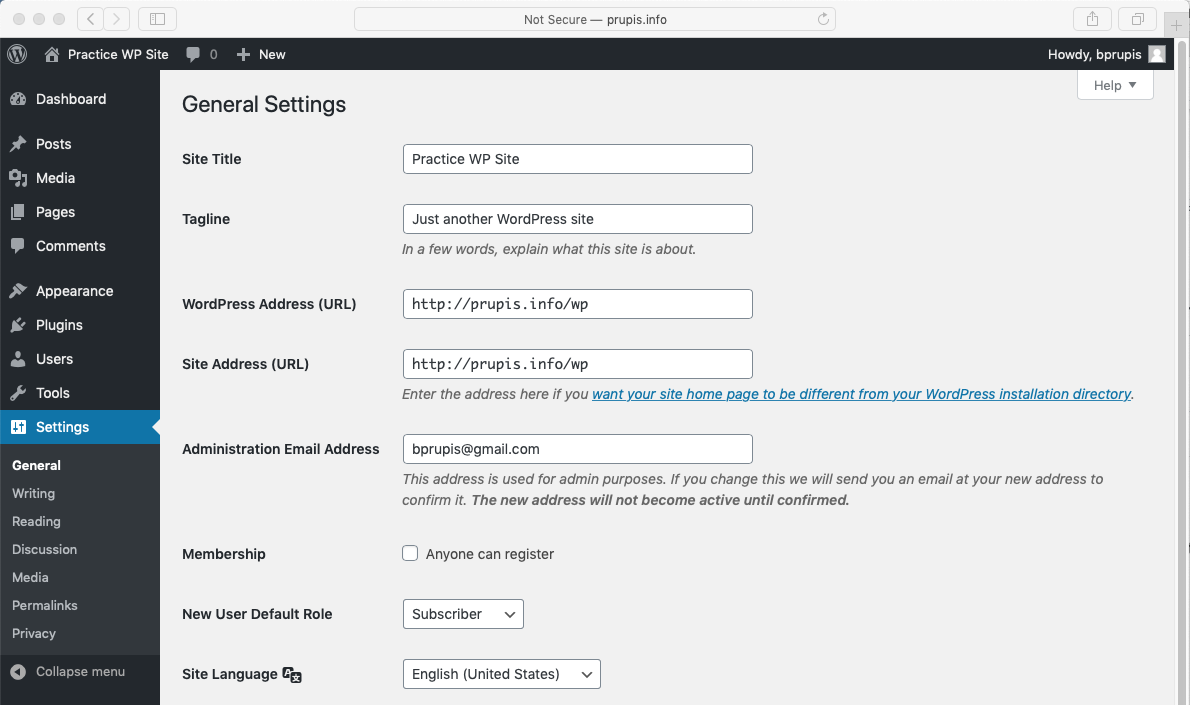
- I see where a path can be changed under Settings, General
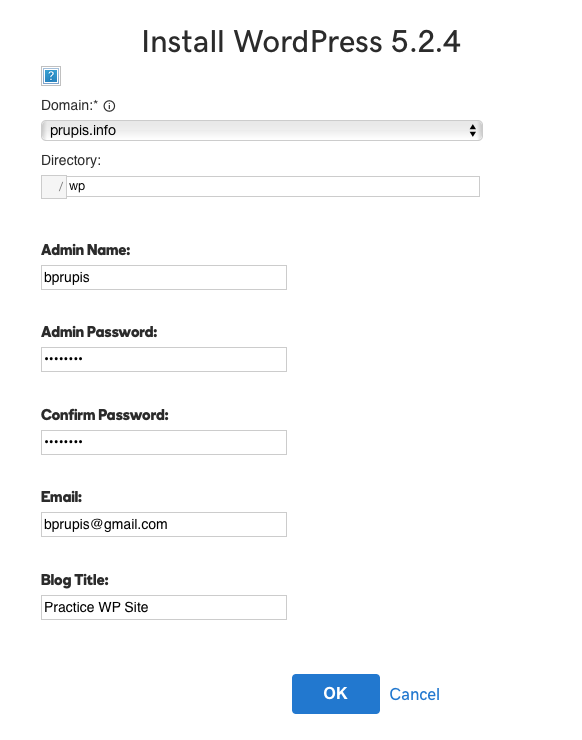
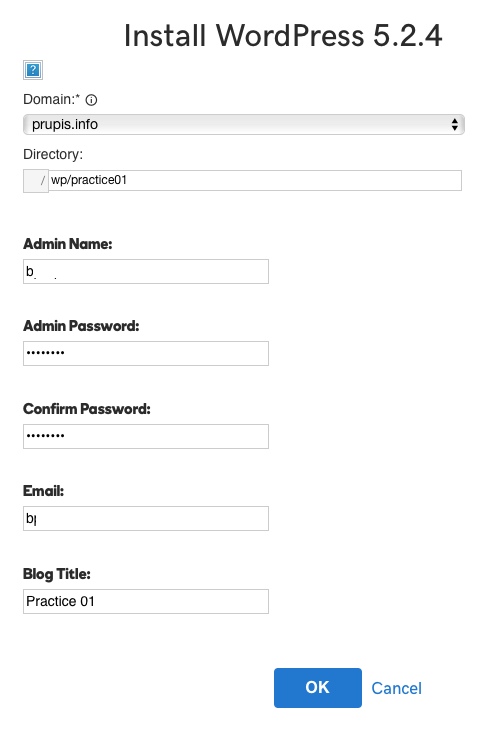
Ignore the /wp folder and use /wp/practice01
- Top
- used same credentials as before
- for the Directory folder I used /wp/practice01
- then I clicked the blue OK button
- Top
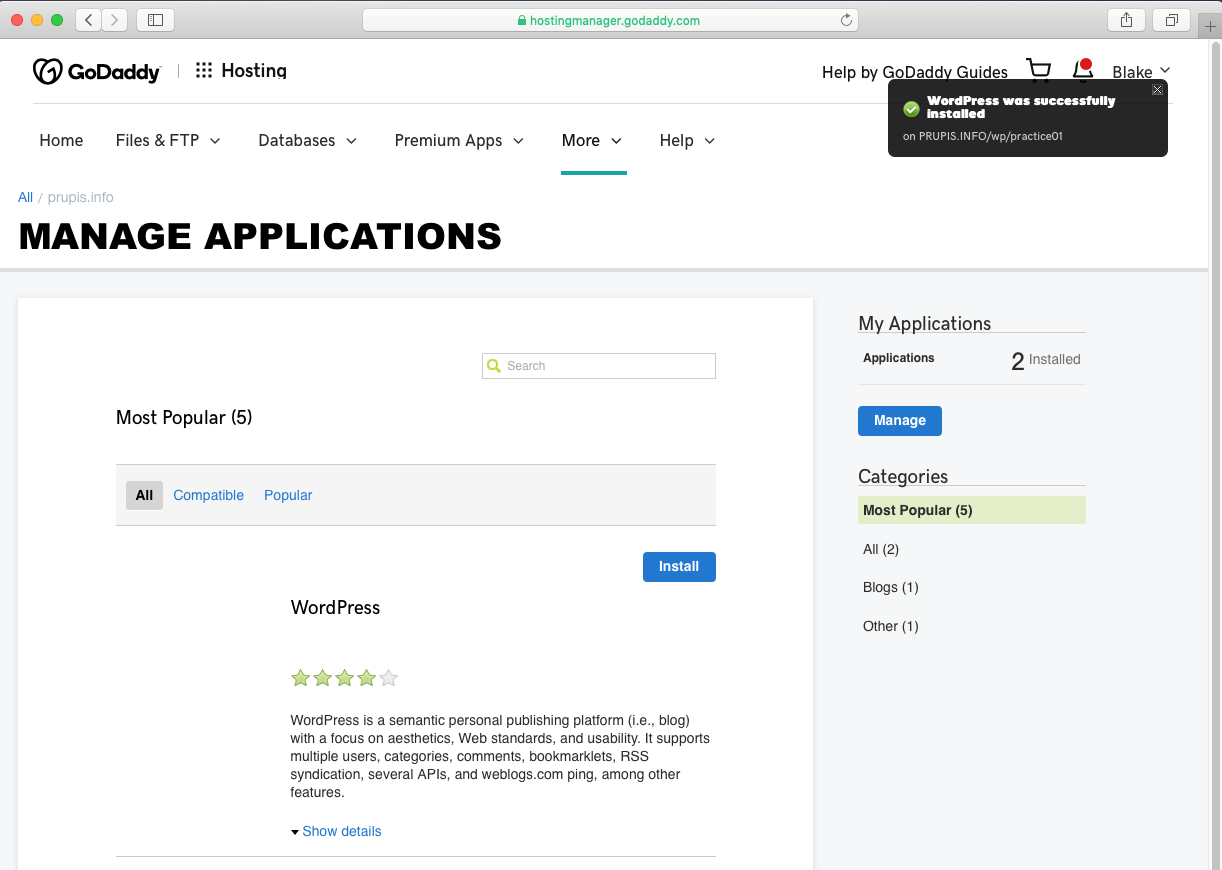
- waiting on the installation to finish for wp/practice01

- Top
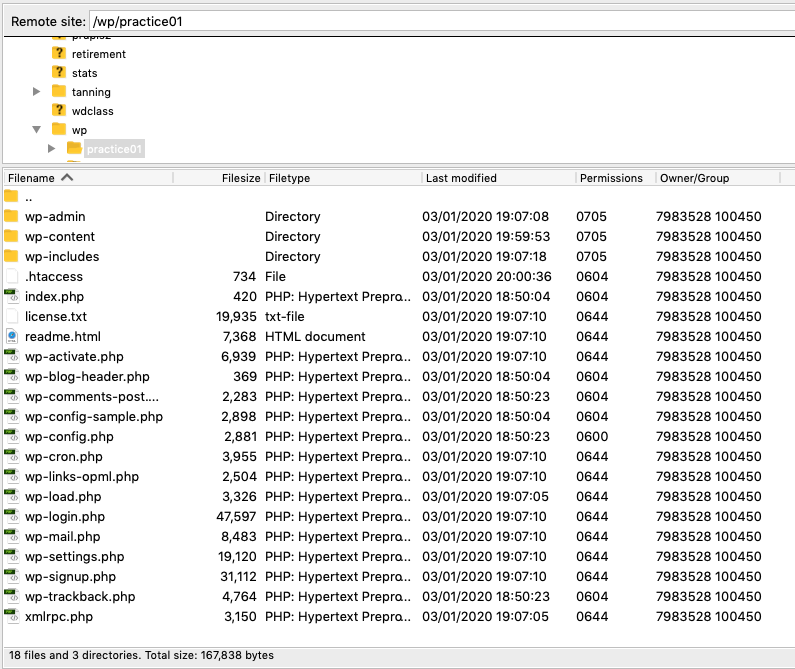
- installation completed
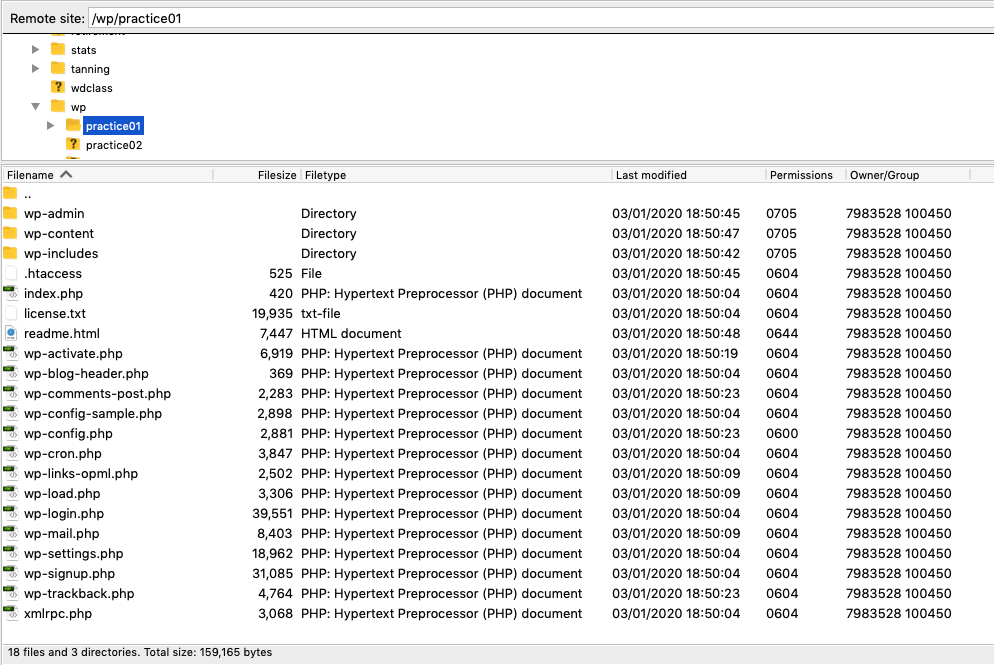
- Top
- all the files are in the correct folder
- Top
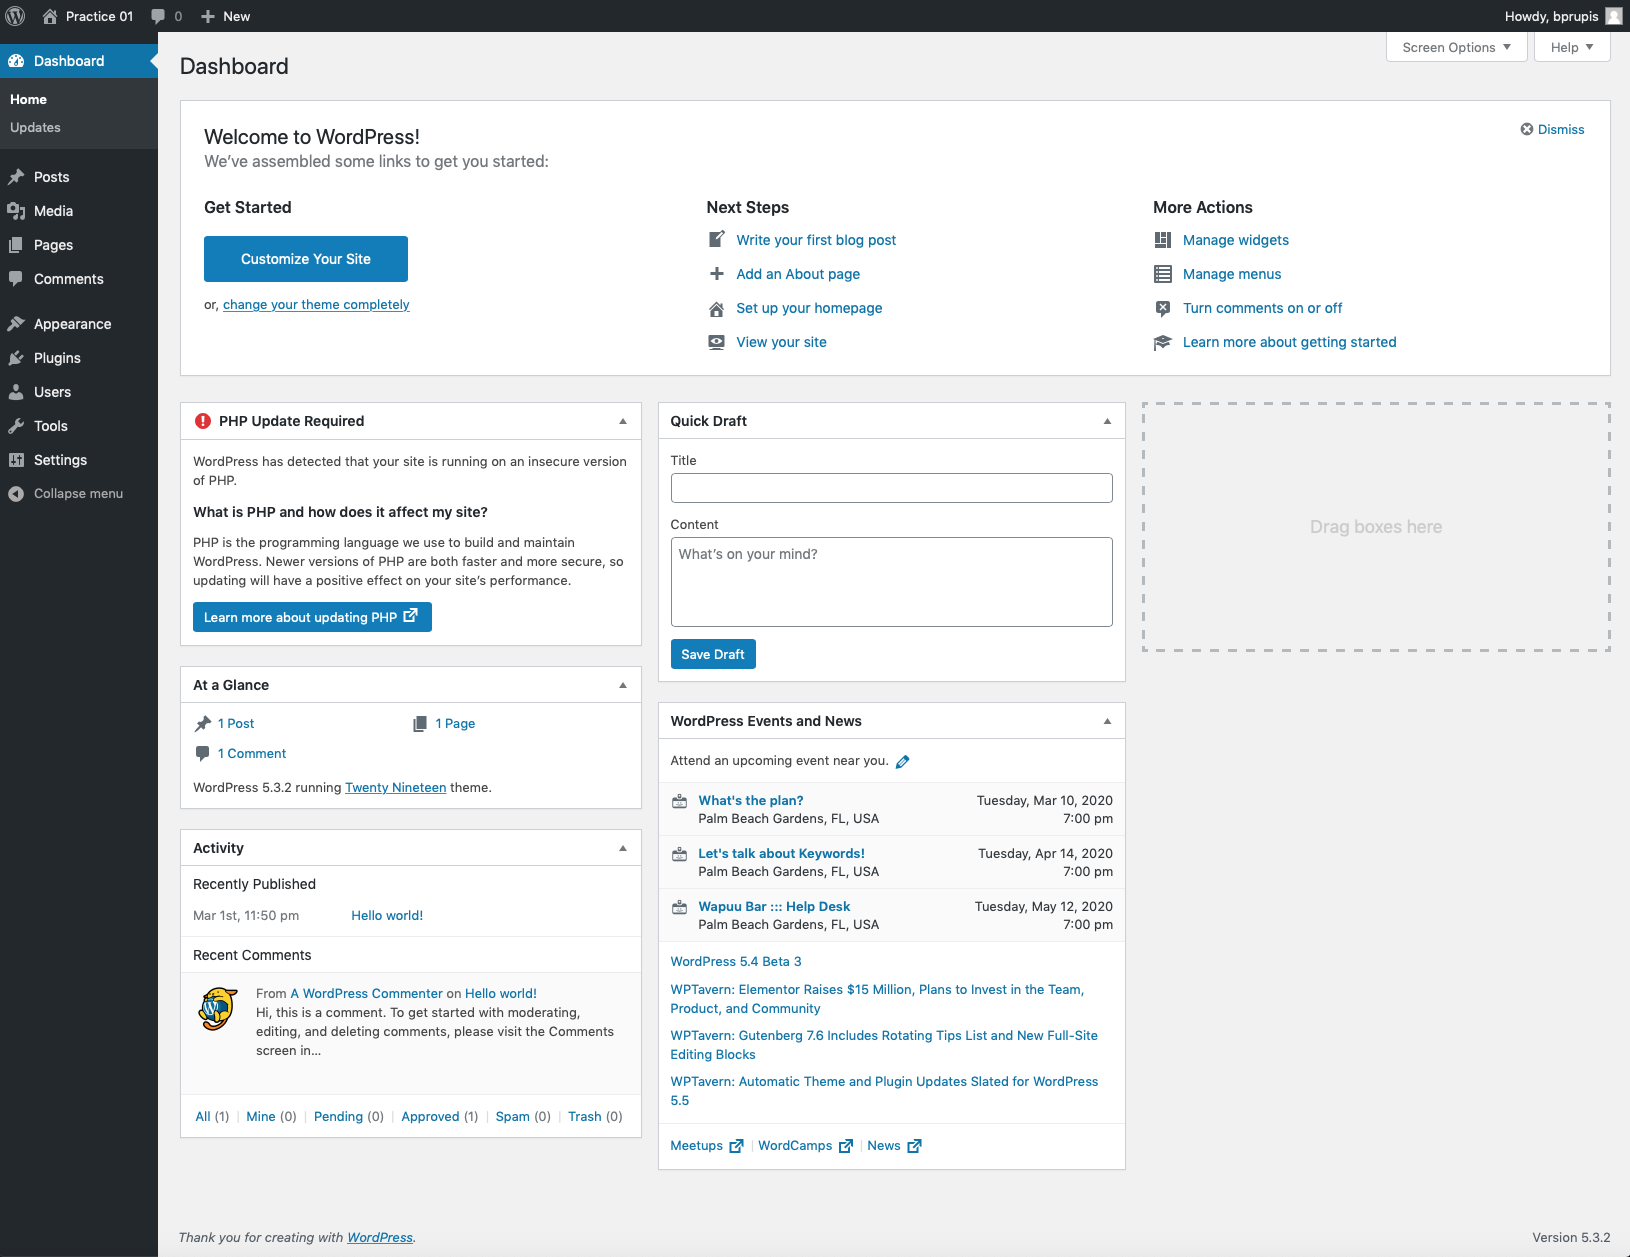
- first look at practice01 Dashboard
- I clicked the Update Now button to get from 5.2.4 to version 5.3.2
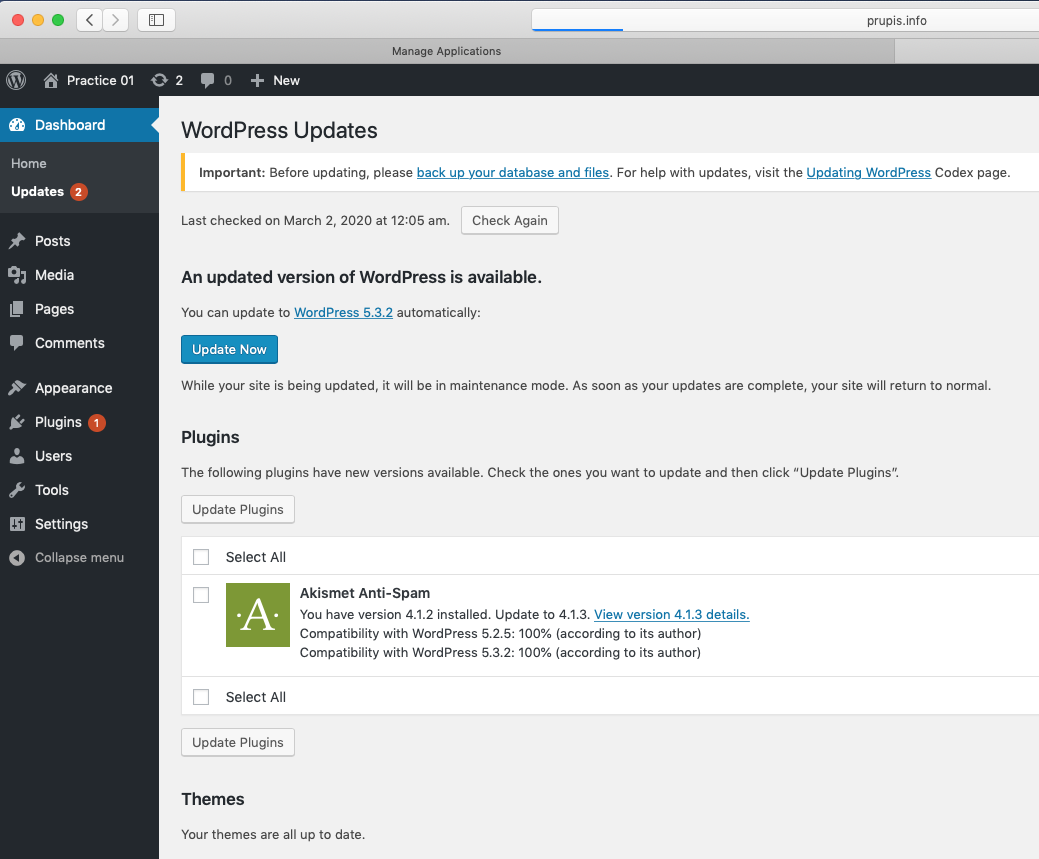
- Top
- after WordPress got updated, I updated Akismet Anti-Spam plugin
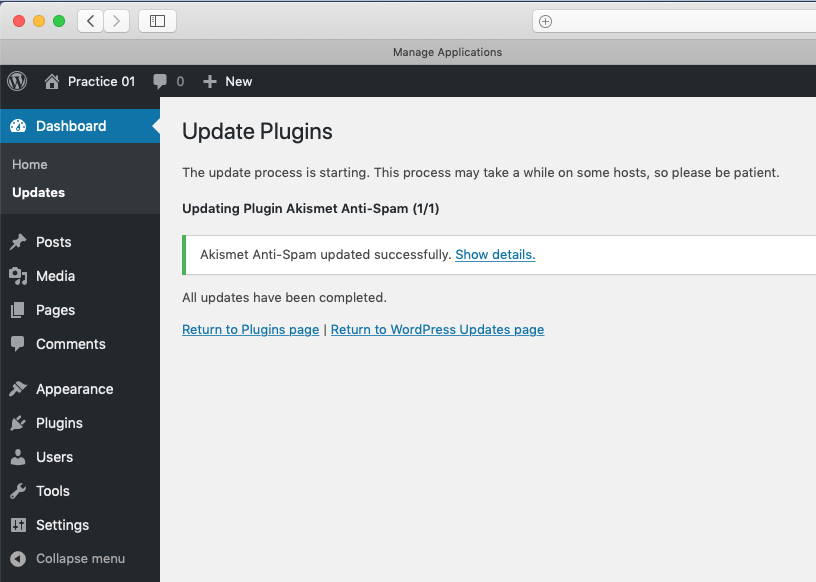
- Top
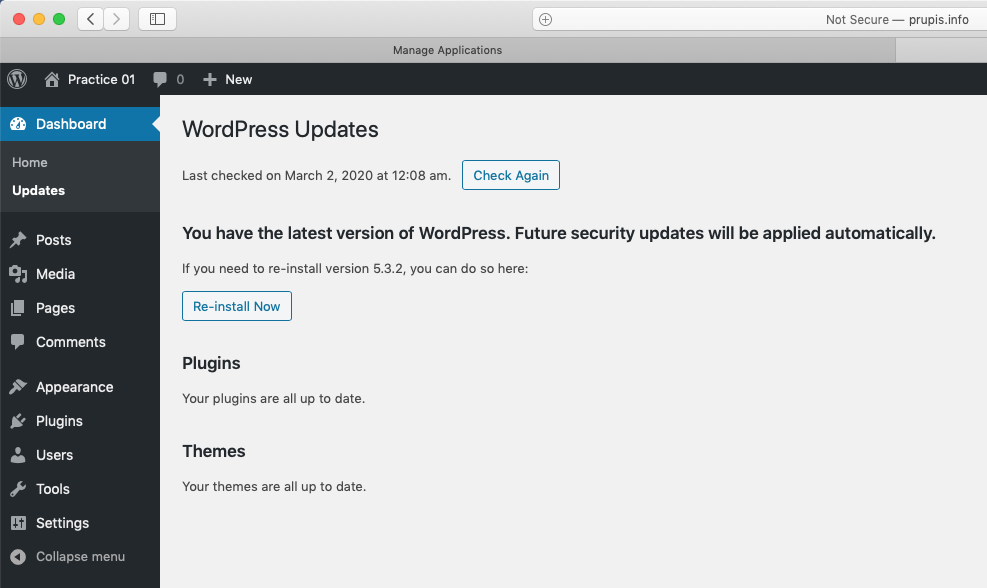
- Updates displays everything is up to date.
- Top
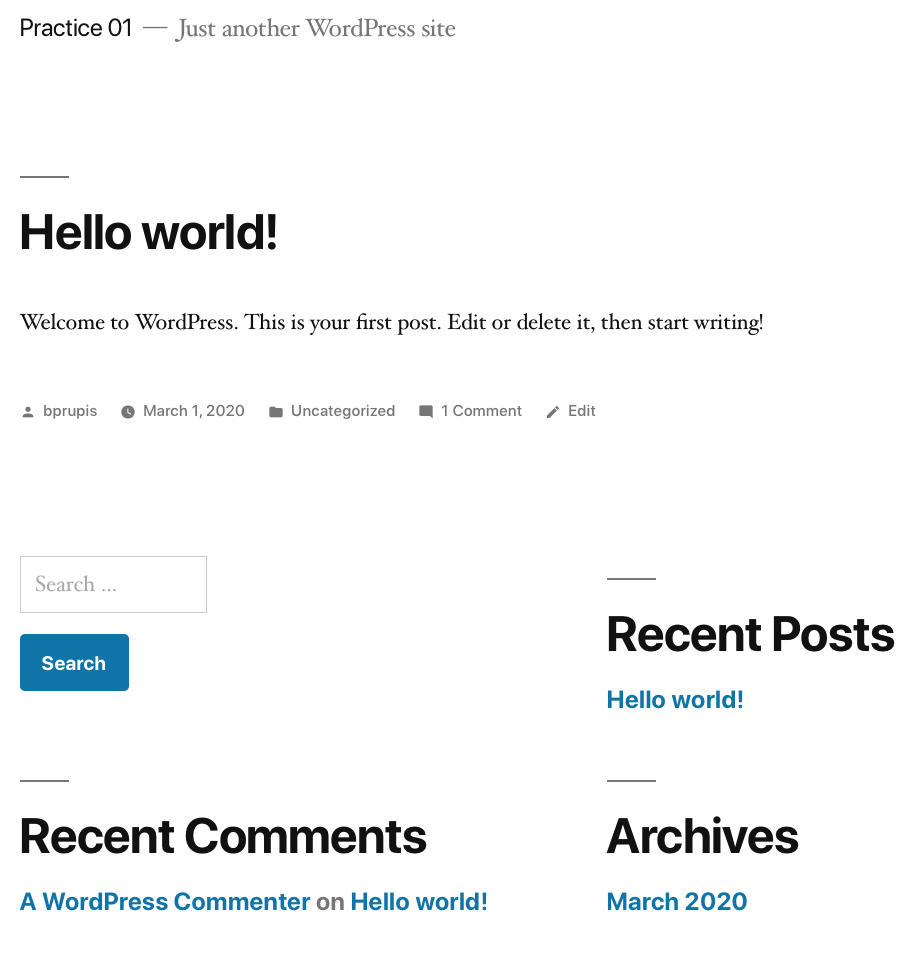
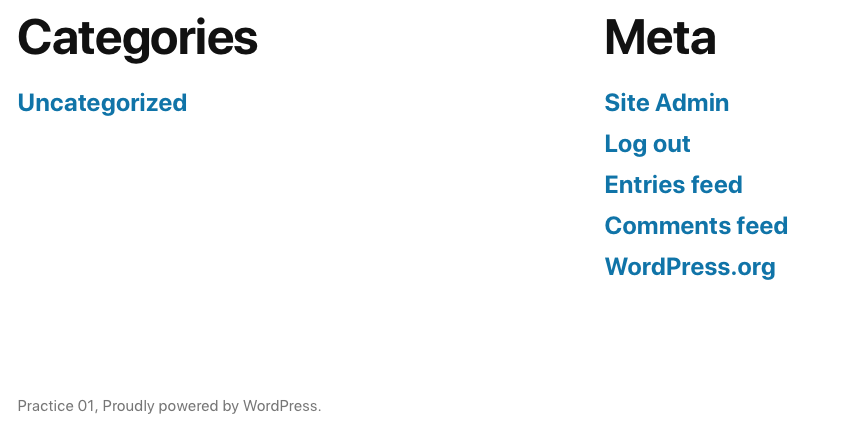
- what wp/practice01 web site looks like thru a browser
- Top
- this is what the Dashboard looks like after the two updates
- Top
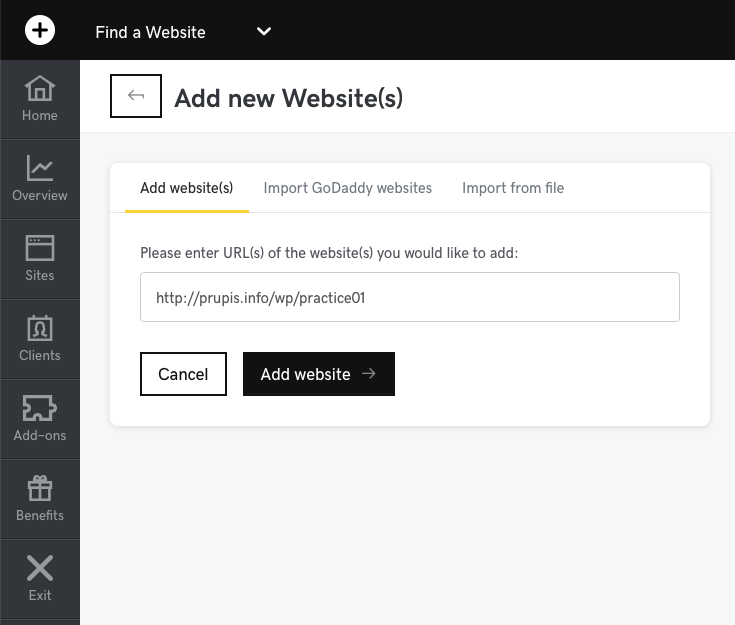
- trying to add wp/practice01 to GoDaddy Pro
- Top
- I added a new WebSite to GoDaddy Pro by using the url http://prupis.info/wp/practice
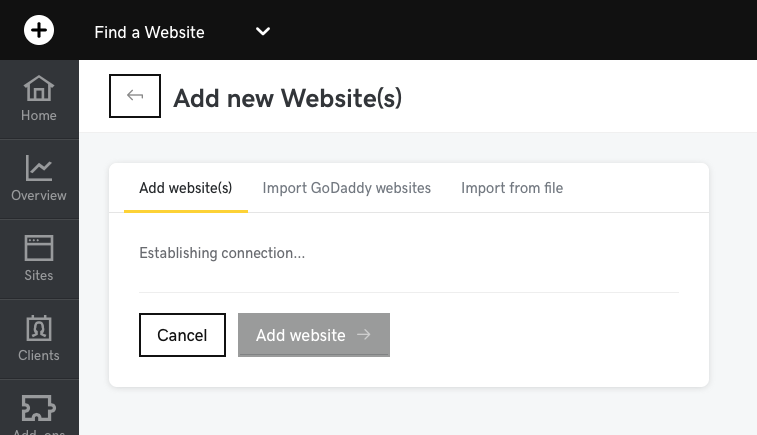
- Top
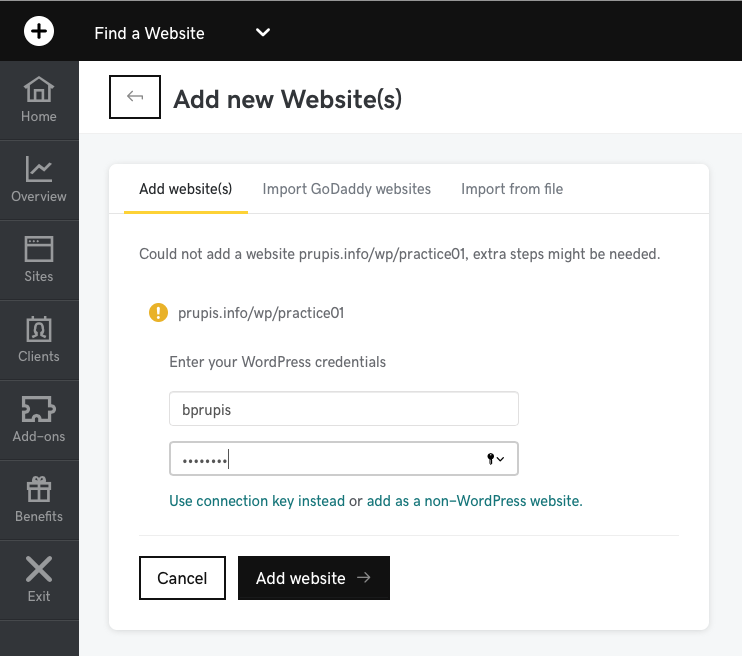
- the screen could not add wp/practice01
- I entered my credentials after the could not add website message appeared
- Top
- thru the Import GoDaddy websites tab
- I have to find out what v73.c12.myftpupload.com is
- I did see someone take care of this on one of the two videos on this page.
Let's see if I can now uninstall or delete WordPress from prupis.info/wp
- Top
- first log into GoDaddy
- Top
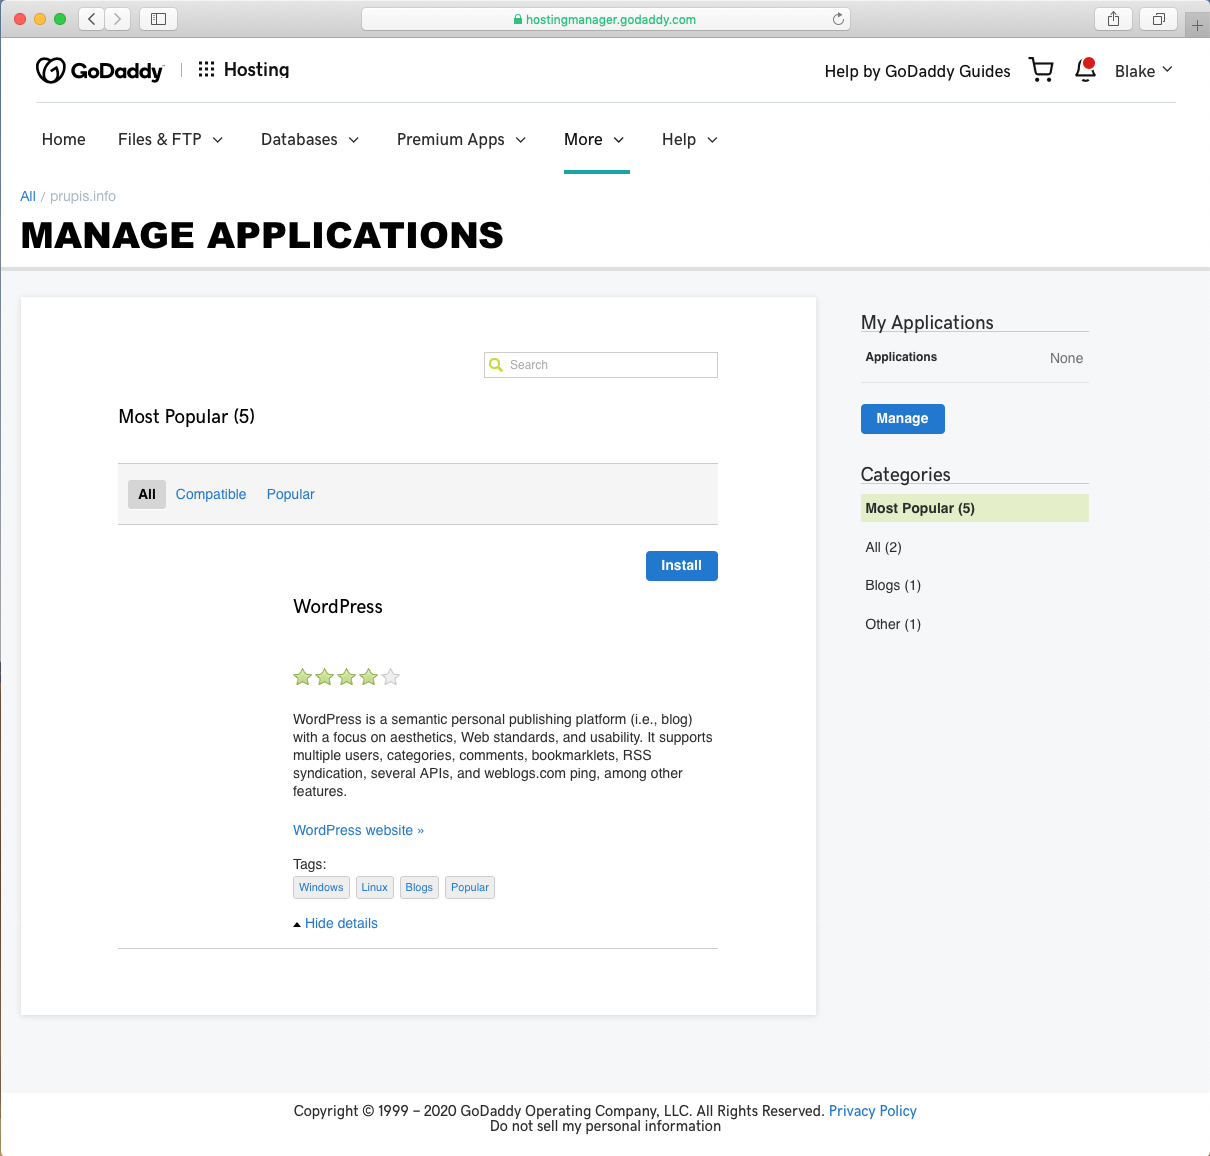
- I clicked the Manage button in the Web Hosting panel
- to display the screenshot below
- Top
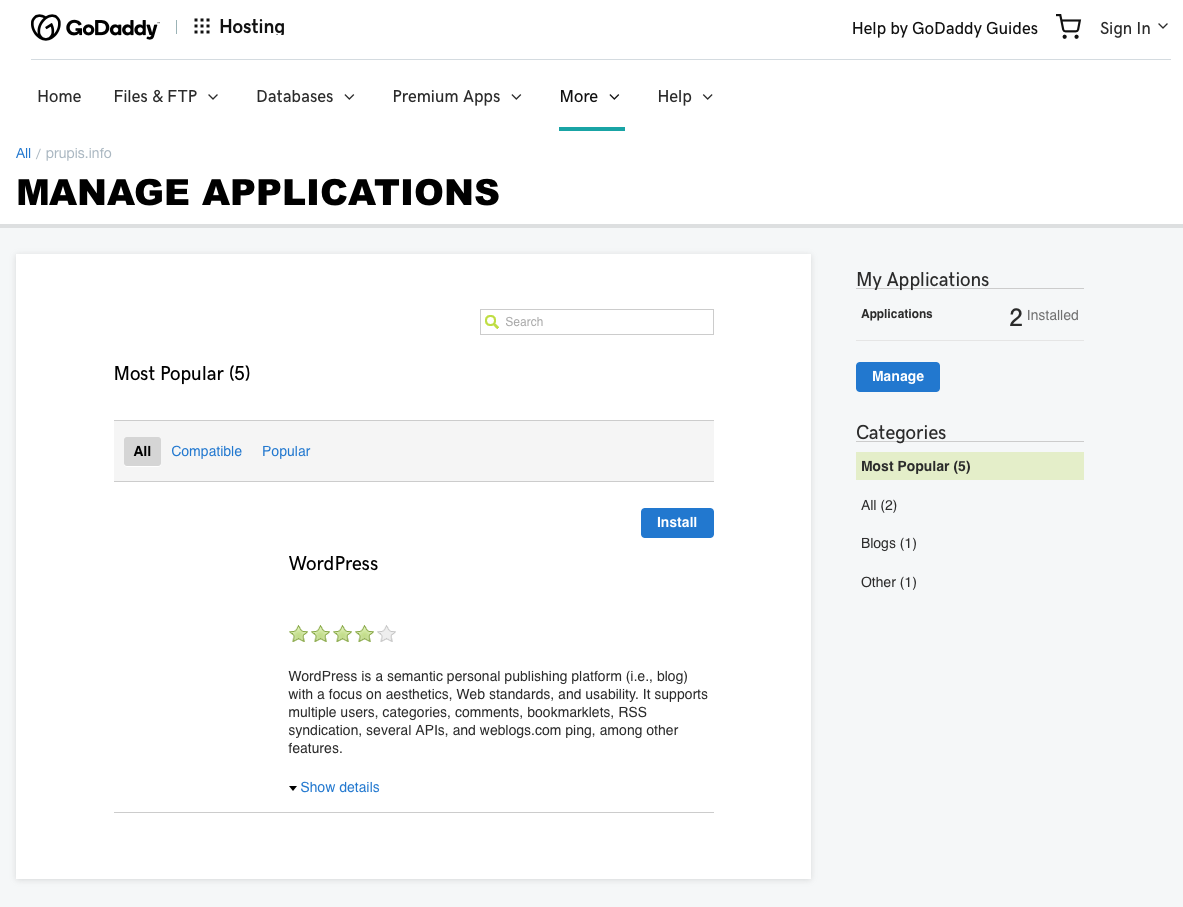
- I clicked the WordPress icon
- to display the screenshot below
- then I clicked on the blue Manage button
- Top
- after clicking the blue Manage button
- the following screen is displayed
- Top
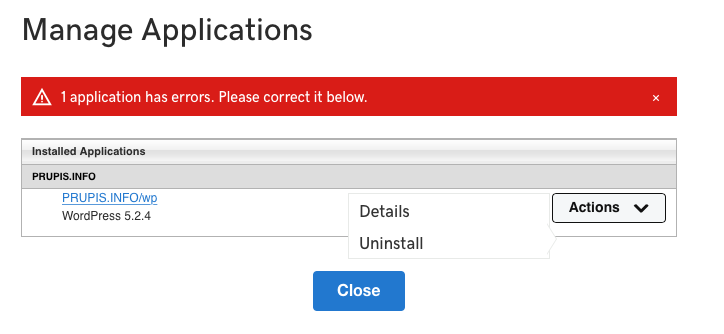
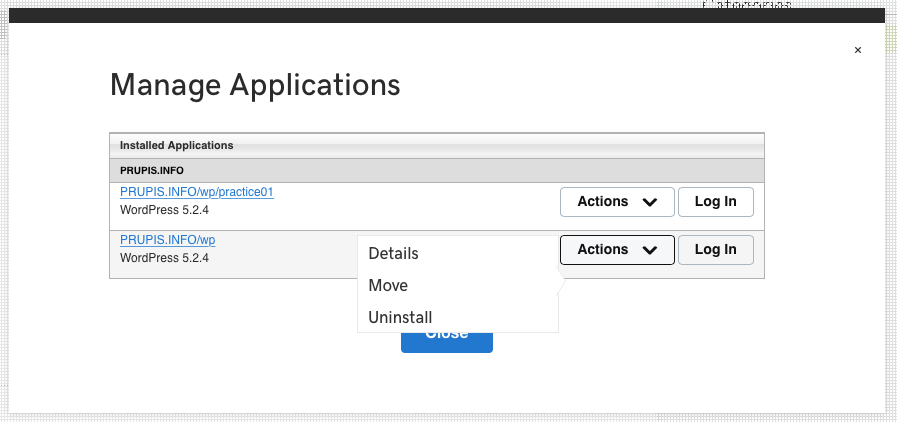
- I selected the Actions button for PRUPIS.INFO/wp
- and the following submenu was displayed
- I selected Uninstall
- because I don't want WordPress in the wp folder
- I want it under the wp folder ex: practice01 and practice02
- Top
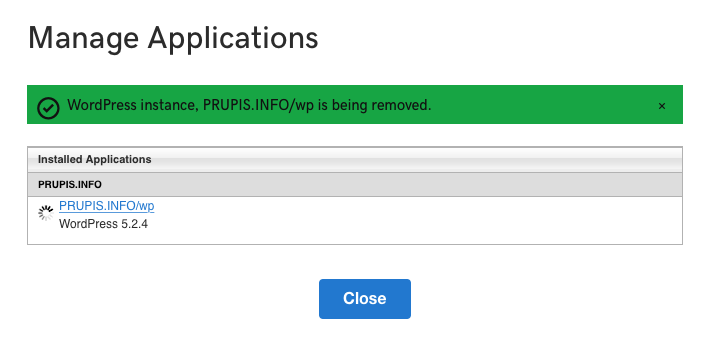
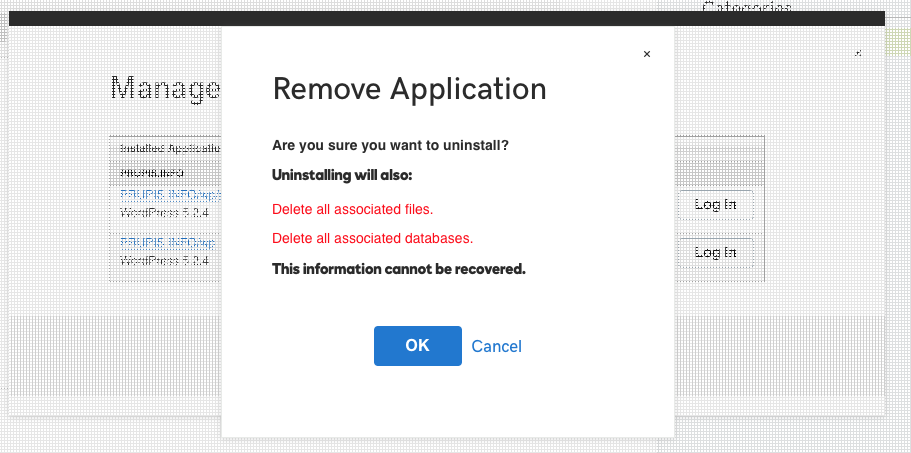
- after clicking Uninstall from the submenu,
- the following warning message box is displayed,
- I clicked the OK button
- res
- Top
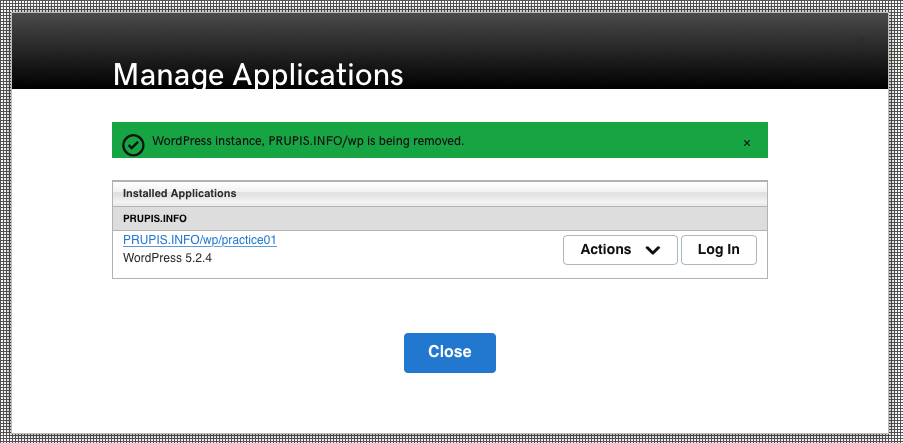
- after clicking the OK button, the Manage Applications screen came back to the forefront
- note the message displayed in the green header, PRUPIS.INFO/wp is being removed
- also note that there is a progress circle to the left of PRUPIS.INFO/wp while the action of removing it from the wp directory is taking place
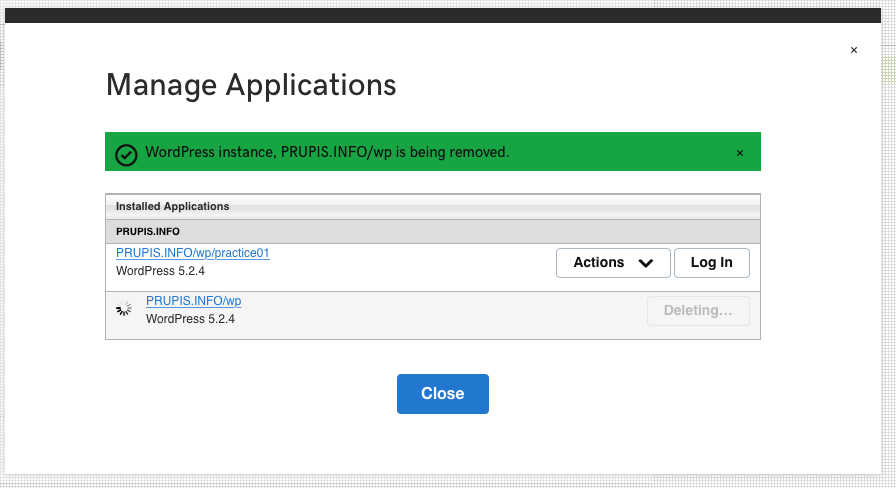
- Top
- after the removal, the Manage Applications screen displays just one application of WordPress installed at prupis.info/wp/practice01
- Top
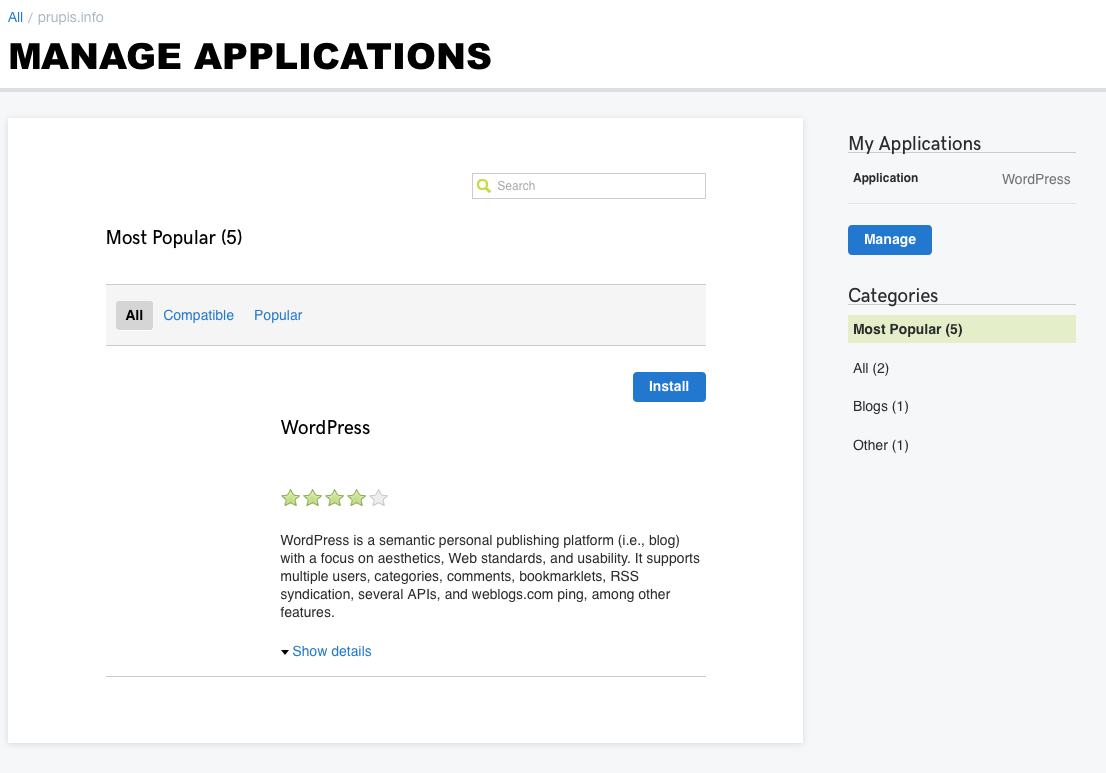
- towards the right of the screen displayed below
- displayed is My Applications and Categories
- in the My Application section, the text Applications have been replaced by Application (minus the letter s)
- to the right of Application use to be the text 2 installed, have been replaced with WordPress
- Top
- the screenshot below displays the contents of the wp folder, many of the files have gone
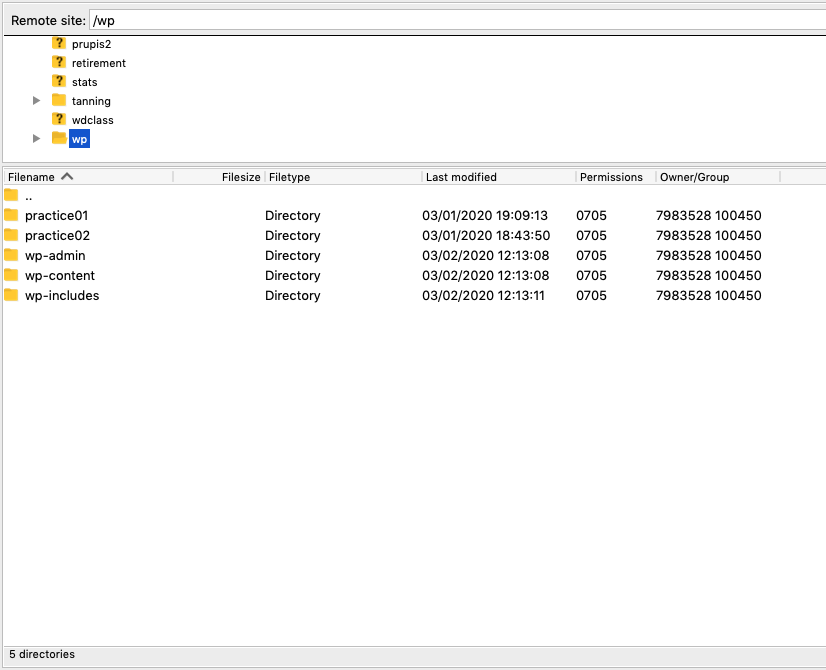
- Top
- the wp/practice01 folder stayed intact when WordPress was removed from the wp folder
- Top
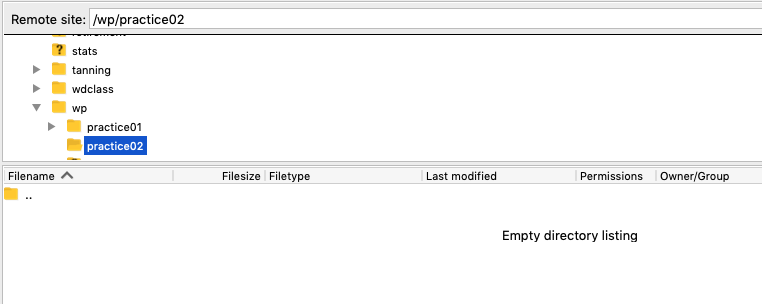
- wp/practice02 is waiting reserve
- therefore this file is currently empty
YouTube Video 1 - WordPress Blog Site - No Extra Pages
- Top
- YouTube Search: godaddy wordpress
- 11:35 | YouTube | Titled: How to Make a WordPress Website with GoDaddy (Step by Step)
- note that this looks like a slightly older version of WordPress
What this Video is About
- Top | the YouTube Video
- 00:20 In this video we are going to learn how to setup a WordPress website on GoDaddy
- 00:34 he displays a link to get a discount for GoDaddy
- 01:00 he shows three plans to own a host site from GoDaddy
- 01:18 he chooses Economy, the cheaper deal of the three offerings
Entering your Domain address
- Top | the YouTube Video
- 01:24 he enters the domain he would like to use
- he types in moviespawn.com - a blog dedicated to movie reviews and news
- GoDaddy will do a search to make sure this domain is available
- if it is, he can click the Select and Continue button
- the screen tells you that it is Added
Creating a GoDaddy Account
- Top | the YouTube Video
- 01:41 Once the domain is added, he will be able to create a GoDaddy account
- by entering your Email address, and creating a Username and Password, and creating a Support Pin
- 01:47 when the Create Account form is complete
- he clicks the Create Account button
- If you already have a GoDaddy account
- there is a link to sign in with so you do not have to create a username, password, and pin
Entering Billing Information
- Top | the YouTube Video
- 01:51 once we have created an account we can put in our billing information
- 02:27 After entering the billing information, he clicks the Complete Purchase button
- 02:30 once the account is setup and purchased, you are brought to GoDaddy's Web Hosting area
Verify your Email Address Emails for GoDaddy
- Top | the YouTube Video
- 02:35 Emails displayed from GoDaddy to verify your email address to use on the domain we just registered and another email about your order summary.
- he clicks the Verify Email Now button within the email.
- you are brought back to GoDaddy's site
- and on this page he clicks the Go to My Account button
- 03:00 GoDaddy's My Products page is displayed
- in the Domains panel, we see the domain he just created, moviespawn.com
- the Web Hosting panel, and the Email & Office panel
- 03:08 in the Web Hosting panel, he clicks the Set up button
- 03:13 first thing you have to do is select a domain,
- we type in the name of the domain you want to use
- he types in moviespawn.com, he then clicks the Next button
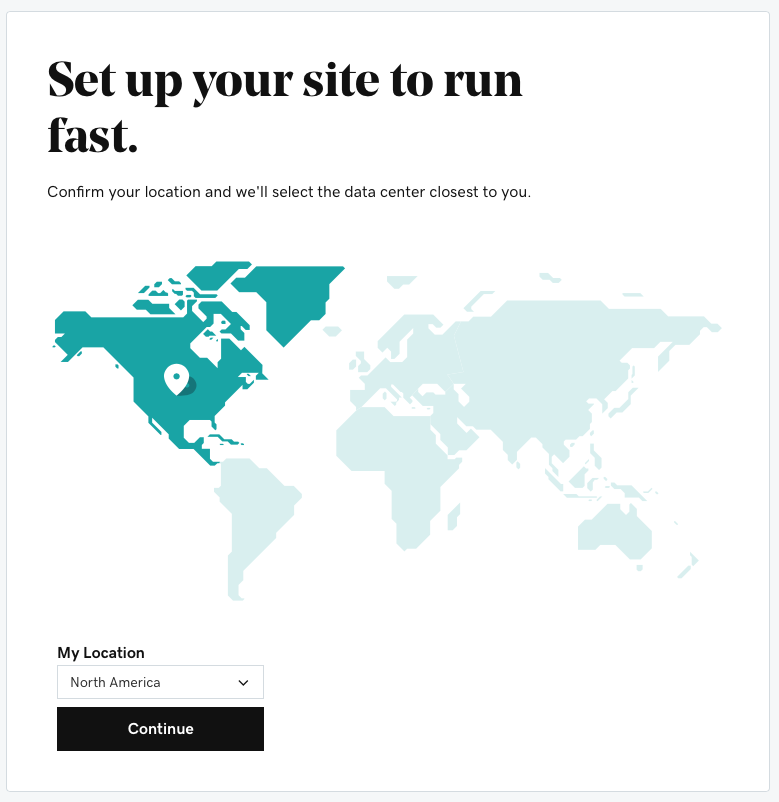
- 03:29 Which data center do you want to use, he selects North America and clicks the Next button
Creating a "Blog only" WordPress Website
Creating the Credentials for the WordPress Website
- Top | the YouTube Video
- 03:40 the next screen is: Create a WordPress website, and displays the following text: This username and password gets you into WordPress admin
- he creates a WordPress username & Password
- then he clicks the Finish button
The cPanel is displayed
- 03:53 next screen displays the Set Up My Site button
- 03:56 he suggest buying a SSL certificate, I'm not doing that for now.
- 04:25 Start creating his website, there are two ways to access the WordPress site
- go to websiteName.com/admin, this will take you to the log in screen
- go to GoDaddy's C Panel Admin screen, he clicks on the banner on top of the page with the Build Website button
- this takes you to GoDaddy's Get Started wizard
GoDaddy's Get Started Wizard
- Top | the YouTube Video
- 04:55 he clicks the Start Wizard button, takes you to the Settings page
- he says this will ask us a few questions about our WordPress Website
- 05:03 Type: he selects Blog only, I might prefer Website + Blog
- 05:04 Industry is selected from the drop down list, he selects Entertainment, I might select Other
- 05:08 in the Title text box, he types the name of the Blog: Movie Spawn
- Note that the Title is displayed on top of every page within the site.
- Tagline: he types Your First Source for Movie News and Reviews
- He then clicks the Continue button
- 05:21 next the Contact screen is displayed
- enter the email address used to creating the GoDaddy account
- you can enter or ignore the phone number, fax, address, etc.,
- he then clicks the Continue button
Choose a theme
- 05:40 the Choose a Theme screen is displayed with only 6 themes, he selects Twenty Fifteen
Customizer screen
- Top | the YouTube Video
- 05:50 after selecting a theme that could be changed later, a Customizer screen is displayed,
- he selects from one of the pictures displayed in the left hand column known as a Header Image, he picks the first one
- 06:01 The theme is installed. Once theme is installed it takes you to the WordPress Customizer.
The WordPress Dashboard
- 06:16 The Dashboard is displayed
- he dismisses the notifications by clicking the Dismiss button located toward the top right hand side of the screen
Plugins
- Top | the YouTube Video
- 06:31 he selects the Plugins icon from the left hand side column.
- he clicks the Plugin' Add New button
- the Add Plugins screen is displayed
- 06:51 He installs the Jetpack plugin by clicking the Install button and Activate button.
- 06:59 when Jetpack is installed you have to Set it up. He clicks on the Set up Jetpack button, & your taken to wordpress.com where you click the Approve button.
- 07:22 presented with Jetpack plans, where he clicks the Start with free button
- 07:41 He clicks the Activate recommended features button
Choosing a new Theme from the WordPress Theme Depository
- 07:54 he wants to choose a new theme from the WordPress Theme Repository
- 07:58 he clicks Appearance from left side column and Themes from a submenu, then he clicks the Add New Theme (large) button
- he says there are thousands of free themes to choose from
- 08:17 he talks about the toolbar to ween down the themes by clicking either Featured, Popular, Latest,
- and if you have a WordPress Account, you can look at Favorites from the toolbar
- 08:32 he talks about the Feature Filter button, he selects Blog from the Subject panel
- 09:08 he finds the Lovecraft theme by using the Search box on the toolbar, he clicks the Install button and Activate button.
Customizing a Theme
- 09:25 he clicks on the Customize button from Theme Details or Lovecraft
- theme details are displayed on the left side of the screen
Changing the Header Image
- Top | the YouTube Video
- 10:04 he wants to change the Header Image
- he clicks the Add New Image button and uploads the image from a folder
- 10:17 he clicks the Select and Crop button to adjust how much of the image he wants.
- 10:28 he wants to click Publish, then he clicks the X (close) button on the top left side to get out of this.
Managing our Posts
- 10:37 He wants to manage his Posts, he clicks Posts from the left column
- 10:43 he deletes the Hello world! post by clicking the Trash button
- 10:45 he wants to replace it with our first movie review by clicking the Add New button located to the right of the header Posts
- 10:49 he adds the title and content to the screen
Set our Featured Image
- Top | the YouTube Video
- 10:54 he scrolls down & clicks the Set featured image from the right side of the screen, which will upload
- 11:02 he clicks the Publish button from the right side of the screen
Looking at our updated WordPress Blog Site
- Top | the YouTube Video
- 11:04 he clicks View post link near the top of the screen to see how it all looks
- he sees the image and the content
YouTube Video 2 - GoDaddy Website Builder 2020 [How To Build A Website On Godaddy] - they make pages
- Top
- 17:02 | YouTube | Titled: GoDaddy Website Builder 2020 [How To Build A Website On Godaddy]
He demos what the site will look like when completed
- Top | the YouTube Video
- 00:08 The speaker of this video shows off the web site he is going to create for this demonstration
- using a free theme from WorPress
- how to get to a library of free WordPress themes
- 01:18 Website hosting is where your website is going to live
- where all of your content is stored including images & videos
- your website domain is the address of your website
Install our website hosting
- Top | the YouTube Video
- 02:23 he tells you where you can go to find his discount page for hosting
- 03:23 He clicks the Get Started button
- 03:29 where he types his "free" domain name
- 03:33 he enters the domain name (ex: www.domainname.com), then he clicks the Search button to see if its available.
- the domain name he would like to use is available
- 03:47 since its available, he clicks on the Select and Continue button
Creating an account on GoDaddy
- Top | the YouTube Video
- 03:58 the Purchase screen is displayed, he clicks the Create Account button
- 04:03 the Create Account screen is displayed, he enters an Email address, Username, Password, and Support PIN number
- the username and password are being created so you can log into GoDaddy
- 04:43 he clicks another Create Account button from the Create Account screen, note: I already have an account
Adding his Billing Information
- Top | the YouTube Video
- 04:55 back to the Purchase screen, he adds his Billing Information, Country, First & Last Name, Phone, Address, etc.
- then he clicks the Save button
- 05:11 on the Purchase screen, he adds his Credit Card info,
- then he clicks the Save button, then he clicks the Complete Purchase button
- hosting info completed
Creating his Hosting is completed
Creating WordPress Account and Configuration
- Top | the YouTube Video
- 05:38 the Managed WordPress screen is displayed, he clicks the Add Site button
- the Add Sitescreen is displayed
- he leaves the What would you like to do ? in the drop down text box
- he leaves the Data Center as North America
- he fills in WordPress username and WordPress password (I already have a WordPress account)
- then he clicks the Add button
- 06:19 the Setting up your site screen is displayed,
- when set up is complete, the message WordPress successfully installed ! is displayed
- then he clicks the WP Admin button
WordPress is Successfully Installed !
- Top | the YouTube Video
- 06:40 the Get Started Quickly with WordPress screen is displayed
- he clicks the No thanks button
- the Are you sure you want to exit and configure WordPress on your own screen is displayed, he clicks the OK button
- this automatically sends you to the WordPress Dashboard screen
- 06:54 the Dashboard is where you go to add or edit to your site
Verify your Email Address Emails for GoDaddy
- Top | the YouTube Video
- 07:00 next, he wants to verify the emails from GoDaddy, where he has to answer the "verify your email address emails".
- where he clicks the Verify Email Now button
- 07:23 he goes back to the Dashboard
he wants to change the domain for the site
- he refreshes the browser for the Dashboard
Adding your Domain Address to WordPress
- Top | the YouTube Video
- 07:31 from the Dashboard, he clicks the Change domain link near the top of the screen
- the Domains screen is displayed, with the Add domain button to the right of the Domains header
- 07:37 he clicks the Add domain button
- the Add domain screen is displayed
- the domain he wants to use is already selected in the Choose a domain drop down text box
- verify that the Make this the primary domain for your account check box is checked
- If you have several WordPress web sites within your domain,
- do we need a separate account for each site which may be stored in several different folders from the home directory ?
- 07:49 he clicks the Add button from the Add Domain screen
- the Domains screen is displayed
- he waits for the updating of the domain to finish
- this will change the location of everything he will make on his WordPress site so its no longer going to use the 678.myftpupload.com domain
Now he will show us how to log into your WordPress account any time you need to edit something on your site.
- Top | the YouTube Video
- 08:12 now he will show us how to log into your WordPress account any time you need to edit something on your site
- 08:21 open up a new tab in the browser
- use your web site for the URL and add /wp-admin
- looks like: yourDomain.com/wp-admin
- after entering the URL, press the Enter key on your keyboard
- 08:37 the WordPress logon screen is displayed
- he puts in the account information he created earlier
- I want to use my existing WordPress credentials
- click the Log in button
- 08:57 this will take us to the WordPress Dashboard
- he says he can now start building the actual site
- 09:03 Note that the Dashboard's left column looks a little different
- now that we have the domain, hosting installed, and WordPress installed
- we can start building the web site
- 09:13 in the black toolbar there is a link named A WordPress Site
- this is used to view what the website looks like right now, he clicks it
- 09:15 the website is displayed
- he says its completely blank, with no content
Installing the Theme
- Top | the YouTube Video
- 09:21 he clicks the Dashboard link from the submenu under A WordPress Site
- so he can install the theme
- 09:30 he clicks Appearance icon from the left hand side
- then he clicks Themes from the submenu
- 09:33 the Themes screen is displayed with three theme panels
- Twenty Nineteen, Twenty Seventeen, Twenty Sixteen, and a fourth placeholder to add a new theme
- Note the 3 in the grey circle which indicate how many themes are displayed
- there are three buttons
- Premium Themes, WordPress.org Themes, Upload
- and a Search box to serach for installed themes
- 09:36 he clicks on the Add New Theme panel
- 09:39 the Add Themes screen is displayed
- 15 is in the grey circle
- Featured has the focus from the toolbar
- the first theme displayed indicates that it is currently installed
- 09:45 he clicks Popular from the toolbar
- 3947 is in the grey circle
- Popular has the focus from the toolbar
- the first theme displayed indicates that it is currently installed
- 09:56 he knows the name of the theme he wants
- so he types in the theme name hitchock
- the Add Themes screen displays just one panel with the Hitchcock theme displayed
- 1 is in the grey circle
- 10:00 when the mouse cursor hoovers over the theme, 2 buttons appear
- 10:04 he clicks the Install button
- the button displays "Installing"
- then the button briefly displays "Installed"
- then the button displays Activate, he clicks it
- 10:17 the Themes screen is displayed again with four themes displayed
- 4 is in the grey circle
- the first theme displayed, Hitchcock, indicates that it is Active
- there is a Customize button displayed
- under the Themes header the text "New theme activated." is displayed
- to the right of that text is a link Visit site
- he clicks the Visit site link
- 10:21 the new theme is displayed so we can see what it looks like
- in the toolbar just above the text "SAMPLE PAGE"
- there is a Customize button
How to change the header image to the Theme.
- Top | the YouTube Video
- 10:25 he clicks the Customize button
- a new colums is displayed on the left hand side with several options
- one option is Header Image
- 10:30 he clicks the Header Image option
- the left hand column now displays two images that look the same
- but the top one displays the text "Current header"
- the bottom one displays the text "Suggested"
- the "Current header" image has two buttons labeled Hide Image and Add new image
- 10:34 he clicks the Add new image button
- the Choose Image screen is displayed
- it has two tabs labeled Upload Files and Media Library
- the Upload Files tab has the focus
- and gives you an upload feature
- by either dropping an image on to the screen
- or by using a Select Files button
- at the top right of the grey screen are three buttons (-) minimize, [] add or displays images, (x) for closing a screen
- there is another button labeled Select and Crop located in the lower right hand corner
- he soon will use this button
- 10:36 he clicks the "Add an image" button located in between the minimize and close buttons
- the images, with an ordered number label displayed beneith them, now appear to the left of the Choose Image screen
- however the first image displays header image instead of a number
- 10:37 he drags and drops the "header image" from the left side of the screen to the middle of the Choose Image screen
- on the Choose Image screen,
- there are two tabs labeled Upload Files and Media Library
- the Media Library tab has the focus
- you see the first image is uploading with a status update bar
- and the text: "Suggested image dimensions: 1440 by 900 pixels."
- 10:45 after the image is displayed on the Choose Image screen
- he clicks the Select and Crop button located in the lower right side of the screen
- the button is now labeled as Crop Image
- the Crop Image screen is displayed, with the image enlarged to the capacity of the Crop Image screen
- the mouse cursor looks like a "crosshairs" icon
- he moves the "select square" lines down, to leave out some of the sky and include more of the ground
- 10:48 he clicks the Crop Image button located in the lower right side of the screen
- the Customizing Header Image screen is displayed breifly with the older image
- and then the newer image is displayed as the new background
- 10:56 he clicks the Publish button located at the top of the left column
For free images
- 11:07 if you need an image,
- for free stock photos use pexels.com, they have a ton of free images to use
- this is where he got the images for this web site that he is demonstrating
- 11:18 he says he wants to close this out
- he means to close the Customizing Header Image column on the left
- to do that you click the X to the top left of the column
- 11:22 he wants to go back to the Dashboard
- by clicking (or hoovering over) A WordPress Website, and from its submenu select Dashboard
He is going to change the default text displayed on that page.
- Top | the YouTube Video
- 11:25 the Dashboard screen is displayed
- 11:28 he wants to go to Settings
- he hoovers over the Settings icon from the left column, the second from the bottom
- which displays a submenu
- within the submenu he clicks on General
- 11:32 the General Settings screen is displayed
- this is where he will edit the Site Title
- it originally displays "A WordPress Website"
- he highlights it so he can change it in the text box
- he also wants to change the Tagline
- it originally displays "just another WordPress website"
- 11:40 he changes the Site Title text
- from "A WordPress Website" to "Moments We Capture"
- 11:47 he changes the Tagline text
- from "just another WordPress website" to "snapshots in time of our lives"
- 11:51 the video does not show this but he was able to Save his changes
He wants to change the default post to his own.
- Top | the YouTube Video
- 12:03 he wants to go to the Posts sections
- he hoovers over the Posts icon from the left column, which looks like a pin
- which displays a submenu
- he clicks the Posts option in the submenu
- 12:07 the Posts screen is displayed
- with one post titled Hello world!
- he wants to get rid of that sample post
- he selects the check box for Title
- Note that the drop-down box displays Bulk Actions
- he changes that to Move to Trash
- then he clicks the Apply button
- the Posts screen now displays No posts found
- 12:24 he clicks the Add New button from the top of the Posts screen
- the Add Title screen is displayed
- 12:44 he inputs into the title: FOCUS FIRST THEN FRAME YOUR SHOT
- 12:50 below the title he adds some sample text for content
- within the content, you can make the (+) plus sign get displayed
- and use the menu it displays to add Paragraph marker, Image, Heading, Gallery, List, Quote, Audio, Cover, and File
- 13:09 he clicks the Categories button located to the right side of the screen
- he says there are no categories right now
- just a category named Uncategorized
- you can add a category by clicking the Add New Category button
- in the New Category Name text box he types in Photography
- then he clicks another Add New Category button
Adding the Featured Image to a Post
- 13:35 He clicks the Featured Image button also located on the right side of the screen
- This is the image that will be seen before the actual post and what you will see on the Home Page.
- he then clicks the Set Featured Image button located under the Featured Image button
- 13:47 The Featured Image screen is displayed
- he then clicks that square that is located in between the minimize and close button towards the top right corner of the screen
- which then displays those images marked as header image and 1, 2, 3, etc. on the left side of the Featured Image screen
- 13:52 he drags and drops the image marked as "1" to the center of the screen
- while dragging the image toward the center, you see the text "Drop files to upload" and the screen turns blue
- the image now occupies the first position of the Featured Image screen
- note that the number "1" is displayed in the Title box on the right side of the screen
- and that the image has the focus among the three images displayed
- 13:57 there is a blue Select button located on the bottom right hand side of the Featured Image screen
- he clicks the Select button, a screen with the new post is displayed insread of the Featured Image screen
- the new image pops up in the Featured Image section of this screen
Publishing the Post
- 14:03 he says the post is ready to go
- there is a blue Publish button located at the top right side of the screen
- he clicks the Publish button
- note that the right side column changed its appearance
- he clicks the Publish button again
- 14:12 he hoovers over the Moments We Capture button on the top left side of the screen
- which then displays a submenu which consist of the Visit Site option
- he clicks the Visit Site option
- 14:15 the page is now displayed with the new image in a panel
- and when you hoover over the new image you see a date and text
- the text displayed is: FOCUS FIRST THEN FRAME YOUR SHOT
- 14:18 he clicks that image, then it enlarges and displayed as follows
- the image is on top,
- then the date in a smaller font,
- under that the Title Focus first, then frame your shot in capital letters,
- and under that is the sample text paragraphs, he scrolls down the post
- under the sample text paragraphs, note the words: Edit Post
- and under that a Leave a Reply button
- 14:26 he wants to create 14 other posts
- you do that the same way he created this post
- he does not do that in the video
- 14:33 when he comes back, it looks like he has the one of the new posts, titled PROTECT YOUR LENS on the screen
- with it's own Featured Image displayed on the right hand side
He shows you what the site currently looks like
- Top | the YouTube Video
- 14:37 he shows you the home page with all the new posts
- he scrolls down this page
- note at the bottom of this screen is the greater than character > which is used to go to the rest of the page
- 14:41 he clicks the greater than character > which brings you to what he calls the second page
- we can see above the posts panels the text: PAGE 2 OF 2
- it also displays the same Title and Tag line, 5 more post panels, and a less than character < to go back to the first page
- 14:44 to go back to the first page it looks like he clicks on the title: MOMENTS WE CAPTURE
- as he hoovers the mouse over the post panels, their own titles are displayed
Creating Pages
- Top | the YouTube Video
- 14:47 he wants to add more pages that will show up in the black bar that displays the text: SAMPLE PAGE
- 14:54 to do that he hoovers over the Moments We Capture button on the top left side of the screen
- this displays a submenu
- he clicks Dashboard, one of the submenu options
- 14:57 the Dashboard screen is displayed
- 15:00 he hoovers over the Pages icon, located on the left side column of the screen
- which displays a submenu with three options, Pages, All Pages, and Add New
- he clicks the Pages menu item, which displays the Pages screen with two pages, one that is published and one that is a draft
- 15:04 he clicks the Add New button located on the top left side of the screen
- he closes the tool tip
- he says setting up a page is almost the same as setting up a post
- he shows where the Title and the content goes
- the content goes into an object called Blocks
- 15:25 in the Title box he enters PHOTOS
- he pasted sample text paragraphs in the content or Block section
- when he did that the column on the right switched the focus from the Document tab to the Block tab
- 15:33 he clicks the Document tab inside that right side column
- he mentioned that he is not placing a Featured Image into this page
- 15:44 he says, once you are done with entering your title and content
- you can publish this page by clicking the blue Publish button on top of that right side column
- he clicks that Publish button, which changes the content of that right side column
- the button displays the text: Publishing...
- and then the column displays the text: Published
- 15:52 he selects Pages again from the left side column, and selects Add New from the submenu
- he wants to create 2 or 3 more pages that is not shown in this video
- 16:00 he just completed the other pages
- 16:03 he hoovers over the Moments We Capture button on the top left side of the screen
- and clicks on Moments We Capture from the which displays the home page
- note that the black bar on top now displays the following:
- HOW TO PHOTOS SAMPLE PAGE VIDEOS
- reserve
- 16:10 he clicks the tab on his browser that displays the Pages page
- which now consists of 5 pages, of which 4 are published and 1 in still a draft
- on the right side you can see the Title for each page
- if you look at the right side column, Date,
- you can see when the four pages were published and how long ago the draft was last modified
- 16:12 he refreshes the Pages screen within the tab on browser
- 16:15 he is going to delete that draft page titled Privacy Policy
- he does that by clicking the check box to the left of that page
- 16:16 he selects the Bulk Action drop down and selects Move to Trash
- then he clicks the Apply button to its right
- 16:23 he selects the middle tab of his browser which displays his home page
- again the black bar displays: HOW TO PHOTOS SAMPLE PAGE VIDEOS
- 16:25 he clicks the refresh button on his browser
- and the Sample Page is gone
- the black bar now displays: HOW TO PHOTOS VIDEOS
- he says, now it only displays the pages he wants to display
- Top | the YouTube Video
- 16:34 he is done creating this site
- he has all his posts up with their featured images
- its time for us to create our own web site with our own content
GoDaddy - How to build a WordPress website for the first time
- Top
- GoDaddy | Article | How to build a WordPress website for the first time
Google Search: how to make a wordpress website not blog
subdomain
From the Google Search page
- When would you use a subdomain?
- A subdomain is a division or alias of your domain that can be used to organize your existing website into a separate site.
- Typically, subdomains are used if there is content that is distinct from the rest of the site.
- Mar 21, 2016
- What is an example of a subdomain?
- A subdomain is a domain that is part of a larger domain; the only domain that is not also a subdomain is the root domain
- For example, west.example.com and east.example.com are subdomains of the example.com domain,
- which in turn is a subdomain of the com top-level domain (TLD).
GoDaddy | Article | Titled: Create a subdomain
Change Directories
WordPress Version
- Top
- hostinger.com | Article | How to Check The Current WordPress Version You Are Using
- reserve
Lynda
Sheri's WordPress Issues
Morris's WordPress Issues
- Top | BlueHost.com
- EAPSE Home Page - Entertainment Artists Promotion Services Enterprise
- Contact Page | Morris is the Business Advisor, Sheila Arguello is the Web Master & Art Director for the site
- reserve
Reserve