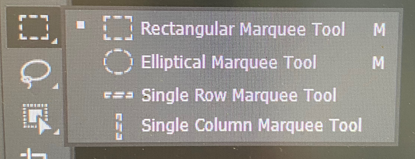
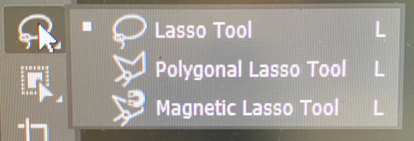
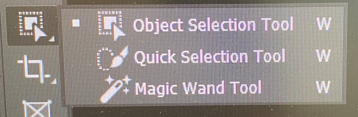
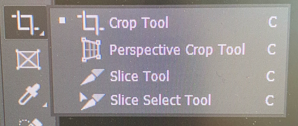
| Count |
Tool icons |
Tool Name |
Other Tools |
| 19 |
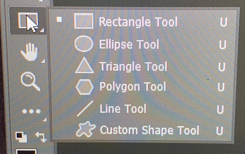 |
Rectangle Tool
|
Rectangle Tool
Ellipse Tool
Triangle Tool
Polygon Tool
Line Tool
Custom Shape Tool
|
- 39:28 Rectangle Tool
- he calls all these tools within the "Rectangle Tool" submenu, the shape tools
- he first selects the Rectangle Tool, which displays its own settings in that top toolbar
- he clicks the Fill button and the Fill palet is displayed
- he says: you can fill it with any color you like
- he says: you can also add a stroke to it, or just an outline if you will
- you can adjust the size of the outline/border
- 39:52 he then clicks and drags, and a rectangle with the fill color and the size of the border already determined,
- is displayed in the image
- and he says: there's our shape
- 39:59 he deletes the new rectangle
- and he says: if you would like to create a perfect square
- just hold the Shift key and Drag, and you will always have a perfect square
- again displayed with the border settings and Fill color
- Top | Details Table | Top of this Table
- 40:08 Rounded Rectangle Tool
- this particular tool does not show up in the submenu for the Rectangle Tool in Adobe Photoshop 2021
- the instructor of this video is using an Apple, I'm using Windows
- 40:13 as soon as he selects the Rounded Rectangle Tool
- some settings are added to the toolbar for the rounded corners
- if you go over to the Radius setting in the toolbar
- the slider control for the setting is used for rounding the corners
- he is going to leave it at "100 px"
- he then clicks and drags
- and as he does so, you can see the rectangle with the rounded corners take shape, without a fill
- and with its width and hight displayed while the mouse button is held,
- changing its numbers as the object is bigger or smaller
- when he lets go of the mouse, the fill color and border settings are used
- and he says: we have a 100 pixel radius on that corner
- then a slider control is displayed on that left top corner
- he doesn't use that slider control, it just vanishes from the video without explanation
- he then deletes that rounded rectangle shape
- Top | Details Table | Top of this Table
|
- 40:34 Ellipse Tool
- still using the same border and fill settings
- just by selecting that tool, he can creates circles or ellipses instantly
- using the Shift key you can make a perfect circle
- Top | Details Table | Top of this Table
|
- 00:00 Triangle Tool
- he does not have the Triangle Tool on his version of Photoshop
|
- 40:45 Polygon Tool
- the Polygon Tool has some unique settings
- he talks about the Sides property, you select how many sides your polygon will display
- it was originaly set to 19, he reset it to 3
- click and drag, you have a triangle using the same border and fill settings previously set
- if you use the Move Tool, you can move the shape around your image
- he deletes the triangle so he could show us something else
- 41:05 if we change the Sides property from 3 to 5
- he says: we can create a pentagon, with the same fill and border settings
- he can move it around with the Move Tool
- 41:13 he says: or we can add 20, meaning change the Sides from 5 to 20
- a shape with 20 sides is displayed, while creating it, it's width and hight are displayed until you let go of the mouse
- when you let go of the mouse, the shape is displayed on the screen using your fill and border settings
- Top | Details Table | Top of this Table
|
- 41:21 Line Tool
- the Line Tool is based on Weight
- so if we have a 50 pixel weighted line, he's going to take the stroke off of this one
- he draws a line up and down, it's red, and is 50 pixels wide
- he also creates a 5 pixel line that is thinner than the 50 pixel line
- Top | Details Table | Top of this Table
|
- 41:49 Custom Shape Tool
- these are shapes you either imported or came with Photoshop
- he displays them by clicking the Shape button from the toolbar
- I don't have as many shapes as he has
- 42:06 he chooses a rabbit from his set of shapes
- by clicking the little square that the rabbit icon occupies
- then you click and drag until you have the size you want for your shape, on your image
-
- however what the instructor did was first choose the rabbit
- the rabbit icon now appears in the "Shape" property setting in the toolbar
- before planting the newly choosen shape on his image
- he changes the "Fill" color from red to blue
- then he drags and drops the rabbit on to the image until he gets the size he wants
- as your dragging the mouse, the shape's width and height are displayed
- when he lets go of the mouse button
- the rabbit is displayed in Blue with anchor points on the shape's borders
- he then chooses the "Direct Selection Tool" so he can use the mouse to move those anchor points around
- by dragging an anchor point to what ever position you want it to be
- it keeps it fill color as your doing that
- he demos this with other anchor points
- Top | Details Table | Top of this Table
|